4 Lightroom Classic Quick Tips to Boost Your Edits (VIDEO)
This post-processing tutorial is the first installment of a new series from image-editing expert Anthony Morganti whose transformative techniques are extremely popular among Shutterbug reader of all skills levels. In each of these videos Morganti will present multiple tips for users of Lightroom Classic, the Cloud version of Lightroom, and the Mobile version as well.
Morganti kicks off the series today with four Lightroom Classic quick tips, each about three minutes in length, that you’ll definitely want to include in your image-editing workflow. The first bit of advice reveals a convenient trick when editing images that were converted from color to b&w.
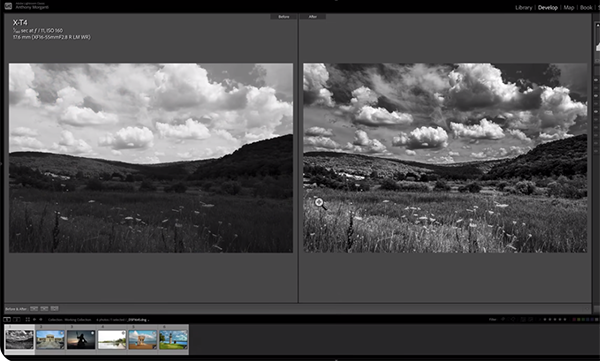
Some photographers like to see before/after examples of their adjustment as the editing process proceeds, and there a couple ways to achieve that. You just hit the “Y” key to get a before/after side-by-side comparison or tap the backslash key to view the images individually in successive windows. But here’s the rub: In either case, the original image appears in color.
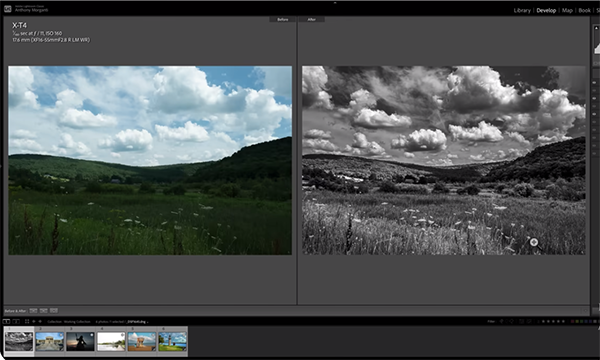
As Morganti explains, however, “when you’re editing in b&w sometimes that before shot in color doesn’t really help you see that you’ve done with your processing, and it may be beneficial to see the before image in b&w. And, as you may expect, there is a way to do that with the simple solution that Morganti explains.
Tip number two has to do with architectural photos, whether they’re captured outdoors of an iconic building, or indoors when shooing an interior. These images are typically shot with wide-wide lenses that may induce distortion in a photo. Hence, verticals may not look like vertical and your horizontal don’t always appear horizontal. In Morganti’s example, the massive building appears to be falling backwards.
Of course, you can always go to Lightroom’s Transform tab, Select Auto see what you get, but frankly the results can fall short. Yet, once again, Morganti offers an alternative approach that many of you may consider preferable. This one is so simple to explain that we’ll let the expert do that.
At this point we’re only halfway there, which means there are two more great tips to go. So be sure to watch this very helpful clip until the end. Then head over to Morganti’s instructional YouTube channel where you’ll find lessons on just about any editing task you can imagine.
And on a topic related to one of today’s tips, we also encourage you to watch the earlier tutorial we posted, with a simple-and-effective Lightroom technique for fixing landscape photos with distracting, curved horizons because they were captured with a wide-angle lens.