How to Use Shutter Priority Mode to Avoid Camera & Subject Movement (VIDEO)
We often discuss the ramifications of various exposure modes offered by today’s modern cameras, and most of the time these tutorials involve a choice between Manual mode and Aperture Priority. But what about the oft-ignored Shutter Priority mode, and when and how should you use it?
Sports and action photographers are well versed in the technique because it enables them to create sharp images of subjects in action, whether they’re athletes, race cars, fast-moving wildlife, or birds in flight. But this particular mode can be helpful in other situations as well.
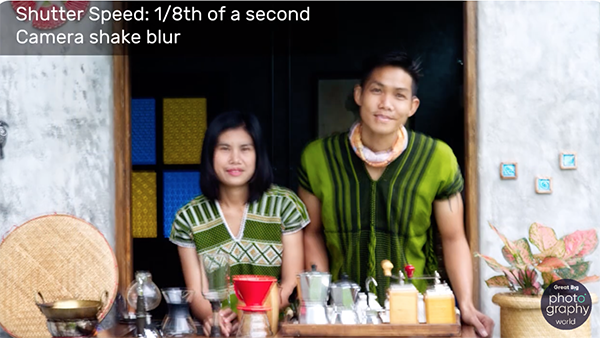
This semi-automatic most give you full control of the shutter speed, while the camera calculates and sets the appropriate aperture required for a correct exposure. This tutorial from the Great Big Photography World instructional channel begins by explaining two relevant concepts: First, choosing a shutter speed that’s too slow causes problems with motion and often result in unsharp photos.
Secondly, the speed that your subject is moving will determine the shutter speed you choose. But Shutter Priority mode isn’t just for action shots, because it’s also very useful when a very slow speed is required for capturing static scenes at night, or for special effects like intentional camera movement or smoothing out water in lakes, waterfalls, and seascapes.
The high and low shutters speed at your disposal varies from camera to camera, with a typical range being around 1/4,000 to 30 seconds or more. For most common applications shutter speeds from 1/500 to 1/60 will get the job done. Of course all this depends upon prevailing light levels and whether you’re photographing subjects in motion, nighttime images of a starlit sky, or evening cityscapes illuminated by street lanps, car trails, or bright signs and windows.
Today’s unnamed instructor suggests a simple experiment that will help you to understand how all this works: First find both a static subject and another in motion. For the static shot set the camera to Shutter Priority at ISO 400. Then capture an image at 1/1000 and make several more shots while halving the shutter speed until you’re down to 1/4 second.

Then repeat the process with a moving subject while successively increasing the shutter speed until you capture an image that’s critically sharp. It’s important to take notes of the settings you employed so that you can draw valid conclusions when viewing the photographs on the computer.
Be sure to pay a visit to the Great Big Photography World YouTube channel where you’ll find similar lessons on using Manual and Aperture Priority exposure modes as well.
We also suggest watching the tutorial we posted with another accomplished pro who provides this warning: “Don’t spoil your photographs with excessive post pocessing.”