Water bills to see a record increase from April – what to know ahead of the rise
Water UK has confirmed that water bills will be increasing from April
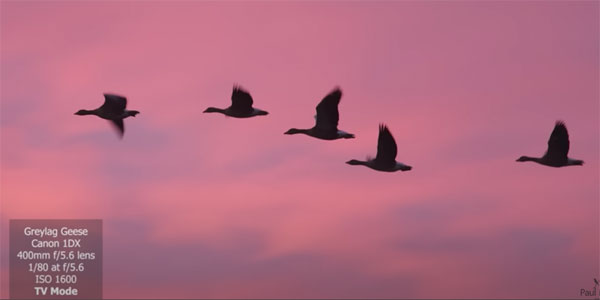
Nailing exposure is often a challenge with all forms of outdoor photography because of ever-changing light, complicated scenes, and a variety of tones from foreground to background. With wildlife subjects this task may require even more thought and precision.
That’s because stationary subjects typically call for a different combination of aperture, shutter speed, and ISO settings than situations than include motion—like birds in flight. And sometimes a static subject suddenly starts to move. What to do? Read on.
Instructor Paul Miguel is a British pro with an eclectic portfolio of landscape and macro photos to wildlife imagery. He says, “I use a range of exposure settings in different situations, and often use Auto ISO.

This tutorial for is for beginning wildlife photographers, and it begins with a helpful review of the most common exposure modes. He covers Aperture Priority, Shutter Priority, and the basics of shooting in Manual mode. He then explains when and how he uses each option, depending upon the subject.
Miguel also provides advice for unpredictable conditions like passing mist and rapidly changing light levels. There’s also a helpful discussion of how the exposure mode you choose has implications for the Metering mode employed.
Miguel says his “go-to” exposure mode when shooting wildlife is Aperture Priority, particularly when he’s searching for subjects in an unfamiliar location. In these situations he typically uses the Auto ISO setting for reason he explains.

“What I like about the Aperture Priority mode in combination with Auto ISO,” he says, “is that you can set a fairly wide aperture, and that means the camera automatically sets the fastest shutter speed for a correct exposure.” He also notes that many cameras have a minimum shutter speed option in the menu to minimize inadvertent camera shake caused by a shutter speed that’s too slow.
Miguel discusses the other exposure options available, how to use them, and why it’s often necessary to change your approach in mid-shoot. He also provides photos that illustrate the tips and techniques he describes.
Because Miguel is such a versatile photographer you can find a variety of lessons on his YouTube channel. So make it a point to visit there often, whenever you’re unsure about a particular challenge,
You may also want to check out the tutorial we posted last month from another pro, explaining how to fix underexposed outdoor photos in Lightroom.
If you confront an absolute mess when opening your Lightroom Catalog, you’ve come to the right place. In the video below you’ll learn how to clean up that chaos for a faster and more convenient workflow.
The video below is particularly helpful for photographers who shoot and edit a lot of images without a tidy system and end up with photos all over the place. The frustrating result is that it can be difficult to find the one image your searching for.
Instructor Austin James Jackson is an accomplished shooter and image-editing expert who shares weekly tutorials on landscape photography and post-processing techniques. This nine-minute episode is well worth watching, as it will save you tons of time, with a cleaner workflow, beginning today.

Even if you’re a neat freak it’s easy to let your Lightroom Catalog get out of hand. And if you tend to bask in clutter you need Jackson’s advice even more. Be sure to check the links beneath the video when you’re done watching, where you’ll find more helpful lessons on maintaining a fast, easy-to-use Lightroom workflow.
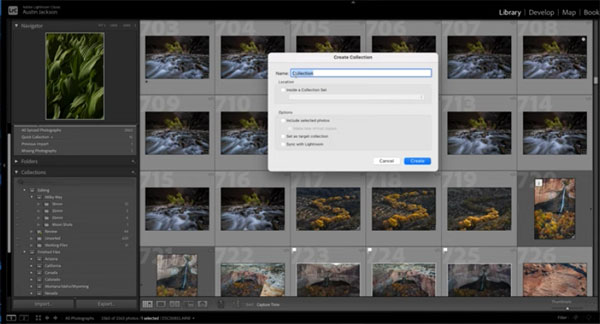
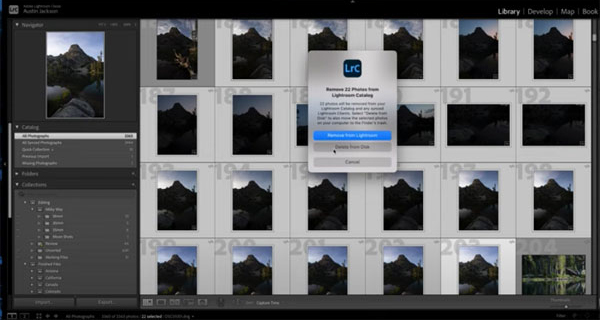
The first step with today’s task is to open your catalog and select All Photographs. By doing this you can see every image in the Catalog, regardless of its location. At this point Jackson offers a blunt warning: “If you use folders to store your images, STOP!” He explains why this is an inefficient practice, and explains how and why to use Collections instead.
As Jackson explains, there are a variety of methods and nomenclature you can use to create Collections, and this one-time task of organizing every image in your Catalog in this manner can be a tedious chore. But according to Jackson, “This is the best way to start cleaning up your mess,” and it will pay big dividends forever more.

Jackson has more valuable organizational advice, including the importance of separating images you’ve edited from those that still need attention. So watch the video, straighten up your room, and then organize your messy Lightroom Catalog before you go out to play!
There’s much more of interest on Jackson’s instructional YouTube channel, so pay a visit and subscribe.
And be sure to check out the recent tutorial we posted, explaining how to accentuate “atmosphere” in Lightroom for more compelling landscape photographs.
