Three things you should always buy at Wilko – and three things you should avoid
After years of shopping faithfully at Wilko these are the buys we’d recommend
If you ask most landscape photographers what’s the first lens they pull out of their bag, the answer is likely to be, “my favorite wide-angle.” That’s because the perspective these lenses provide is ideal for capturing expansive vistas.
Interestingly, however, that trend is no longer universal, as you’ll see in the tutorial below. In fact, one of our favorite landscape photographers says he’s changed his mind and now prefers using a telephoto lens more often than not. And from what we’ve seen elsewhere, this approach appears to be a growing in popularity.
We often turn to Danish landscape photographer Mads Peter Iversen for the wisdom he shares on shooting and editing landscape scenes. In this eye-opening episode he discusses why and how he now tends to go long.

Keep in mind that Iversen’s imagery is recognizable for a unique, minimalistic look that is perhaps more conducive to telephoto photography than other conventional styles. In this episode he’s photographing a lonely Lighthouse in westernmost Denmark, as the sun is about to set.
As Iversen says, “I now tend to shoot landscapes with my 100-400mm telephoto zoom,” for reasons he explains. He also shoots at the long end of a 28-200mm lens. Iversen reflects on the reason for the shift away from wide-angle lenses, even though he used them to great effect for years in the past.
While watching this lesson you’ll pick up some great advice on various focal lengths, camera settings and composition, and how these considerations factor into Iversen’s success. You’ll also see how getting in tight can add impact to the landscape photos you make.
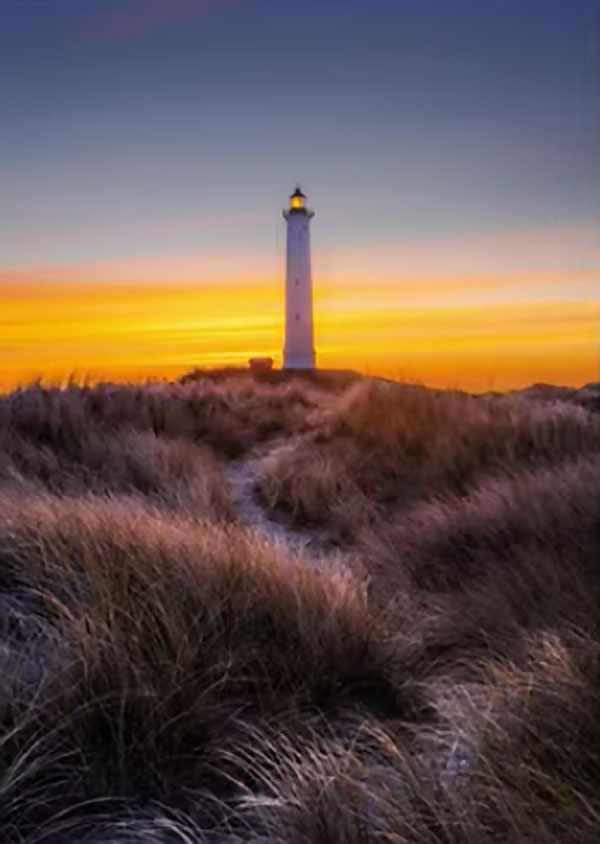
Iverson also presents some interesting diagrams and statistics to back up his notion of a growing preference among professional photographers for lenses with more reach. Whether or not you agree, how about this: The next time you head out to photograph the great outdoors, bring along a telephoto lens and see if it expands your vision.
There’s much more to learn by paying a visit to Iversen’s instructional YouTube channel, so don’t forget to check it out.
And for more sage advice for selecting your next lens, take a look at the recent tutorial we posted explaining why f/4 lenses are awesome compared to faster options. It may save you a lot of cash!
We’re always looking for shooting and editing tips that provide a unique look and give Shutterbug readers ideas for creating a style of their own. If landscape photography is your thing and you want to try something different, the tutorial below is for you.
The typical goal when shooting outdoors is capturing images with bright and vivid tones—either in the camera with appropriate settings or during post processing. This episode from German landscape pro Christian Mohrle demonstrates a straightforward Photoshop edit for creating a dramatic “gloomy” effect instead.
Before clicking the “play” button we suggest you download the sample Raw file in the description beneath the video, so you can make the enhancements yourself as Mohrle describes the steps. Then be sure to watch until the end, where you’ll learn some important tricks for cleaning up the image by removing distracting artifacts.
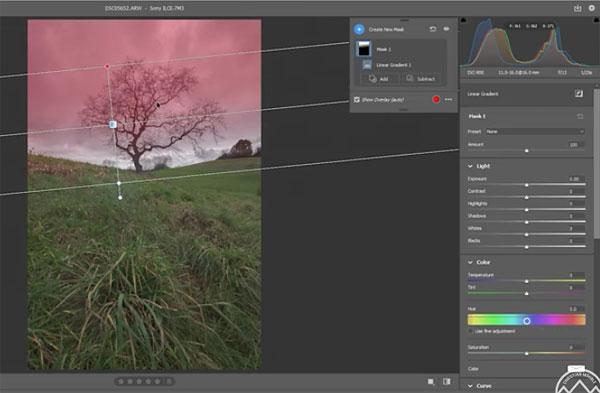
Mohrle begins, as always, with a few basic adjustments to make the image look as good as possible before jumping into the effect at hand. He changes the profile to Adobe Neutral which immediately reveals more details in the sky and opens up the foreground.
Other preliminary enhancements include bringing up color temperature, dropping highlights in the sky to enhance clouds, and further increasing the blacks. At this point the image is already much improved, and it’s time for a bit of masking. Mohrle places two linear masks over the sky; a large one to increase contrast, and a smaller mask at the very top for “adding interest.”
Next Mohrle turns Photoshop’s Color Mixer to modify existing tones for the specific look he’s after. He brings down the yellow hue, “to make the grass look fresher,” drops blue saturation, and pumps up the greens.
All that’s left to achieve a very compelling image is some careful sharpening and the aforementioned cleanup.
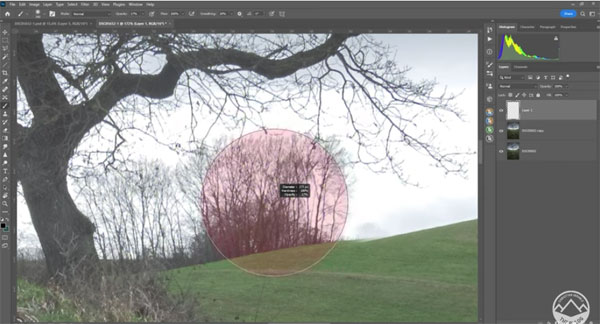
There are many more tips and tricks available on Mohrle’s popular YouTube channel, so head over there when you have time.
And if you’re just getting started in landscape photography be sure to check out the tutorial we posted from another expert, with five great tips for improving your skills.
Olympus just announced the M.Zuiko Digital ED 90mm f/3.5 Macro IS Pro for Micro Four Thirds systems. Shutterbug has obtained an early sample and is currently preparing a full review. In the meantime, here’s a rundown on this exciting new lens. You can watch Olympus’s video here.

Key Features

Macro 2X
A big step above most Macro lenses, the Olympus 90mm f/3.5 Macro provides 2X magnification (i.e., 2:1 instead of 1:1 macro or half-macro 1:2) which increases to 4X when used with Olympus MC-20 Teleconverter. Autofocus is active throughout entire macro range. Note that 2X in Micro Four Thirds equals 4X in 35mm full-frame equivalent.
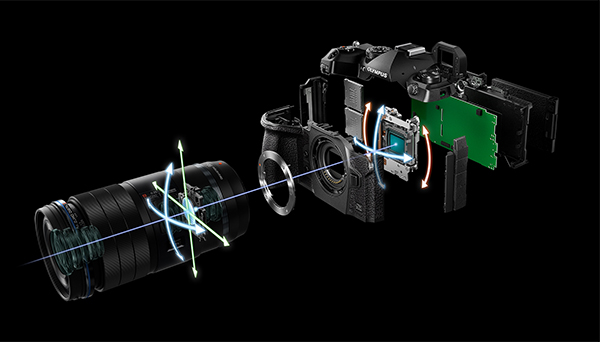
Integral 5-axis Image Stabilization
When used with compatible camera body, axis synch-IS is engaged and delivers up to 7 stops of shutter speed compensation.
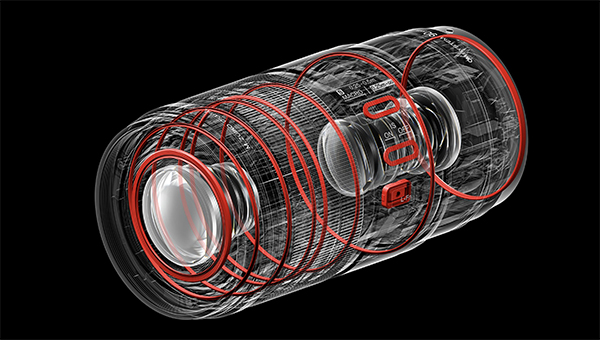
Weathersealing IP53 splashproof and dustproof performance is further enhanced with fluorine coating on front element. Fluorine is oleophobic and hydrophobic (sheds oil and water) and helps keep the front element free of fingerprints and easier to clean.
The Olympus 90mm f/3.5 Macro also freezeproof down to 14° F.
Lightest Weight in Its Class
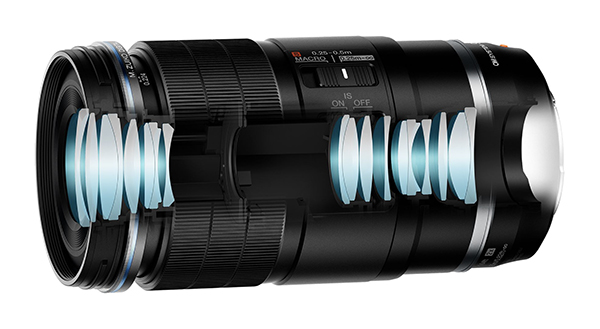
Weighs 15.97 ounces (453g) making it the lightest among comparable Macros. Compact form factor: diameter 62 mm, maximum diameter of 2.75 inches (69.8 mm) and overall length of 5.4 inches (136 mm).

Price and Availability
Projected price is $1499, and it will begin shipping mid-March 2023. Price and deliver date subject to change.
Full Review Coming Soon
Watch for our full review of the Olympus 90mm f/3.5 2X Macro.
— Shutterbug Staff
