I made pancakes in an air fryer – here’s what happened
I love my air fryer, but air fryer pancakes might be where I draw the line
If you’re just getting started in landscape photography there’s plenty to learn for capturing dynamic images. The tutorial below will accelerate the learning curve with a very helpful checklist of the “best practices” to use.
Danish landscape photographer Mads Peter Iversen is a favorite among Shutterbug readers who appreciate his straight-to-the point tutorials and the beautiful images used to illustrate his tips. This episode is one you’ll want to bookmark for future reference.
While primarily intended for beginners, experienced shooters will also pick up some great advice while watching Iversen describe the topics on his list. As he says, “the sooner you start implementing these practices the easier you’ll make it for yourself.” So get started today.
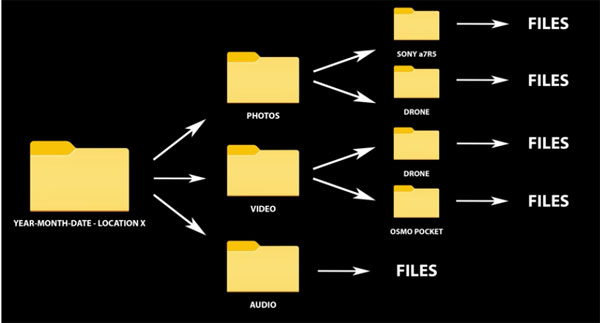
First and foremost according to Iversen is creating an effective file structure on your hard disk. While this task may seem boring, Iversen says, “Trust me: you’ll beat yourself over the head in two or three years if you lack a proper file structure.” He demonstrates his straightforward system, and it’s one you can just copy yourself.
Second on Iversen’s list is another mundane but essential task; namely, safely backing up your files. Here he insists that one copy of your images is insufficient for preventing heartaches, and he recommends having multiple backups in different places. Once again, it’s easy to emulate the method he suggests.
Another of Iversen’s best practices is the importance of configuring your camera in a way that makes sense for your style of shooting. He has a number of great suggestions, beginning with turning off all beeping sounds. Not only can this “noise” be distracting to you, but audible sounds may scare off birds and other wildlife subjects.
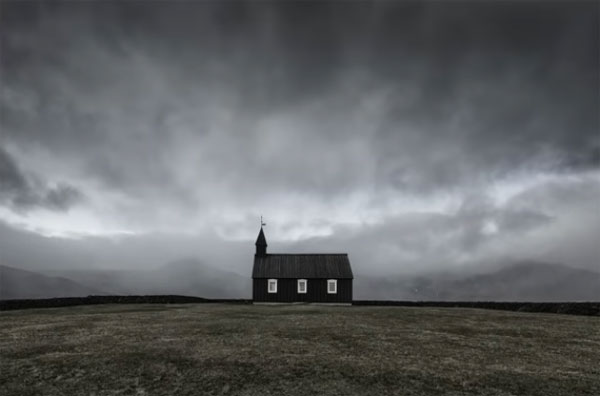
The video covers more important ground, including the gear you should invest in first, where to look for inspiration, and learning through constructive critiques. He also provides his take on chasing a unique style and much more.
We encourage all landscape photographers, from novices to advanced shooters, to visit Iverson’s instructional YouTube channel.
And when it comes to editing your work, don’t miss the earlier tutorial we posted explaining how to use a simple Lightroom slider to add POP to landscape photographs.
Do you want to make perfect masks in Lightroom and get the job done in half the time? If so, you’ve come to the right place. The Lightroom hack in the tutorial below is so simple that it only takes five minutes to explain.
Instructor David Johnston is an accomplished landscape pro who regularly posts basic shooting and editing lessons designed to help nature photographers elevate their skills. His goal for this episode is “to show you a one-button click for perfect masks every time.”
If this sounds too good to be true, read on. Johnston begins with an image he captured in a Texas swamp. It’s a beautiful scene but the photo is a bit flat. His goal is to transform the dull shot into something really special using simple masking to selectively bump up contrast, tonal values, and colors in the right places.
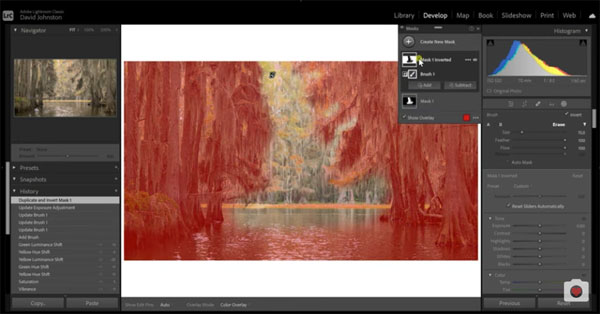
Johnston walks you through the step-by-step process that begins by selecting Lightroom’s Brush icon (you can also bring up the tool by clicking the K on your keyboard). He then describes the various options available, which include modifying the size of a Brush and choosing the appropriate Feathering value for the task at hand.
Lightroom’s Auto Mask option is another key setting, and Johnston explains why he typically leaves it on. In short, “Auto Mask is going to find those different areas as best as possible using Lightroom’s sophisticated AI technology.”
With these and other key settings in place, Johnston begins painting in the background, taking care to avoid “bleed over” on adjacent areas. As he explains, “I’m trying to brighten the background and darken the foreground trees” to make the image stand out.

Now it’s time for the one-click magic to finish the job. Instead of taking the conventional approach by creating a second mask for the foreground, Johnston demonstrates how a single button will duplicate and invert his first mask. In other words, “everywhere it wasn’t brushed in is now automatically brushed in. ”BOOM end of masking!
Johnston also explains how to do a bit of quick and easy cleanup whenever that’s necessary for achieving a perfect result.
You can watch more of Johnston’s tips and tricks by paying a visit to his popular YouTube channel. And don’t miss another tutorial we posted, explaining how one simple slider may forever change how you edit photos in Lightroom.
Some photographers shy away from employing presets when editing their work because of a misconception that they’re difficult to use. Nothing could be further from the truth, and as you’ll see in the quick tutorial below, you can even create your own custom presets with ease.
Simply put, presets are a collection of previously made edits that are saved as a batch. Then they can be applied to an appropriate photo, or multiple photos, as fast as you can click your mouse
Hence, these timesaving tools are really worth considering if you haven’t already jumped on the bandwagon, whether you purchase an affordable package or make them yourself. As you’ll see, they work their magic in several ways. A common approach is to apply a preset to similar images from the same shoot before importing them into Lightroom or Photoshop.
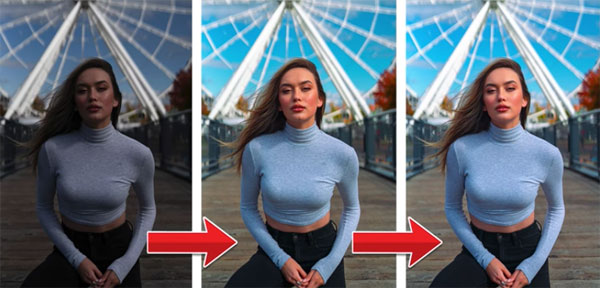
Once you open the editing program of your choice, you can use the imported images as is, or make a few simple tweaks if that’s what a particular photo requires. In addition to dramatically speeding up your workflow, presets also enable you to establish consistency among a wide range of images, thereby creating a recognizable style all your own.
In the eight-minute tutorial below from portrait pro and educator Justin Laurens you’ll learn everything necessary to use and create presets today. And we guarantee that once you start editing images in this manner you won’t stop,
Laurens demonstrates a five-step formula for getting the job done, saying that, “The secret is how to fine-tune a preset to make it fit perfectly with any image you want to apply it to.” He also explains how to “batch edit photos with lightening speed.”
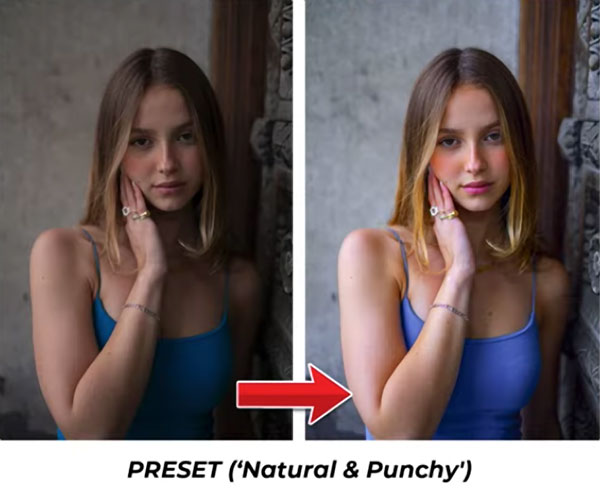
Be sure to watch this episode until the end, when you’ll learn how easy it is to create presets of your own that will work perfectly with your particular style of shooting.
There’s much more to see on Laurens’ instructional YouTube channel, so be sure to pay a visit and subscribe.
And if you like quick-and-easy tricks, check out the tutorial we posted explaining how to use a simple slider that will change how you edit photos in Lightroom.
