Cosori air fryer recall – US customers warned to ‘immediately stop using’
Everything you need to know about the recall of the popular air fryer in US and Canada
Noise in digital photos can seriously degrade image quality, especially when shooting with budget gear, in much the same way grain is annoying in film photography. There are several editing techniques for cleaning up noisy shots, but today’s topic is banishing these ugly artifacts as much as possible in the camera.
As you might suspect, modern high-end cameras do a much better job of handling noise than their older counterparts or the budget models available today. That’s because of improved senor technology and significantly greater high ISO capabilities for shooting in low light or with long lenses.
Photographer Waseh Ahmad specializes in photo tutorials that work wonders with all kinds of cameras—from expensive pro models to those that are a fraction of the cost. The in-camera noise reduction methods discussed in the episode below are targeted at photographers on a budget. Ahmad covers a lot of ground in less than 10 minutes and he discusses the misconception that simply lowering ISO is all that’s necessary for solving the problem. In fact, during a brief explanation of how and why noise occurs you’ll learn what else can responsible for this common problem.
As Ahmad explains, three are three primary culprits when noise appears in an image: 1) noise from light (or more specifically the lack there of); 2) sensor noise that occurs even before an ISO setting is chosen; and 3) Noise from the camera sensor once your selected ISO is applied.
He discusses how an understanding “signal-to-noise ratio” is a key component of resolving the problem. Here he says, “Increasing ISO just amplifies the signal” unless you make other adjustments, in much he same way that cranking of the volume on a cheap radio degrades sound quality.

With the foregoing as an introduction, Ahmad then walks you through a variety of key camera settings for improving image quality by getting noise under control. He also provides a few shooting tips and tricks that really help.
There’s much more to learn on Ahmad’s YouTube channel, whether you shoot photos with a phone, entry-level camera, or full-fledged pro mirrorless or DSLR model.
And while you’re thinking about image quality, check out the earlier tutorial we posted explaining a fast Photoshop fix for photos with soft, pixelated edges.
High Dynamic Range (HDR) is an important technique that enables you to shoot or edit photos that appear more like what one sees with the human eye. The concept involves balancing out light and dark areas of a scene to capture more detail in both highlights and shadows.
In the past we’ve featured tutorials on how to edit conventional photos to create an HDR look, and other lessons explaining how to attempt an in-camera effect using the HDR setting available in most modern models. The tutorial below from The PHLOG Photography channel takes a hybrid approach—combining the best of both techniques
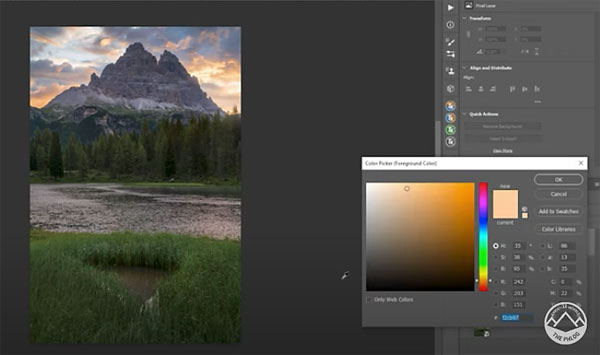
This approach used by German landscape photographer Christian Mohrle demonstrates a simple method for editing images shot with HDR that don’t quite meet expectations when captured in the camera. As you’ll see, the shadows in his photo are still far too dark, but since it’s an HDR file there’s plenty of expanded dynamic range available to rehabilitate the shot.

As with all lessons from instructor Christian Mohrle, we begin with a reminder to download the sample Raw image with the link beneath the video. That way you can make the changes yourself (a great way to learn) as they are explained.
Mohrle’s first step is always a few basic adjustments to make the image look as good as possible before tackling the specific task of the day. Here he does that by changing the profile to adobe Standard and modifying white balance for more warmth and base saturation
After a few quick tweaks to exposure, Mohrle moves on to masking and color grading to selectively enhance specific portions of the scene, and as he works the image is increasingly transformed. He targets the sky with a radial gradient to add contrast, saturation, and a bit of glow. You’ll see how a linear gradient further improves the shot.

Mohrle’s color grading technique is also effective and super simple, as is the manner in which he carefully cleans up and sharpens the photo in his final two steps. Bottom line, this 11-minute video is well worth your time.
There’s much more to see on Mohrle’s YouTube channel, targeted at outdoor shooters, so be sure to take a look.
And don’t miss the tutorial we shared from another expert, explaining a simple trick landscape pros use that you should try yourself.
