We predict Aldi’s rope swing seat will be this year’s garden must-have
It’s sure to be a staple come the warmer months
If you’re new to photography welcome aboard, and there’s no way around the simple fact that you’ve got a lot to learn. The quick tutorial below is designed to short-circuit your learning curve by revealing five common mistakes made by beginners and how to avoid them.
Stijn Borgers (AKA Sightseeing Stan) is a German freelance photographer based in Germany’s beautiful Black Forest. His goal in the 11-minute tutorial below is to set you on the right path with a handful of tips and tricks that will “help take your photography to the next level and capture beautiful, memorable shots.”
Making mistakes in part of learning and adapting to any new artistic endeavor; the trick is not to repeat the errors of your ways. By paying close attention to this rule, your skills will quickly evolve, and you’ll no longer consider yourself a beginner in short order.

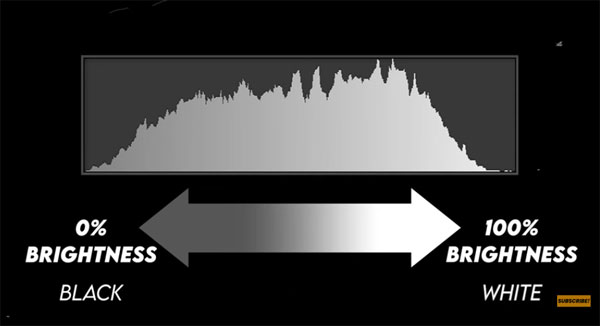
One of the first challengers you’re like to encounter is achieving a proper exposure without losing any details in an image. According to Borgers, a big mistake with this goal is trusting what you see through the viewfinder or on your camera’s rear LCD. That’s because, in Borgers’ words, “those are typically not that reliable, and chances are you’ll end up with an overexposed or underexposed shot.
Borgers demonstrates how to employ a few features in your camera, like the histogram and the “blinkies” so you you can consistently dial in a correct exposure under a variety of lighting conditions. By following his advice you can cross exposure off your list.
Another mistake to avoid is crooked horizons or photographs that aren’t level, and you’ll see how getting things straight makes a big difference in the impact of your photos. In some cases this “disturbing” error creates bad empathy and may ruin an otherwise nice shot. Most camera have built-in tools to help you get things right.

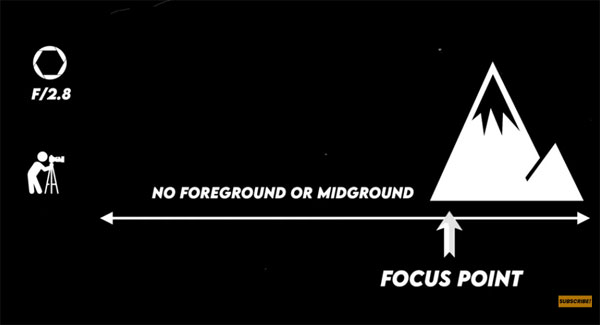
Borgers’ other tips include using aperture and shutter speed settings in he correct way for the task at hand, achieving the proper depth-of-field, focusing techniques, lens choice, and more.
There’s much more to learn for photographers of all skill levels on Borgers’ instructional YouTube channel. So pay a visit and subscribe when you have time.
On a related topic, we also suggest you check out the tutorial we posted from another accomplished pro, explaining several helpful tips for those new to landscape photography.
EV-Compensation is an important concept to understand if you want to consistently capture properly exposed images in the camera. Also known as Exposure Compensation, this setting is a feature in just about any camera you own, and when used properly it often eliminates the necessity of balancing tones during the editing process.
In basic terms this helpful tool enables you to easily override the exposure setting chosen by your camera. It’s particularly useful when photographing scenes with uneven light, or those with overly bright highlights or dark shadows. In other words, you can take control by manually adjusting tones in an image.
As you’ll see in the tutorial below from instructor Booray Perry, EV-Compensation works differently depending upon the camera exposure mode you’re using. Perry notes that some cameras have a dedicated physical dial on the top for making necessary adjustments, while others require a button press or the rotation of a wheel for selecting the value you want.

In either case, most cameras enable you to modify exposure from -3EV to +3V and some offer an even greater range. In either case, making the adjustments is easy and effective, and you can view the result on the rear LCD or in the viewfinder in real time before snapping the shutter.
When shooting in Aperture Priority mode, for example, you choose an f/stop and the camera provides what is “thinks” is the appropriate shutter speed, but depending upon the scene at hand, that combination may fail to deliver a good result. Perry says that in this case EV-compensation works it’s magic “by changing your shutter speed or ISO—but it won’t change your aperture setting.”
When using other modes, let’s say Shutter Priority, EV-Compensation has different ramifications, but in basic terms you choose the parameter of most importance (like a fast shutter speed for action shots) and the camera does the rest. In other works, accurate photos with “less thinking.”

If you’re looking for more simple explainers like this one, head over to Perry’s YouTube channel and take a look.
We also suggest you check out another helpful tutorial we posted recently, explaining how to use Selective Color to fix hot spots and highlight blowouts in Photoshop.
If you’re familiar with Aftershoot’s AI-driven Culling app, prepare to be amazed by their latest innovation: Aftershoot EDITS. This cutting-edge AI editing software streamlines the entire post-shoot workflow, saving photographers countless hours and preserving their unique editing styles.
How does Aftershoot EDITS work?
Harnessing the power of AI, this software accelerates the editing process without sacrificing the photographer’s personal touch. How does it achieve this? By developing personalized AI Profiles based on your past edits.
Simply upload previously edited photos from your Lightroom Catalogs, and the AI will analyze your style, learning from your techniques.

Aftershoot EDITS applies the knowledge gained from your previous edits to create what is called your “AI Profile.” This unique AI Profile is then used to edit your unprocessed photos with remarkable speed – up to 1,000 photos in under a minute!
With the ability to create up to 5 different AI Profiles, you can tailor your editing preferences for various shoots, from landscapes and portraits to weddings. This flexibility ensures your unique editing style is applied consistently across different lighting, subjects, and scenes.
How accurately can it replicate your editing style?
In terms of its AI editing capabilities, Aftershoot EDITS can automatically straighten, crop, and adjust white balance, tones, vibrance, saturation, exposure, HSL, highlights, and shadows.
With a claimed 90%+ accuracy in replicating your style, you’ll still have complete control to make any further refinements as needed. Plus, the AI editor continuously learns from your additional adjustments to apply them to future edits.
Take a closer look at how EDITS works in this video. The software’s accuracy improves as you upload more edited photos from Lightroom, effectively learning from your unique editing choices. In addition, Aftershoot EDITS is user-centric, allowing you to fine-tune its functionality according to your preferences.
The ultimate offline AI editing tool
Aftershoot is already saving countless photographers hours of their time with AI Culling. The image below is just a snapshot of some power users boosting their post-shoot workflow with it. And now, with EDITS integrated, it will at least double their time saved.

The best part? Aftershoot EDITS offers unlimited photo edits! This means you can give the AI editor thousands of images to edit all at once – within minutes.
Ultimately, it frees you from the tedious editing process and gives you more time to focus on the creative aspects of your business, like booking clients, conducting shoots, and enjoying quality time with your loved ones.
For a limited time, Aftershoot EDITS is available free of charge to all Aftershoot users. The pricing structure will be unveiled soon, but Aftershoot promises it will be a flat monthly/yearly rate for unlimited photo edits – no pay-per-image!
Try Aftershoot EDITS
Ready to revolutionize your post-shoot workflow? Experience the value and benefits of Aftershoot EDITS and discover how it can supercharge your photography business.
Try Aftershoot with a free 30-day trial, including both CULL and EDITS features.

