Judging panel unveiled for IWTTF Awards
Social enterprise Women in Travel CIC has announced a series of industry-leading names on the judging panel of its inaugural IWTTF Awards.
Photographing our feathered friends can be difficult for those new to the game, and editing the results can be equally challenging if you’re not confident about your post-processing skills. If you’re dissatisfied with past results, the tutorial below will be a big help.
We frequently turn to German pro Jan Wegener for sage advice on photographing birds and editing the images. This tutorial is a bit different because it takes the form of a conversation between Wegener and like-minded photographer and educator Glenn Bartley.
The topic of this interesting conversation is a handful of post-processing hacks that will transform good photos into great ones. The lesson revolves around five nice images that each display unique problems. You’ll learn how to fix each of them with simple editing tips and tricks.

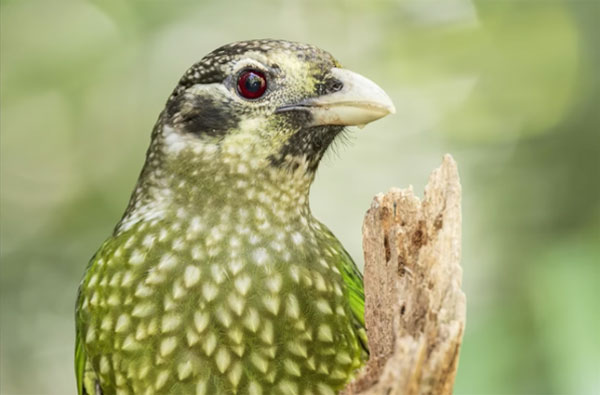
The pretty image atop of this page was captured by Wegener in his backyard using a painted background to make his subject stand out. While his shot looks pretty great, it illustrates a not uncommon problem; namely, sometimes a bird is too far to one side of the frame (or either too high or too low).
The solution here, when the photo is shot too tight, is to add a bit of extra canvas to the image so the subject isn’t cramped within the composition. In this case Wegener decided to expand the frame at the top, and you’ll see how easy this is to do.
The second image of concern is a photo captured of a colorful bird in Australia. As Bartley explains, the problem is that this bird has a blue shoulder patch that’s so bright in the image that the photo looks looks unrealistic. Here the trick is a “double-processing” technique that faithfully depicts the actual color.

The other helpful hacks are designed to fix images that look either “too sticky,” too red, or “too chunky.” In all three cases the rehabilitation process is fast, easy and effective. While watching the video try to think of other ways you can use these interesting editing hacks.
You can find more helpful tips and tricks on Wegener’s popular YouTube channel, and view Bartley’s impressive imagery on his Instagram page.
There are numerous ways to edit b&w images depending upon the look you’re trying to create. Sometimes the goal is a soft, moody effect, while other times you want a photo to jump off the page. The tutorial below is geared toward the latter, explaining how to use two “hidden” Photoshop filters for achieving eye-popping results.
Instructor Unmesh Dinda is an internationally acclaimed image-editing expert with 4.5 million subscribers to his instructional YouTube channel. The episode below demonstrates a quick technique for creating dramatic b&w imagery using two unfamiliar Photoshop filters.
Dinda says, “These methods provide ultimate control over light and contrast, and we’ll learn how to customize them.” He takes a deep dive into how the techniques work, and he discusses timesaving Photoshop Actions for one-click results.

By the time you’re done watching this 18-minute lesson you’ll understand how to add natural grain, recover lost shadow detail, and make eyes sparkle in portrait photos. Dinda notes that these techniques are particularly intriguing “because they take all the confusion away and give you very dramatic results.”
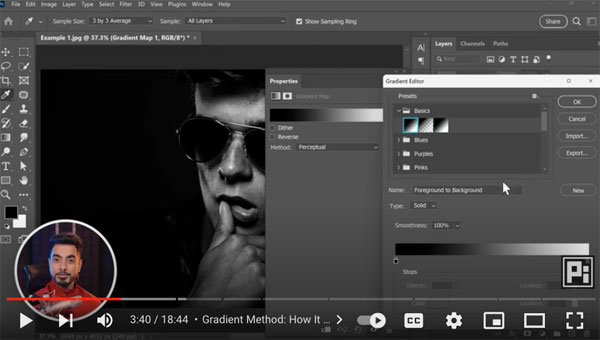
When Dinda says this method is super simple he means it. To get started all you have to do is create a gradient map from black to white, and BOOM—instant drama. If the result is too contrasty for your liking, simply change the method from Perceptual to Classic.
Dinda also demonstrates how easy it is to turn this one-step edit into a one-click Photoshop Action, and he has a few other tips for refining the image even further if need be. He also describes a simple “calculation method” and explains how it works.

You’ll also learn a quick step-by-step method for adding a bit of grain to make your image appear as though it was shot on film. Dinda also wants to open up the shadows in this particular portrait of a male model, and he demonstrates a straightforward way to do that.
The final step in this impressive transformation is making the subject’s eyes come to life. After taking a look at Dinda’s before/after images you’ll want to add this technique to your Photoshop bag of tricks.
Dinda’s immensely popular YouTube channel includes lessons on just about any image-editing task you can imagine, so pay a visit now and frequently in the future. We also suggest you check out another tutorial we posted recently, explaining the important concept of Color Temperature and how it affects your photos.
