Experts issue garden furniture warnings ahead of heatwave – and how to avoid garden fires
It pays to ensure your safety when lounging around outside this summer
There are all kinds of excuses for unappealing landscape photos: The sun is too bright, weather is awful, no clouds in the sky, dull, drab light—just to name a few. But if you’re serious about photography, and know your way around Photoshop, it’s time to stop complaining and transform these duds into something really special.
In today’s tutorial from German pro Christian Mohrle you’ll learn his workflow for turning a sow’s ear into a silk purse with a little help from Photoshop. His demonstration image in an uninspiring seaside shot that we recommend downloading with the link beneath the video, so you can make the changes yourself as he explains the straightforward steps.
Mohrle’s goal for this transformation is to give the boring image a dark and gloomy appearance full of drama. The first step in the process is to change the profile from Adobe Color to Adobe Standard. This immediately lessens contrast and slightly brightens up the dark shadows.

The next steps involve a few basic, global adjustments to the image, which are accomplished in Photoshop’s Basics panel. Mohrle drops the overall exposure, further brings down highlights for more details in the sky, and opens up the shadows a bit for more details in those areas too.
Mohrle also slightly increases the whites to give the image more life, and after a few additional simple tweaks the image is much improved.
With the preliminary enhancements out of the way it’s now time for selective adjustments that provide the look he’s after. Mohrle’s first objective here is to darken the top portion of the sky, while leaving the area near the horizon quite bright. To accomplish this he turns to Photoshop’s masking panel and demonstrates how its done, using a Radial Gradient with a nice round edge that matches the area to be adjusted.

Mohrle then adds a Linear Gradient to the very top of the image to further refine the result. A second Radial Gradient is employed to add a subtle glow to the middle of the scene. A bit more fine tuning, and he turns to simple color grading and sharpening.
All that’s left is a bit of cleanup, and careful dodging and burning using a TK plugin that’s available in a free version. After comparing the before/after images we think you’ll agree that the transformation is quite impressive. You can find more great editing tips and tricks by visiting Mohrle’s instructional YouTube channel, so be sure to do that when you have time.
We also suggest watching another tutorial we posted earlier, with a very helpful beginners guide to shooting dramatic long-exposure photos.
Unless you shoot in black-and-white, the effective use of color can make or break a photo. Having a good eye certainly helps, but a basic understanding of color theory can make all the difference.
The eye-opening tutorial below comes to us from Nucly, an instructional YouTube channel dedicated to helping photographers improve their imagery with very helpful tutorials on photo retouching and other Photoshop techniques. This 30-minute episode is a bit longer than most, but it imparts some valuable information that will help elevate your skills
Instructor Rikard Rodin is an accomplished author, photographer, and Creative Director currently based in Los Angeles. He has two goals for this important tutorial, the first of which is explaining how the Color Wheel works. Then, with that knowledge under your belt, he demonstrates how to use “Color Harmony” in Photoshop to create the most pleasing images possible.

As you’ll see, there are actually different types of color harmony, that include Complementary Harmony, two types of Split Complementary Harmony, Analogous Harmony, and what’s known as Triadic Harmony. Less important that the terminology is how these color styles can be used to advantage with a few basic tools in Photoshop.
As Rodin notes, “We’re going to take five images, and for each determine the key color, decide on a harmony, and then adjust the colors of the image in Photoshop to achieve our chosen harmony.” It’s a unique form of color enhancement that we haven’t discussed before.
Make sure you check the description beneath the video where you’ll find three helpful links you’ll want to explore. The first two direct you to the color wheels used in this tutorial, just in case you wish to purchase them for yourself.

The third link is for photographers interested in a more comprehensive discussion of these matters, which you’ll gain by watching Rodin’s online Color Grading Masterclass. There’s also much more to learn by paying a visit to Rodin’s interesting YouTube channel.
We also recommend you watch the tutorial we posted from another pro earlier this month, demonstrating what he says are “five basic landscape photography tips every beginner should know.”
Here is another helpful how-to designed to give landscape photos an uncommon look. Like others we’ve posted in the past, it will enable you to capture unique images and set you on the path toward creating a style all your own.
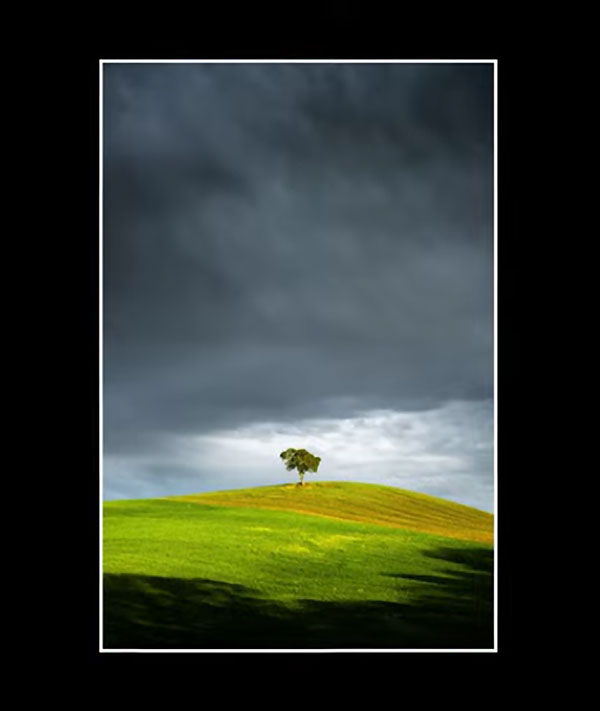
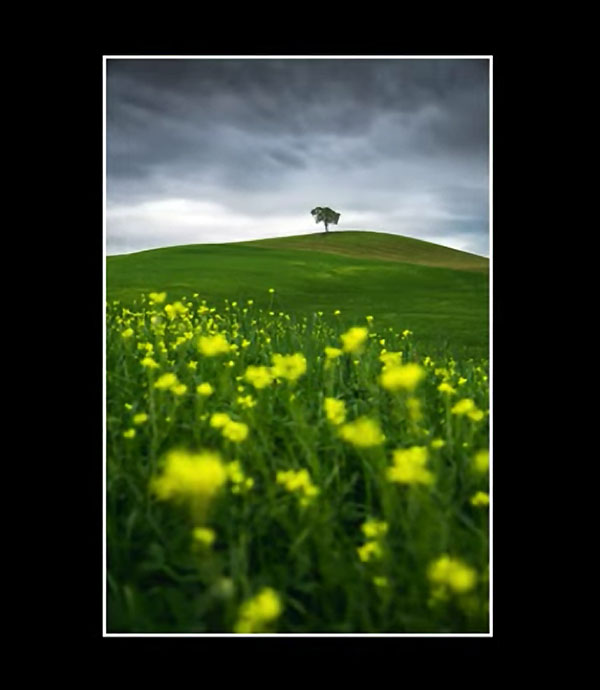
This episode from acclaimed Danish photographer Mads Peter Iversen is all about using telephoto lenses to narrow the focus of unremarkable scenes and directing a viewer’s eyes to one essential subject. The technique works equally well with long primes lenses telephoto zooms.
Iversen is a professional landscape photographer whose remarkable images are immediately recognizable because of his eye-catching minimalist style. And as you’ll see, one secret to his success is leaving a wide-angle lens in the bag and reaching for a longer focal length instead.

In this behind-the-scenes episode you’ll watch Iversen work his magic in Tuscany, a destination he calls “a telephoto zoom lens paradise.” The advantage of a zoom, as compared to a prime, is that you can experiment with more expansive framing if the situation arises. Or you can shoot the scene wide and up close and determine which image you like best.
Iversen explains his preference like this: “Although a wide-angle lens can definitely be used, it’s the long lens in combination with great light and atmosphere that delivers the most incredible results”—especially when shooting in this beautiful (yet sparse) region of Italy.
You’ll follow Iversen as he visits several locations while explaining his techniques for this style of photography. During this excursion his two weapons of choice are a Tamron wide-to-tele 28-200mm zoom, and a longer Sony 100-400mm when more reach is required.

Along the way you’ll pick up valuable advice on composition when minimalist photos are the goal. Exposure and other camera setting can me important too, when photographing a lone subject against a bright sky—without much else in the frame to balance the light.
In other words, this approach to landscape photography is a much different challenge than when photographing conventional landscapes that often have dense foliage surrounding a primary subject and in the background. Iverson has a variety of straightforward tips and tricks for getting the job done.
After watching the 16-minute tutorial head over to Iversen’s instructional YouTube channel for a variety of lessons on photographing the great outdoors.
We also recommend watching the tutorial we posted from another pro recently, explaining a simple Photoshop technique for giving unremarkable landscape photos a soft, dreamy glow—another way to achieve photos with a unique look.
