This 70s-inspired chair is trending for summer – but with a new, modern look
It’s perfect for both indoors and outdoors
We’ve been bringing you all the capabilities of Lightroom’s recent update as fast as we can, and today’s tutorial describes the new Adaptive Presets, and demonstrates how to use them for a variety of image-editing tasks.
Instructor Anthony Morganti is a Photoshop and Lightroom impresario who we rely upon frequently for demystifying new editing tools. In today’s eight-minute episode he explains everything you need to know for making faster and more precise edits with the new Adaptive Presets found in Lightroom.
The first step is finding these new tools, and you do that by navigating to the left-hand panel in Lightroom’s Develop Module. Once you click on the Presets tab on the top you’ll first see any presets you purchased in the past. The next section includes all the Presets built into Lightroom, with the new Adaptive Presets at the top of the list.

You’ll then see the available options, which include Adaptive Portrait, Adaptive Sky, and Adaptive Subject—each with a subset of tools. So what exactly are these Adaptive Presets and how do they differ from a “normal, everyday, run-of-the-mill Lightroom Preset?”
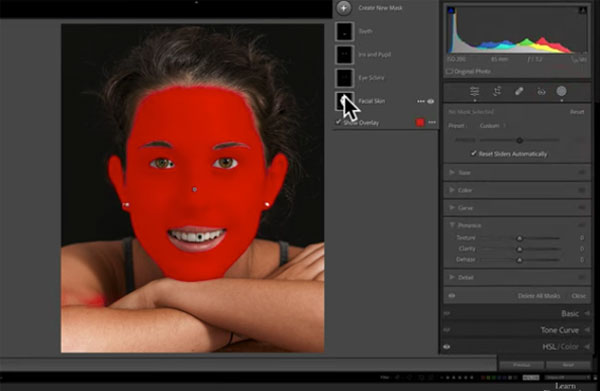
Morganti explains the difference like this: “The new Adaptive Presets work by “taking a number of AI masks and bundling them together—so with a single click you can edit a bunch of things at one time.” He uses a simple portrait to demonstrate the almost instantaneous method of softening the model’s skin, whitening her teeth, enhances her eyes and more.
You also have the option of choosing which of these enhancements you want, if some of the adjustments are unnecessary or unwanted. So, for example, if your only goal is to whiten a subject’s teeth, or darken her eyebrows, the Adaptive Presets enables you to do just that.

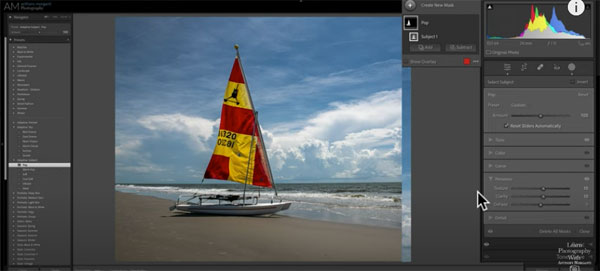
As you see, when Morganti pulls up a seaside photo, the other Adaptive Presets work in much the same way. For this shot he selects the Adaptive Sky Preset to demonstrate how this one works to selectively enhance various attributes of the sky, while leaving the rest of the photo untouched.
The lesson concludes with an explanation of the Adaptive Subject Preset which could be a person, an animal, or in this case small sailboat on the beach. By watching Morganti work some magic with these new tools, and comparing the before/after images, we think you’ll agree that Lightroom’s timesaving Adaptive Presets are a big deal.
After watching the video pay a visit to Morganti’s YouTube channel where you’ll find an abundance of image-editing tips and tricks. We also suggest checking out the tutorial we posted from another image-editing expert, explaining how to use simple Lightroom masks to create nature photos with enhanced depth and drama.
Outdoor photography presents a variety of challenges for shooters of all skill levels. Light is ever changing, composition can be difficult with complicated scenes, and arriving at a proper exposure is difficult when there is a wide range of tones in the frame.
In the tutorial below, one of our favorite landscape pros reveals 10 favorite tips that that are easy enough for anyone to use. Based in Nova Scotia, Simon d’Entremont specializes in nature, travel, and wildlife photography, and he’s a superb instructor. This eight-minute episode will help you achieve far better photos during all your outdoor pursuits,
Simon begins with a very useful tip when there’s a wired fence between the camera and your subject. This works particularly well when shooting at the zoo, or at other enclosed locations like nature centers or parks that lock their gates at the end of the day.

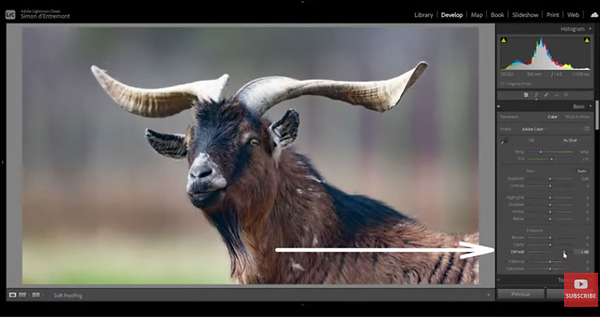
All you have to in situations like this is position yourself really close to the fence. With the proper camera settings the fence is thrown out of focus and virtually disappears as you focus on whatever appears further back in the scene. Under some circumstance this method may impart a slight haze to a photo, and Simon demonstrates how to easily eliminate that by using Lightroom’s Dehaze tool.
Simon’s second tip explains how to use a monopod more effectively when you didn’t bring along a more stable three-legged camera support. With this trick you place the foot of the monopod close to your foot, lean it forward, and press the lower section against your shin. As Simon says, “The bows out the monopod, creates a more stable base for your camera, and results in sharper photos.”
What about when you post a photo to Facebook or Instagram and the image doesn’t appear as sharp as the original? Simon has a workaround for that too. By following his advice your photos will look great and remain sharp when you share them online.

This lesson includes six more helpful tips that are just as straightforward and effective as those mentioned above. They literally take no time to master and will help you greatly up your game.
Simon’s instructional YouTube channel contains many more tips and tricks like these, so be sure to pay a visit when you have time.
And be sure to watch the tutorial we posted recently from another accomplished outdoor photographer, explaining how to make stunning landscape photos when the light isn’t right. .
