This nostalgic kitchen trend is back and here to stay, according to experts
Classic never goes out of style
If you carefully analyze a selection of outstanding landscape photos, you’ll realize that contrast plays a big part in their impact. Yet, discussions of outdoor photography techniques often ignore this essential component.
We’re putting a stop to that today with the six-minute tutorial below in which an acclaimed British photographer discusses the significance of contrast, how to spot it in a scene, and ways to use it to shoot more compelling images.
Instructor Mike Smith is a British landscape photographer whose behind-the-scenes tutorials are really popular with Shutterbug readers because of his straightforward approach. After watching this six-minute episode we guarantee that the importance of accentuating contrast will forever be top of mind whenever you’re shooting in the field.

Smith puts it succinctly: “Using contrast is a great way create different moods within your photographs. You can get everything from an edgy image to a dream-like image.” As he explains, contrast is simply the difference between the lightest and darkest portion of a photo, and, in a way, it’s linked to what’s known as “dynamic range.”
Key determinants of this essential component include the camera you use, the settings you employ, and the nature of a scene itself. Making the most of the interaction between these key variables is what this quick lesson is all about.
All this will become clear by viewing Smith’s selection of images. One has a very bright sky with dark mountains in the background. Another, taken on a bright day, is evenly lit with highlights and shadows that aren’t far apart. In either case you can emphasize contrast with the exposure tips that Smith provides.

Smith notes that one of the best ways to learn new techniques is by eliminating as many distractions as possible. And when it comes to understanding the impact of contrast, he says the color in a scene can be a very big distraction. Thus, he suggests practicing his suggestions while shooting in b&w.
As he says, this will give you a very different shooting experience, with variations in contrast being much easier to discern. Then, when you switch back to color, you’ll be far more prepared to make the most of his tips for using contrast to advantage. In other words, different colors have different luminosities, which is another way of evaluating variations in brightness.
This is one of those techniques that once you get it, you’ve got it forever, so how about giving this a try as soon as possible. There’s much more to learn on Smith’s instructional YouTube channel, so be sure to check it out.
We also suggest watching another of Smith’s tutorials that we posted in the past, explaining how to use back-button focus for faster, more precise subject acquisition.
Today one of our favorite wildlife photographers shares a secret he says significantly improves how the subject of an image is perceived. What makes this simple trick so powerful is that it can works wonders for just about any photo you shoot outdoors.
While instructor Steve Perry is known for amazing wildlife imagery, his portfolio is also full of stunning landscapes and nature photos. In today’s episode he demonstrates the impact of camera height, and how a slight change in vantage point affects the mood and feel of an image.
In less than 12 minutes Perry explores what happens when you use a higher, lower, or eye-level perspective. As he says, “Not understanding these impacts can sabotage any chance you have of creating more compelling, artistic images.” He also covers several field techniques that make it easy to follow his advice.

As Perry explains, there are three primary ways that perspective affects the story you’re telling with a photo, and they’re all centered around the relationship between camera height and a subject’s eyes. He begins by illustrating how a photo is perceived when the camera is positioned above the subject’s eye.
Perry rarely photographs wildlife using this approach for several reasons. He says this perspective conveys an unwanted feeling that the viewer is dominant and creates less connection with the subject. He also notes that this can often “minimize the importance of the subject.
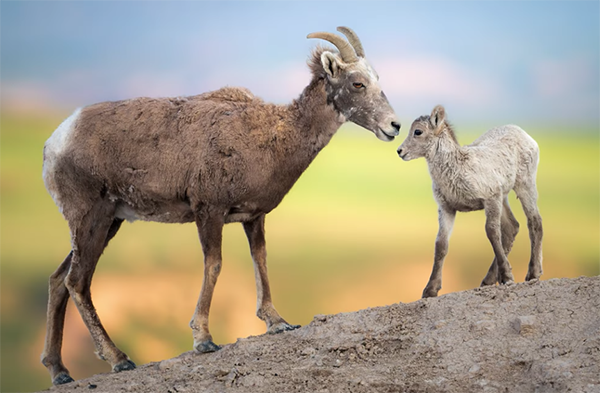
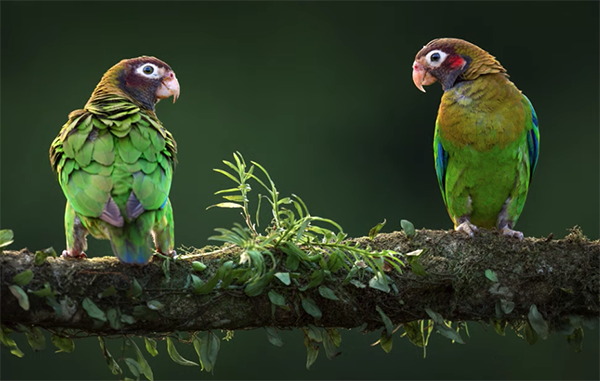
A better technique is to shoot at the subject’s eye level (like we do when photographing children and small pets). Perry says this approach creates ‘increased empathy and engagement” by connecting viewers with the subject and making them feel like they’re part of the animal’s world. An eye-level perspective also helps add depth to an image and is particularly powerful when photographing small subjects.

As you may expect, Perry’s third tip has to do with shooting below the subject’s eye level, which is another of his regularly used techniques. While this method can be extremely effective, he notes why the proper subject is needed to make it work.
When done properly, a below-eye-level perspective makes powerful animals appear even more majestic and intimidating—while making the viewer feel smaller and vulnerable. This can also be a fun approach to take with small subjects, because it imbues them with a unique sense of dominance that we typically don’t expect.
There much more to see, and specific techniques to learn, and by the time you’re finished watching we think you’ll be convinced. You can find more helpful tips by visiting Perry’s popular YouTube channel.
We also suggest checking out the tutorial we shared recently from another top outdoor photographer, explaining seven common landscape photography mistakes made by both amateurs and pros, and easy ways to fix them.
