Hugh Jackman just experienced a very common dishwasher mishap – this is what to do if it happens to you
The experts explain how to fix this disaster…
What do you mean you’ve never cleaned your lenses and the dirty sensor in your camera? After all, some of us spend a small fortune on cameras, lenses, and important photo accessories, and regular maintenance is part of the game. As one pro says, “It definitely behooves us to do everything in our power to try to extend the life of our gear as much as possible.”
It’s true that some photographers avoid sensor cleaning because they’re afraid of screwing things up. But with some affordable supplies and the knowledge you’ll learn today, this task is both safe and a no-brainer. The same goes for lenses, tripods and other accessories that you rely upon every day.
In less than 16 minutes you see how landscape photographer Mark Denney goes about the spring cleaning that he repeats in summer, autumn, and winter, and often more frequently as needed—especially before an important trip. He walks you through the satisfying step-by-step process so you can set your fears aside.

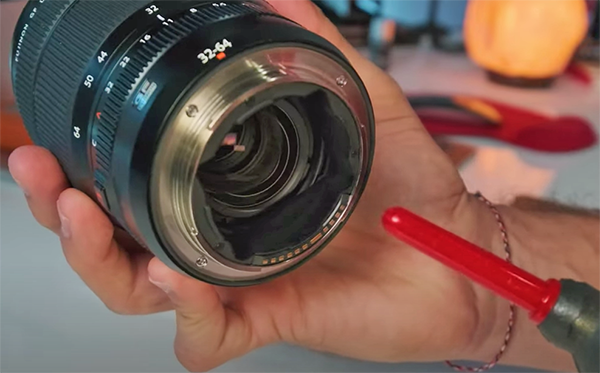
It’s virtually impossible to capture great quality images with a grimy lenses, and that’s where this important tutorial begins. Denney recommends that you carefully examining the lens barrel to make sure it’s free of dust and debris before turning your attention to the front and rear glass elements. Doing this is quick and easy with the help of a rocket blower or a soft brush.
It’s also easy to clean the lens elements, and experienced photographers often do this several time during a shoot, especially when in the field where dust, rain, fingerprints, and other contaminants are a constant concern. Denney explains the importance of blowing off elements before taking subsequent steps, otherwise you may rub dirt into the glass and cause irreparable damage.
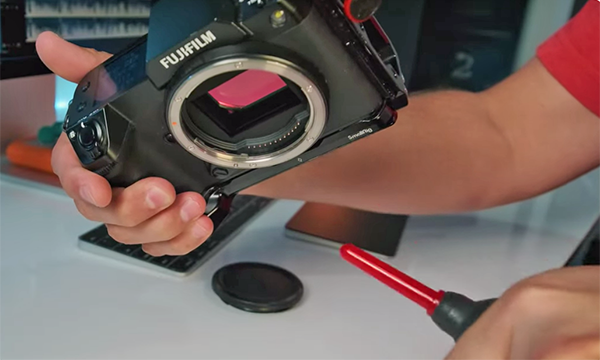
Spiffing up the camera’s sensor is a bit more involved, and it’s a task you should do at home in a clean environment. The first thing to determine is whether or not the sensor actually requires cleaning, and Denney explains how to do that. If you decide to proceed, hold the camera face down, so any dust and debris doesn’t push further into the body as you follow his advice.

It’s important to keep the camera body pristine too, making sure there’s no dirt on or beneath all the buttons and dials. LCD panels are also deserving of attention using the proper materials and procedures to avoid scuffs and scratches to the surface.
Denney also discusses how to care for tripods and other accessories so that they operate smoothly and efficiently and live a long life. Once your gear is bright and clean, be sure to follow Denney’s advice for taking regular preventative measures. That way your next round of cleaning will be even easier.
You can find more great tips on editing, shooting, and gear by visiting Denney’s popular YouTube channel. And be sure to watch an earlier tutorial we posted, explaining how sensor size affects image noise. Hint: prepare to be surprised.
Well-composed landscape photographs are often difficult to achieve—especially in scenes with several important elements. Sure, there are a variety of common guidelines, like the Rule of Thirds and the importance of leading lines, but you’re undoubtedly familiar with those.
Today’s tutorial goes in a different direction with five composition secrets “that you’ve never heard of before” from an accomplished pro who says, “learn my step-by-step framework and you’ll start improving your landscape photography compositions today.”
Instructor Dave Morrow is a full-time wilderness photographer who spends nine month a year living in a tent and chasing light, so he knows whereof he speaks. His says he uses these technique daily, and so can you whether you’re deep in the outback or closer to home. This behind-the-scenes episode takes place during a five-day excursion as Morrow hikes through mountainous terrain.

Morrow provides a link to his free PDF Guide that you can download to your camera and have it handy while shooting in the field. The first thing he does when arriving on location is to carefully scrutinize what he sees, based upon “an algorithm I have in my mind” that helps him decide where to begin. Based upon the following rules he developed himself, Morrow then says either “heck yeah” or “no.”
Once Morrow determines the optimum center of attention in a scene he then looks for a complementary foreground element on the opposite side of the frame. This enables him to capture images with compelling balance that guides a viewer’s eyes through the frame. As he explains, “If everything is just on one side of the image there’s no point in having the other side of the scene in the photo.
He calls this “the offset technique” and it’s very helpful for creating a dynamic sense of scale. As you’ll see, this approach is even more effective when you’re able to include complimentary colors in the two main zones of an image. Then you’ll achieve what Morrow refers to as a “square color harmony.”

Morrow also demonstrates a super simple “interestingness grid” that’s responsible for many of his most compelling images. You don’t need to overthink this one, because it’s intended to be a rough and versatile guideline. This one is sort of like a modified Rule of Thirds with a bit more sophistication.
At this point you’re barely halfway through the great tricks you’ll learn. And once you understand all six they’ll become part of a composition algorithm in your brain too!. Morrow’s instructional YouTube channel is full of helpful tips and tricks like these, so be sure to pay a visit and see what’s available.
And don’t miss the tutorial we posted recently, explaining a “secret” technique for sharpening landscape photos that another pro developed himself.
