Does IKEA do Black Friday? Last year it shunned the sales event, but this year could be different…
The Swedish store opted out of Black Friday, in favour of ‘Green Friday’ but some deals could still be on offer
One of the biggest challenges when shooting indoors is dealing with unusual light that imparts ugly color casts to the images you shoot. This can even happen when photographing outdoors in ambient light when nearby or overhead objects may bias tones and make them appear unrealistic.
While we all like to get things right in the camera, and adjustments to White Balance settings sometimes help, the easiest way to correct this problem is with some thoughtful adjustments during post processing—especially when the offending color casts are too extreme to be resolved with a camera’s built-in White Balance options.
Instructor Roy van der Wens has leveraged his experience in fashion photography to become one of the best-known wedding photographers in the Netherlands. He does most of his work indoors, where he has little or no influence on the lighting in a venue. He’s therefore had to develop the straightforward Lightroom technique you’ll learn today for correcting unsightly colors to create flattering and natural looking images of a subject.

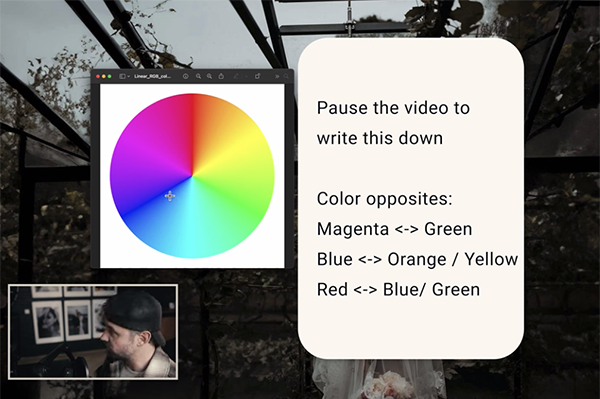
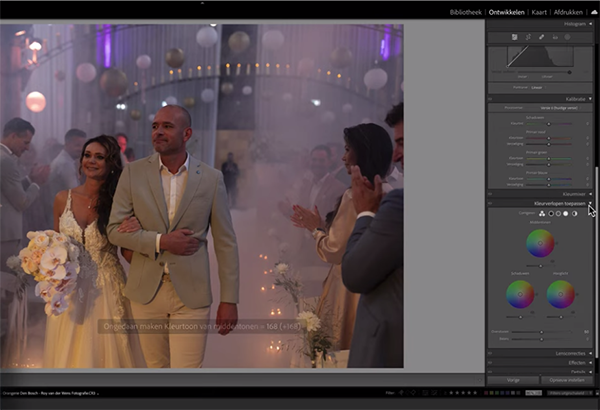
Wens uses a few expletives to describe the color problems he’s experienced in the past, and we encourage you to ignore his frustration if you find his terminology offensive because the tips he provides are quite valuable. He uses a color wheel to illustrates how weird light can make capturing nice images difficult to say the least. His first demonstration photo, captured at an indoor venue, is a perfect example.
According to Wens, the Lightroom adjustments you’ll learn are partly based upon color science with a heavy dose of personal experience thrown in as well. Regardless of the terminology he uses, we can all agree that the magenta light is pretty awful—giving unnatural, somewhat ghoulish pink tones to his subjects. At a concert this might be acceptable, but at a wedding reception not so much. The other images he provides suffer from different, but equally problematic colors.
While working quickly to capture impromptu, candid images, it just doesn’t make sense to spend time sorting through potential in-camera solutions.. But the Lightroom techniques he demonstrates can easily resolve most of these problems and make Wens and his subjects proud of the results.

Bottom line, after watching this 14-minute video you’ll understand how to create pleasing photos when weird light is a challenge. Wens’ popular YouTube channel contains other helpful lessons like this one, so be sure to take a look.
And don’t miss the tutorial we posted recently from a respected image editing expert who explains whether you need one or multiple Lightroom catalogs for an organized workflow, and the best way to get the job done.
