Our 10 most popular vacuum cleaners of 2023 and why you need one in your home
Ideal Home’s round-up of our most popular vacuum cleaners including models from Shark, Miele and Beko
It’s not too late to update your New Year’s Resolutions, and there’s a good one to add to the list: Don’t make the same common photography mistakes that you did in the past. That way you’ll become a much better photographer in 2024 and beyond.
When it comes to landscape photography there are numerous mistake that can detract from the quality of your work. Some involves shooting techniques while other have to do with ineffective editing. The good news is many of these errors can easily be corrected, as you’ll see in the quick tutorial below.
Instructor Austin James Jackson is a Utah-based landscape pro who we often turn to for solid advice that’s appropriate for beginners and advanced photographers alike. In this nine-minute episode he describes five mistakes he’s made himself and he explains how to fix the for better-looking images.

Sometimes we don’t realize the error of our ways until we return home to review our photos on the computer. When this happens, and it’s too late to reshoot, careful post-processing is the name of the game. And that sometimes means taking a subtle approach to avoid making matters even worse.
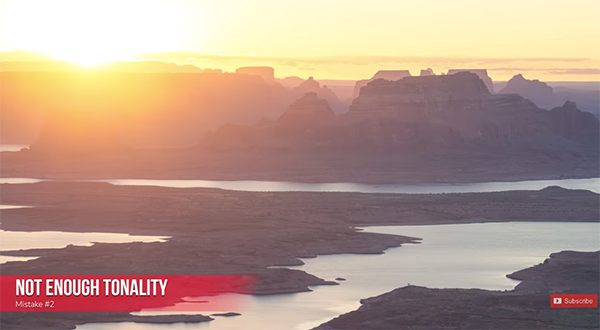
One common error in this regard is a temptation to over-adjust White Balance, and an unnatural appearance is often the result. Jackson notes that “we all want those fiery red sunsets,” but here’s the rub: by warming up color temperature the sky may look great, but the rest of the image will suffer if you take a heavy-handed approach.
Jackson demonstrates the method he uses to pump up the sky while retaining a realistic look to the image as a whole. Another editing pitfall is one that Jackson refers to as a myth; namely an overreliance on the camera’s histogram while adjusting exposure as you shoot. He admits that balanced tonal values are an important goal, but he explains why you shouldn’t be overly concerned if a small portion of the frame is blown out—especially when photographing sunsets.

Another potential problem is being fixated on wide-angle scenes, a topic we recently addressed in a tutorial explaining how to use a mid-range zoom lens to shoot landscape photographs with a different look. Jackson provides his own take on this matter which includes the observation that some situations simply don’t lend themselves to shooting an expansive vista.
The video concludes with two more mistakes to avoid, one of which involves “chasing clouds instead of light,” while the other describes other instances of over- or under-editing your images. There’s much more to learn on Jackson’s popular YouTube channel, so be sure to take a look.
And don’t miss the tutorial we mentioned above regarding the power of mid-range zoom lenses when shooting in the field.
There are numerous reasons for eliminating distracting elements from a photo, beyond the proverbial example of a fencepost emanating from a subject’s head. In today’s quick Photoshop tutorial you’ll learn what an image-editing expert says is “one of the newest and most impressive ways to remove objects in Photoshop.”
Perhaps you captured what would be a compelling street scene, were it not for some litter in the foreground. Or maybe you photographed an impressive monument and a tourist stepped into the frame just as you snapped the shutter. There’s also the familiar problem of ugly powerlines detracting from a beautiful sky.
Effective object removal can be an important task for environmental portraits, landscape photos, wildlife imagery, and a variety of other genres. And as you’ll see in quick Photoshop lesson below, getting the job done to perfection can be far less complicated and time-consuming than you think.

Instructor Brendan Williams regularly posts editing tutorials designed to simplify seemingly complicated tasks, and his powerful technique takes less than 10 minutes to explain. He covers a lot of ground in a hurry , so we recommend downloading the free cheat sheet using the link beneath the video.
Williams says the method you’ll learn is quick and effective, even when working with complex images. As you see, the advice he provides can be employed as a standalone process, or in combination with other Photoshop Object Removal tools—depending upon the photo at hand.
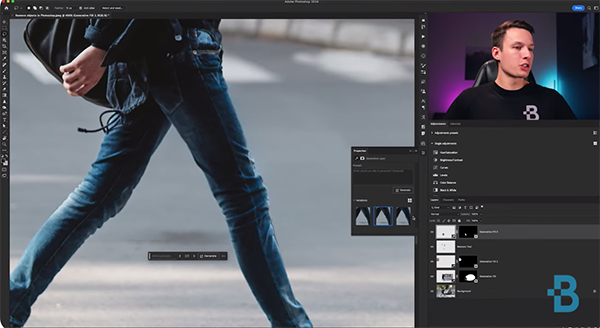
The example used for this demonstration is one that could be considered complex. It’s a photo of a man crossing the street, and William’s goal is to remove a car that looks like it’s about to hit his subject and eliminate a few other vehicles in the background that sort of muck up the shot.

The task of using conventional methods to remove an object as large as the car in the foreground would typically be extremely difficult. That’s because, as Williams explains, “we don’t have enough sample areas to rebuild what was behind the car.” But now, with Generative Fill, we can easily create new pixels to realistically reconstruct the shot.
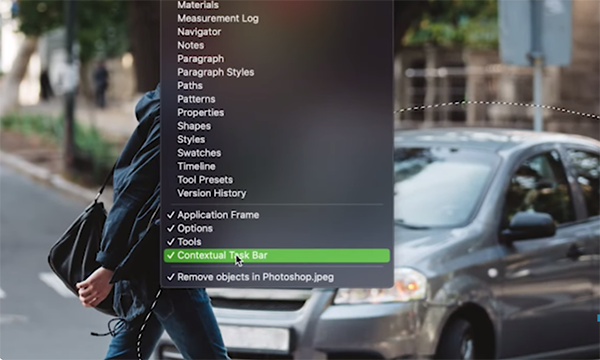
Williams describes how to begin by using Photoshop’s Lasso tool to create a “general selection” around the distracting vehicle. He then explains a couple of important settings you’ll need to make in the Options bar before proceeding further. The rest of the process is surprisingly quick and easy if you follow Williams’ step-by-step instructions.
The lesson concludes with a description of how to use Photoshop’s Remove Tool to get rid of smaller objects like cars in the distance and pedestrians on the street in the midrange of the frame. You can find more straightforward image-editing tips and tricks by visiting Williams’ instructional YouTube channel.
We also suggest watching an earlier tutorial we posted from another processing expert who explains how to expand your photo editing skills by unlocking the power of Layers for a much more effective processing workflow.
