Jennifer Garner champions this ‘dated’ kitchen trend, with a modern and sophisticated twist
The actress is proving this trend is here to stay
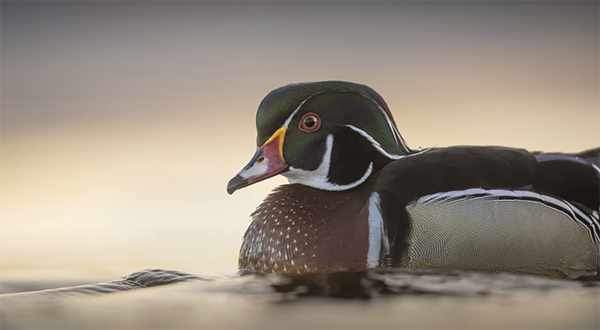
If you’re thinking about trying you hand at wildlife photography but don’t quite know where to start, the beginners guide below is just what you need. You’ll pick up some great advice from an accomplished pro that will enable you to get going this weekend.
And don’t worry that this genre of photography requires traveling to an exotic location. That’s because you can capture great images at a local nature reserve, nearby lake or stream, or even by taking a quick trip to the zoo. And if you use a long lens for photographing your kid’s sporting events, you already have what you need.
Instructor Simon d’Entremont is a notable Canadian wildlife and nature photographer based in Nova Scotia. He covers a lot of ground in this 17-minute introduction to the craft, so you may want to be prepared to jot down a few notes.

Simon explains everything from essential equipment, important camera settings like focus, metering, and exposure modes, to basic field techniques. There’s also a helpful discussion, especially for beginners, regarding where and when you’ll have the best chance of finding appropriate subjects throughout the year—no matter where you live.
The lesson kicks off with gear, and Simon says there’s really only two things you needed to get started: a camera and the aforementioned long lens. While a fast maximum aperture can be a very helpful, any telephoto will do. A tripod is a great accessory when shooting in low light.
Simon says that any interchangeable-lens camera you currently own will likely work just fine, and here’s how he summarizes this portion of the lesson: “In wildlife photography the lens is more important than the camera and will more greatly impact your photos.” in other words, like with other types of photography, a great lens on a cheap camera will yield better photos than a cheap lens on a high-end professional camera body.

The best camera settings and modes for wildlife photography can be vastly different than those used for other genres, especially when photography birds in flight and other subjects in motion. Simon clearly explains the optimum choices to make for different types of wildlife—with frame rates, focusing modes, and shutter speeds of particular concern.
Depth of field must be also be considered so you can accentuate the subject in your scene by separating it from an out-of-focus background. Simon says that one question he receives frequently has to with where, when, and how to find great subjects, and this topic is an important aspect of the video.
The foregoing is just a taste of what you’ll learn by watching this episode, and there are more wildlife tips and tricks on Simon’s instructional YouTube channel. You may also want to revisit a previous tutorial we posted from Simon in which he explains how to choose the best camera settings for shooting wildlife, landscapes, portraits and more.
Sometimes we’re out and about, capture a nice shot, and don’t want to wait until we return home to edit the image on a computer. The solution is simple: load the image into Lightroom Mobile and get the processing done.
Instructor Anthony Morganti is a photo-editing impresario to whom we frequently turn for his expert advice. This episode is a departure because his Photoshop and Lightroom tutorials typically involve getting the job done with the computer versions of these popular image editors.
This lesson is a very helpful quick-start guide to mobile editing, and Morganti demonstrates the basics on his iPad. He notes that what you’ll learn also works on an iPhone—and should translate to Android devices as well. He walks you through a simple edit and covers all the basics.

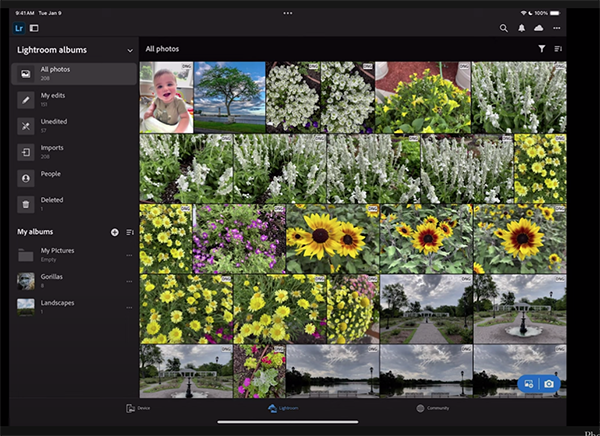
The first thing you have to do when opening Lightroom Mobile is log into your Creative Cloud account. Once you do that the album section of Lightroom Mobile will appear. It resembles the Library Module in Lightroom Classic where all your photos reside. So simply tap on a thumbnail and the image will open in the Edit section.
One thing you’ll notice right away is that Lightroom Mobile has far more capabilities than you likely thought. The Edit panel appears to the right of your image and displays a wide variety of tools. Categories include Light, Color, Effects, Detail, Optics, and Geometry. Further down in the panel you’ll find options for Presets, Cropping, Healing tools, Masking, and Lens Blur.
In other words, the vast array of features that will enable to accomplish much of what you typically accomplish on the computer. Surprised? There’s also a section on the left side of the workspace that includes all your albums. These are pretty much like your Collections in Lightroom Classic.

Now that you understand how to navigate the Lightroom Mobile app, Morganti walks you the step-by step process he uses to edit one of his shots—a photo he pulls out of his Landscape album that needs a bit of work.
Morganti explains why he always begin with cropping and straightening as needed, before moving on other adjustments like color, sharpening, exposure and the like. Whether you’re working with a mobile device or on the computer, the order in which you enhance an image can be important for achieving the best possible results.
So pay close attention as Morganti takes you through the entire editing process, which may not seem too different than what you usually do on the computer. Then head over to his very popular YouTube channel where you’ll find more great image-editing advice.
We also suggest checking out an earlier tutorial we posted with another expert who explains how to unlock the power of complementary colors when editing photographs in Lightroom.
