Deliciously Ella reveals her go-to saucepan set – and it’s one of our favourite affordable brands
It’s not what we would have expected
Sooner or later we all fall into a rut and run out of fresh ideas. This tutorial will definitely get your creative juices flowing again the next time this happens to you, with what one pro calls “a totally underrated landscape photography editing trick.”
If you already own a tilt-shift lens there’s no reason to read further. But these lenses can be exorbitantly expensive and are of limited application to many photographers. In simple terms, these lenses enable you to make camera movements by changing the orientation of the lens—up and down or side-to-side—with respect to the image sensor in the camera.
By doing so you can correct a variety of perspective distortion like converging vertical lines in landscape or architectural images when tall trees or towering buildings are part of the shot. These lenses also make it relatively easy to control depth of field by modifying the plane of focus—thereby controlling the portion of a photo that appears sharp.

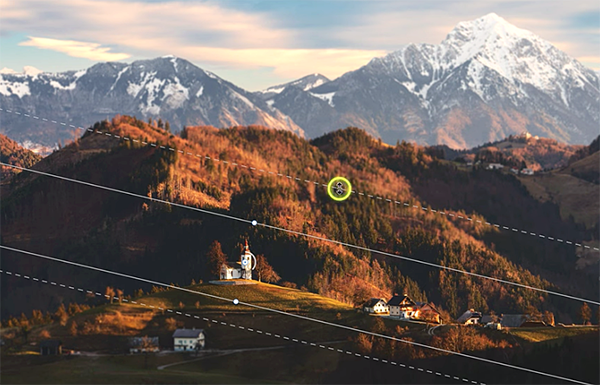
As you’ll see in this tutorial from instructor Brian Matiash, it’s not difficult to mimic these movements during the image-editing process to achieve a very similar and realistic effect. As Matiash explains, this trick “doesn’t work with all types of photos,” but the results are very compelling when it does.
Matiash kicks off the lesson with this important note: “This is one of those tools that can add just the right amount of pizazz to a photo, but only if the composition lends itself to this technique.”
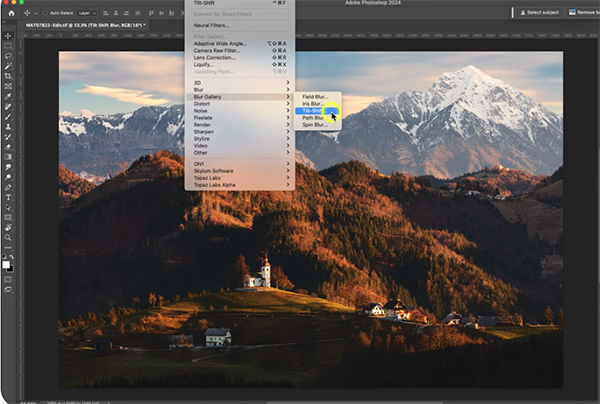
The first step when considering tilt-shift blur in Lightroom or Photoshop is to carefully evaluate the image at hand to make sure it’s a viable candidate for this powerful edit. Matiash demonstrates what to look for by pulling an unedited image he made during a trip to Slovenia. It’s a picturesque landscape with a quaint church atop rolling hills in the foreground, with towering snow-capped peaks looming in the distance.

Matiash explains why this particular photo is a good choice for the tilt-shit effect and what he wants to achieve. Then he walks you through every step of the process for getting the job done to perfection. As you’ll learn, impressive results are very easy to achieve by following his expert advice.
You can see more of Brian’s helpful tips and techniques by visiting his instructional YouTube channel, which is a great source of information for anyone who shoots landscape, travel, and nature photographs.
We also suggest watching an earlier tutorial we posted from another accomplished pro who explains how to create eye-catching image-blur effects when editing your photographs in Lightroom.
Boudoir photography is a unique form of portraiture, with the goal being to accentuate a model’s features in a sensuous manner. And with a bit of help the images you capture will make great gifts for a friend, spouse, or significant others.
Unfortunately, many photographers shy aware from this genre because of the common misconception that complicated artificial lighting techniques are required to achieve beautiful results. As you’ll see is the beginners guide below, nothing could be further from the truth.
Instructor Yuliya Panchenko is a renowned Orlando-based boudoir photographer who regularly posts tutorials for shooters of all skill levels who are interested in giving boudoir a try, and today’s episode is designed for beginners. So take a look, find a model, and you’ll be surprised by what you’re able to accomplish.

The approach demonstrated in this episode involves the art of capturing stunning boudoir images using natural window lighting and nothing more than a simple backdrop. In other words, this behind-the-scenes lesson is perfect for those just starting out.
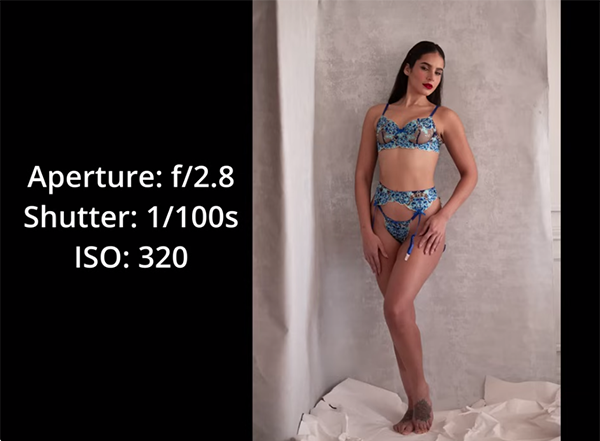
You’ll watch Panchenko photograph the pretty and talented Jennifer Rose, while providing a variety of step-by-step instructions and insider tips for creating flattering, intimate portraits. One of the first steps, especially if your subject is new to modeling, is to create a comfortable environment to minimize nervousness and allay any concerns she may have. And careful guidance and encouragement goes a long way.
You’ll garner valuable advice while watching Panchenko do her thing—everything from composition, camera settings, and helpful directorial tips. Panchenko also demonstrates a variety of sensuous poses that work well for models with different physical attributes.

Panchenko also explains how to set up an appropriate space in your home to use as a “studio.” The window-light techniques she demonstrates will prove valuable for conventional portraits, table-top shoots, macro photography and much more. And the communications skills she imparts have other benefits too.
Once you follow Panchenko’s advice and capture some beautiful image during your first attempt at boudoir, we’re confident that both you and your model will be proud of the results. And your new-found confidence will make future shoots even easier.
When you’re ready to experiment with more advanced skills, pay a visit to Panchenko’s instructional YouTube channel where there’s much more to learn about posing, supplemental lighting techniques, wardrobe selection, and more.
One of the first challenges faced by inexperienced photographers is arriving at a correct exposure, and this can be particularly difficult when shooting outdoor scenes full of bright highlights and deep shadows. This tutorial explains how to take advantage of a simple camera setting that enables you to control the brightness of an image by instantly increasing or decreasing exposure.
Just about every camera has a feature called Exposure (EV) compensation that lets you override exposure adjustments when shooting in one of the camera’s semi-automatic modes. You can even take advantage of this convenient trick when shooting in Program mode if your camera has that capability.
This tutorial from Great Big Photography World demonstrates everything you to know, and the technique is so simple that that it only takes three minutes to explain. Once you understand how it works you’ll rarely have to worry about achieving accurate exposures, and you ‘ll be able to concentrate on other important variables like composition and focus.

While EV compensation enables you to decrease exposure when an image is too bright and take the opposition approach to open up dark photos, this episode is devoted to the later situation. But after watching the video it will be a no-brainer whenever you want to go in the other direction.
The unnamed instructor provides this common example: “At times you’ll have too much light hitting the camera’s sensor from the sky or background, and therefore the main subject of your image will appear too dark.” This is where EV compensation comes into play by letting you modify the exposure settings calculated by the camera.
Simply put, “Dialing in EV Compensation toward the + symbol will lighten your exposure.” Camera’s typically enable you to do this in 1/2 or 1/3-stop increments within a range of plus or minus three our four stops. You can easily experiment to see how this works by going outside and making a few shots of a friend in the foreground with a bright sky overhead.

This technique offers other key benefits not covered in the video like when photographing scenes with a lot of bright snow. Because the camera’s meter is designed to properly expose “average” subjects that have a value of middle gray, that’s how snow will appear in a photo unless you add a stop-and-a-half of EV compensation.
The same holds true in the other direction when there’s an abundances of blacks in an image (like a portrait of a black cat) and you don’t want the subject to appear dirty gray.
There are many more beginner tips on the Great Big Photography World YouTube channel, so make sure you take a look when you have some free time.
We recently posted another straightforward primer with a beginners guide to properly exposing photographs when shooting with your camera’s Manual exposure mode setting. As you’ll see, capturing images in Manual is easier than you think.
