Optimize Landscape Photos with This Oft-Ignored Editing Tactic (VIDEO)
Experienced landscape photo0graphs know that their job isn’t completed in the field, because thoughtful processing is essential for spectacular and realistic results. This task requires using the proper tools in the correct order, but there’s another key consideration that is frequently overlooked.
This eye-opening Lightroom tutorial from the PHLOG Photography YouTube channel harkens back to the days of film, when photographers created a strategic plan before going into the darkroom. According to instructor Christian Mohrle, the same holds true when processing digital files because having a detailed plan before sitting down at the computer is “absolutely vital.”
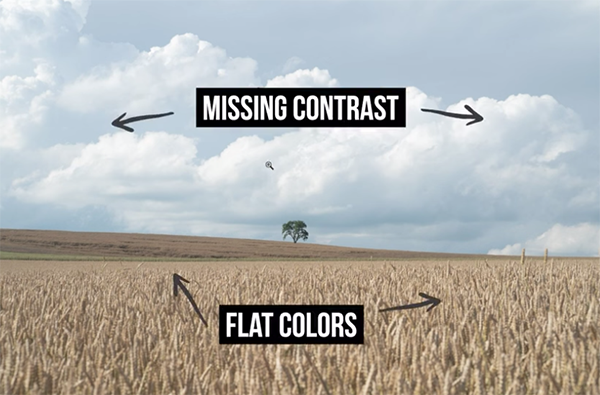
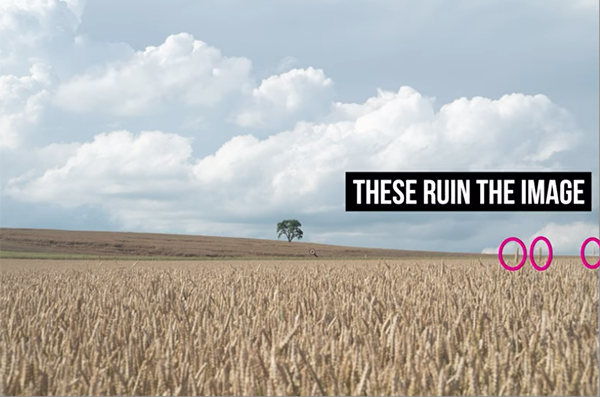
This point is clearly illustrated in the image above in which the notations on the original shot are reminiscent of how darkroom experts marked up their proof sheets before getting to work. And the anticipated adjustments are remarkably similar.

Mohrle’s demonstration image (which you can download with a link beneath the video) is a boring and unimpressive shot with flat colors and insufficient contrast in the sky. Mohrle says he anticipated this result while on location, “but I already knew there were things I could do in Lightroom to make the photo look far more interesting.”
So examine the notations on Mohrle’s original file, then watch how he executes this detailed plan for a remarkable transformation. And if you downloaded his Raw file you can make the changes yourself as the step-by-step process is explained. Every image requires unique enhancements but the takeaway is this: a pre-edit strategy will make post processing faster and far more effective.
Mohrle proceeds with a specific hierarchy of changes, and he always begins with basic adjustments to an image as a whole, before turning to the selective use of masks to refine various portions of a scene in different ways. The next step is thoughtful, localized color grading to further refine the effect.

Careful sharpening comes next, and you’ll see why Mohrle favors a subtle approach. For this particular image he adds the optional step of Focus Stacking to get things just right. Then he concludes the process with a bit of cleanup to remove small distractions and other unwanted artifacts.
A quick glance at the before/after images reveals how well this approach works. There’s much more to learn about editing landscape photos on the PHLOG Photography YouTube channel, and in the recent tutorial we featured with another pro who explains why too much color can ruin your landscape photographs if three essential elements are missing from your post-processing workflow.
Interested in Bird Photography? A Primer to Get You Started (VIDEO)
Photographing our feathered friends is a lot of fun, and it’s a very accessible form of wildlife photography no matter where you live. Today’s tutorial from B&H Photo Video is designed to get you inspired, with a handful of techniques you can start using today.
The great thing about this popular genre is that colorful subjects abound nearby, at a local park, nature reserve, and even in your own backyard. Best yet, you don’t need any specialized gear to capture amazing images—just the five tips you’ll learn in this three-minute episode by the expert known as Trav in the Bush.
Trav is an accomplished bird photographer based on Vancouver Island in beautiful British Columbia. His first tip is something we all consider when shooting in the field; namely, the best time of day for the task at hand. When it comes to birds, it’s pretty simple: Get out there early in the morning.

As Trav says, “birds have been sleeping or resting all night, so in the morning they’re ready to sing and they’re to eat.” And as we all know early birds are also blessed with stunning Golden Hour light.
You’ll also want to become familiar with the behavior and habits of the species you’re likely to encounter, which often changes with the seasons. On Vancouver Island, for example, waterfowl are plentiful in winter, while in summer bald eagles are the name of the game. A solid understanding how different birds eat, fly and behave will significantly increase your odds of success.
Trav’s third tip is straightforward and simple: “Get low and shoot at eye level.” This is a common technique used by experienced wildlife photographs regardless of the animals they capture, and they do so for good reason: “Shooting at eye level really makes the viewer enter the bird’s world, and it creates an overall more pleasing image.”

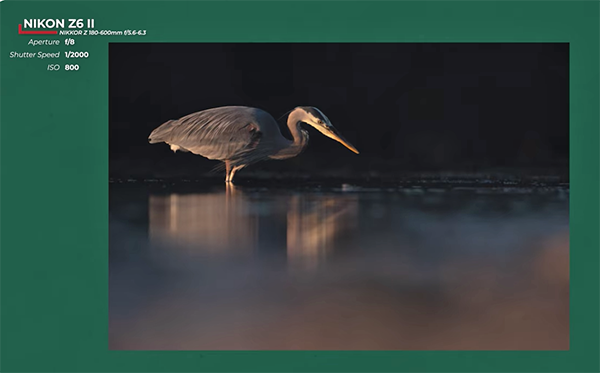
Tip #4 is all about achieving perfect exposures in soft morning light. Here Trav explores key camera settings and the important ways that shutter speed you select impacts your results. Trav notes there are a few exception like big owls and other slow-moving birds, “but for the most part our subjects are small, twitchy, and fast.” That’s why he recommends a shutter speed of 1/2,000 as a starting point.
The lesson concludes with Trav’s favorite tip which is to “pay attention to the background.” Obviously, a cluttered background full of branches and small twigs isn’t pleasing to the eye, and it’s detrimental to separating a subject from surrounding areas within the frame. Fortunately he has some solid advice for doing things right.
If this tutorial strikes your fancy and you want to see more of Trav’s exceptional work, pay a visit to his website.
Our First Online Workshop + 72 Hour Sale Announced!
Advertisement
Subscribe to Our Newsletter
Popular Posts
Pages
- 360 Interactive Virtual Tour Sample
- About the Photographer
- Business Portrait Photography
- Concert Photography
- Event Photography
- Fashion Photography
- Food Photography
- Landscape Photography
- Portrait Photography
- Product Photography
- Real Estate Photography
- Sport Photography
- Still Photography
- Street Photography
- Travel Photography
- Videography


