You know a tool is hyper-useful when you recognize its potential with little or no explanation. Perception depends of frame of reference, and photographers are quick to imagine how certain items mesh with their image-making work habits. Foil windshield visors become ad hoc reflectors, for instance, wooden boxes become props and discarded sunglasses translate into creative filters.
Here’s a trio of photo accessories that you may find indispensable once you comprehend the logic that conceived them.
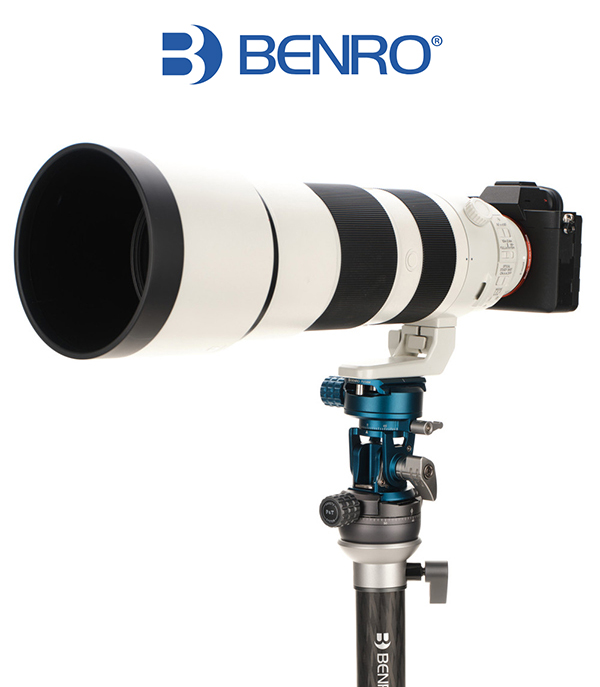
Benro SupaDupa Tilthead
Benro, founded in 1995, is part of the MAC Group, a photo powerhouse that includes such brands as Tenba, Sekonic, Shimoda, x-rite Pantone, Toyo-View, Broncolor, Heliopan, Novoflex and several other names quite familiar to photographers. Perhaps because one of the staples in Benro’s product assortment is a lineup of monopods, they have devised a gizmo that increases the usefulness and functionality of the one-legged family of camera supports. Works great on tripods, too, incidentally.
The Benro SupaDupa Tilthead (dumb name, awesome product) allows photographers and filmmakers to precisely align their capture device in relation to the subject. It enables 90º tilt in one direction, 60º in the other and full 360º smooth panning. It accommodates standard 3/8 or 1/4-20 threaded mounts and includes an Arca-compatible quick release plate.
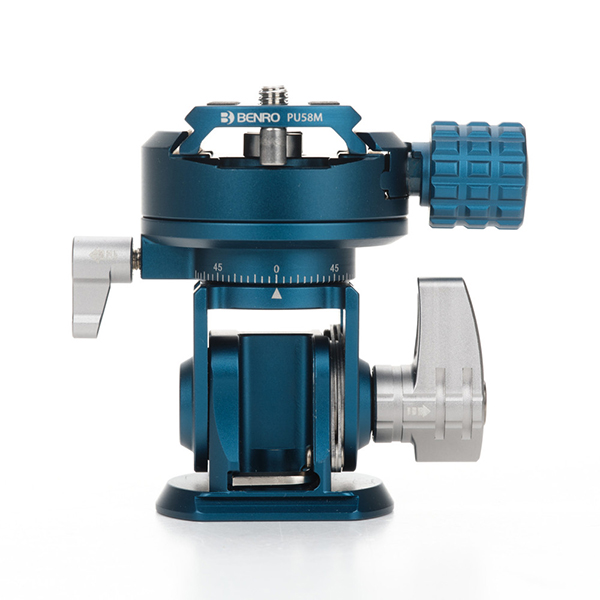
Beefy for sure, it supports equipment weighing up to 17.6 pounds (8kg), so heavy lenses and camera rigs are secure and safe. It also looks great, and weighs just 12.3 ounces (.35kg). I stopped believing in Santa Claus back when Pepsi Cola was still sold in 12-ounce glass bottles, but just to cover all the bases I’m asking the Jolly Old Elf to put a Benro SupaDupa Tilthead in my stocking this year.
Suggested price is $139.95. Here’s a link to find and Authorized Benro Dealer.
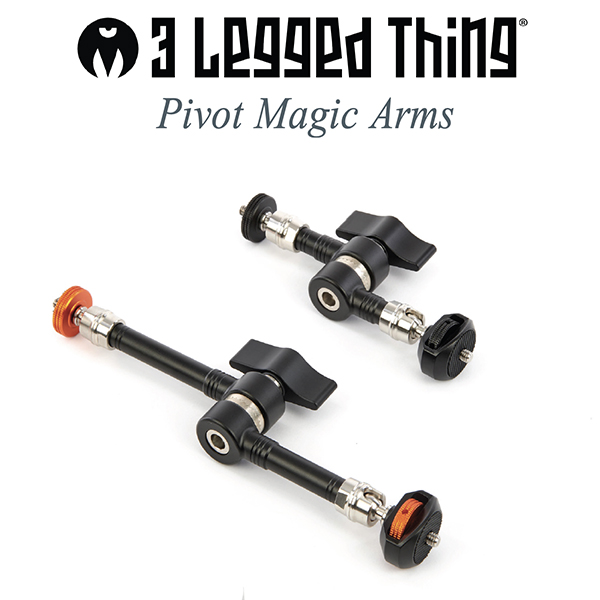
3 Legged Thing Pivot Magic Arms
3 Legged Thing was founded about 15 years ago by Danny Lenihan in Stagsden, Bedfordshire, UK, a town north of London and a bit west of Box End. Their office is in one of the sheds that were once home to 30,000 chickens who produced 25,000 eggs per week whilst consuming 24 tons of chicken feed. True story—I’m not nearly clever enough to make stuff like this up.
3LT is best known for tripods, camera L-brackets, photo bags and a host of tripod accessories. They taught the world that tripods can be colorful and fun, just as long as they’re also brilliantly engineered, extraordinarily well made and realistically priced.
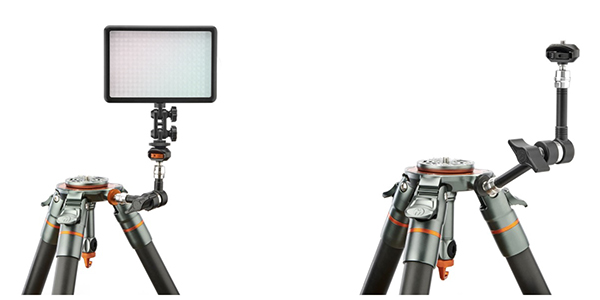
Which brings us to the 3 Legged Thing Pivot Magic Arms. Reminiscent of bionic joint implants, Pivot Magic Arms are designed to hold and attach lights, microphones, compact monitors, action cameras and other accessories to your tripod, L-bracket or mounting plate’s 1/4-20 thread. They’re available in two sizes: 5.9 inch (150mm) and 9.8 inch (250mm). They’re very sturdy; the Pivot 150 ($79.99) supports up to 11 pounds (2kg) and the Pivot 250 ($89.99) up to 6.6 pounds (3kg). Also, they come in two colorways, Lava (orange and black) and Darkness (matte black).
With these articulated marvels you can securely arrange the vital components of your camera set-up with precision and ease. Once constructed, you’re assured that your kit is configured the way you want it without mess or wasted time.
You can order Pivot Magic Arms today directly from 3 Legged Thing or click here to find an Authorized 3LT Dealer near you. Take a look at 3 Legged Thing’s complete line of tripods, L-brackets and other photo accessories, visit their website or check out the Official 3 Legged Thing Store at amazon.com.
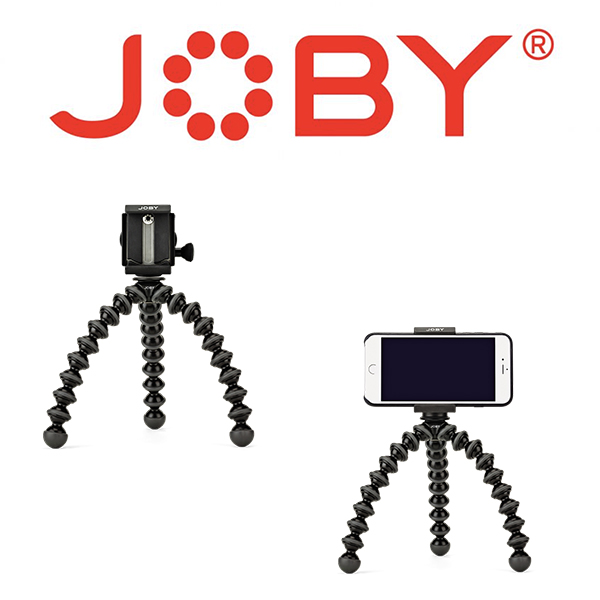
GripTight GorillaPod Stand PRO
GripTight GorillaPod Stand PRO is from Joby, the company globally known for their widely loved (and extensively imitated) assortment of GorillaPod products. Joby is part of the Videndum Group, distributor of some of the most trusted photo accessories around, including Savage (seamless backgrounds), Lowepro, Manfrotto, Gitzo and others.
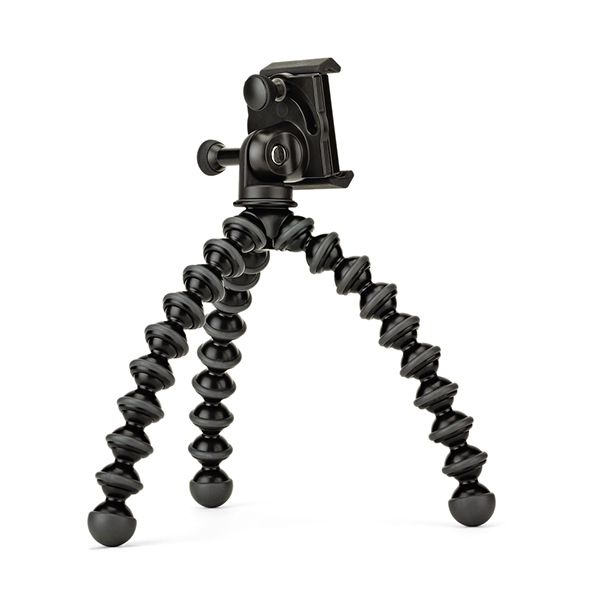
One look tells you that the GripTight GorillaPod Stand PRO is a smartphone holder that can be used as a tripod, or—by wrapping its knobby, octopus-like legs around a pole, fence, roof rack or other support of suitable size—a very sturdy freehand smartphone support. Made from tough ABS plastic, TPE (thermoplastic elastomers) and stainless steel, this baby Gorilla adapts to nearly any situation. Order today from the Joby website; price is $69.95.
While on the Joby website, take a long look at their Outlet section. You may find the accessory you’ve been looking for, like maybe sneakers for your GorillaPod. Really.
If You Enjoyed This Article
Click here to choose from more than 500 reviews, how-to articles, quizzes, attempts at humor and other alleged insight into the world of photography written by yours truly, weekly (weakly?), over the past 10 years.
Become a Member of the Shutterbug Community
Register for a free account. Sign up for our newsletter. Spend five minutes (or less) uploading your best shots once every week or so. Potentially become a Shutterbug Photo of the Day winner. Enjoy viewing the fantastic work being done by thousands of photographers all over the world—and add your images to the enduring collection.
—Jon Sienkiewicz