Home Alone-core is the nostalgic interior trend you’ll want to try – interior experts reveal how to achieve a ’90s Christmas
Merry Christmas, you filthy animals…
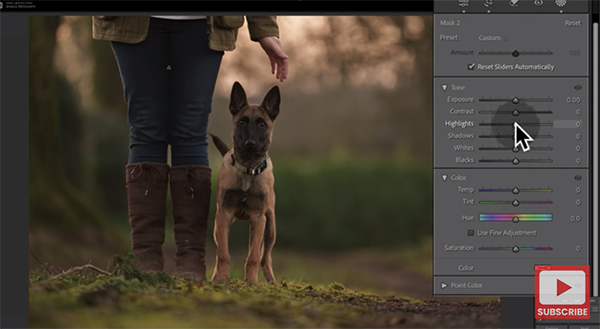
Sometimes the light can be “as flat as a pancake” when shooting outdoors, and this common situation rarely bodes well for capturing impressive imagery. But if you do the best you can it’s possible to transform a boring photo into something more special during post processing as you’ll see in this video tutorial from the folks at That Photography Spot channel.
The topic at hand is a powerful image-editing technique known as Split Toning that works equally well in Photoshop and Lightroom. Our instructor Jess explains the basics like this: “Split Toning is an easy way to create a more eye-catching photograph by drawing attention to your subject while calming down the background and the environment elsewhere within the frame.”
Jess considers this technique “essential” for her environmental dog photography but the same approach works wonders for making all types of dull images more engaging—especially those captured under less-than-ideal light.

The seven-minute lesson begins in Lightroom as Jess demonstrates the simple steps required to get the job done and add this transformational technique to your everyday workflow. Then she illustrates how to achieve the same attention-grabbing results when working with Photoshop instead.
As you’ll see, there’s more than one way to accomplish this task, and the best approach to use often depends upon the characteristics of the specific image at hand. The editing sequence is also important for optimum results, and Jess explains why you should apply split toning before adding other adjustments and finishing touches to a photo.
Jess also recommends a bit of dodging and burning at the very end, before exporting your work. But she says that even if you skip this optional step “you’ll still be miles ahead of where you were at the start.”

There are many more post-processing techniques to learn on the popular That Photography Spot YouTube channel, so be sure to take a look.
And don’t miss the tutorial we featured recently with another image-editing expert who demonstrates how easy it is to unlock Photoshop’s “secret” Knock Out tool for faster more productive post processing.
It’s sort of surprising that more photographers don’t avail themselves of the all-important histogram when shooting and editing their work. One of our favorite landscape shooters puts it like this: “Understanding the histogram is key to mastering exposure and taking control of your photography.”
Instructor Jalen Oban is an accomplished outdoor photographer based in the Pacific Northwest. He’s also a post-processing expert, and today’s helpful primer leverage both of his skills. In barely six minutes you’ll learn how to read, use, understand the histogram. Once you do, the quality of your images you will consistently improve.
You may be surprised to learn that the histogram is equally powerful whether your’e looking at the camera’s rear LCD in the field or processing images on the computer. Oban covers both scenarios in simple terms, and we’re pretty sure you’ll no longer ignore this “essential” tool by the time the lesson concludes.

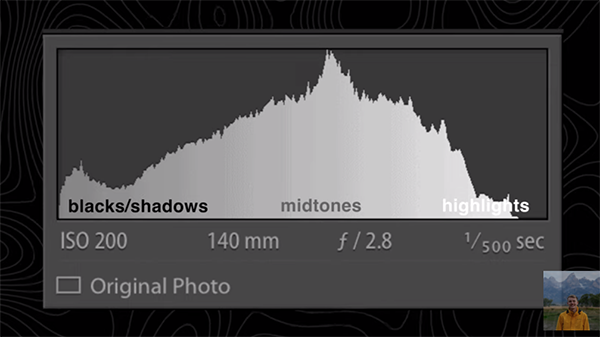
It’s all about learning how to interpret the peaks and valleys of the easy-to-interpret histogram and it doesn’t take long. Oban promises that mastering this tool “will help you achieve balanced exposure, preserve details, and create stunning images every time.” In other words, just about everything we want.
Oban begins with the camera by enabling the histogram option so that it’s readily available on the rear LCD and displays the tonal values of a scene with the current exposure settings in use. In basic terms the histogram is nothing more than a simple graph that instantly reveals if you’ve nailed exposure or need to modify either ISO, aperture or shutter speed,
Best yet, a histogram illustrates the specific direction, either up or down, of any exposure adjustments that need to be made. Oban then turns to Lightroom and explains how to unlock the power of the histogram during the image-editing process. Everything you’ll learn in this portion of the lesson is equally applicable with just about any other editing software you may use.

Oban’s popular YouTube channel is a great source of in-camera and post-processing instructional videos so be sure to pay a visit when you have time to explore.
And don’t miss the related tutorial we featured with an acclaimed outdoor pro who demonstrates what he calls another “foolproof hack” for perfectly exposed in-camera wildlife, nature, and landscape photographs.
