Victoria Beckham is the latest celebrity to try the ‘Naked Christmas Tree’ trend – the understated micro-trend taking over the festive season
This stripped-back look is making waves this Christmas
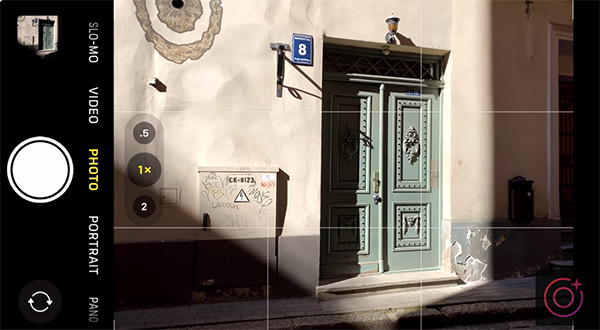
You may be super accomplished when shooting with a camera, but what about when a great opportunity arises and all you have is the iPhone in your pocket? Sure you can grab a few acceptable snapshots, but wouldn’t you rather capture compelling photographs instead?
This challenge occurs for a number of reasons, including a smartphone’s inconvenient form factor and the fact that some camera centric controls aren’t where you expect them to be. This episode from the iPhone Photography School explains several essential exposure tricks and techniques that you should understand today.
Founder Emil Pakarklis kicks off the 19-minute lesson with this: “Getting the exposure just right is crucial for capturing photos with stunning detail. But did you realize that exposure can also be a powerful creative tool to produce truly unique images?” If not, you’re in for a treat.

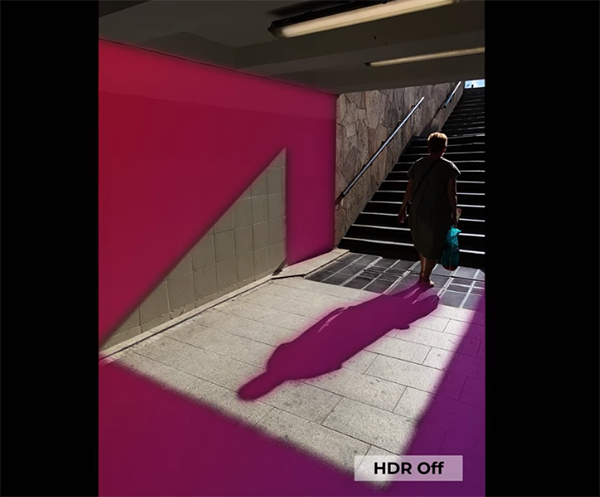
Pakarklis begins by quickly reviewing the concept of “dynamic range,” specifically with regard to mobile photography. One consideration that’s important to keep in mind is that the human eye is far better at “processing” a full range of tones from white to black, than is the mall sensor in a phone—especially when shooting in high-contrast situations. Here he begins by disabling the phone’s HDR setting.
One of Pakarklis’ mobile photography goals is to capture images with unique highlights and shadows, and he demonstrates how to adjust Exposure Compensation on an iPhone to make the most of whatever difficult lighting conditions you may confront.
Skillful composition is essential for all styles of photography, and Pakarklis has some solid tips for dealing with the inconvenient shape of a smartphone when framing up your shots. In this regard he provides helpful advice for experimenting with different shooting angles and vantage points to make images with a unique flair.

Pakarklis discusses several methods for dealing with exposure situations that are particularly challenging—just like you’d do with a mirrorless camera or DSLR. Also on the agenda are the benefits of locking focus and exposure, how to emphasize dramatic shadows, and much more.
Bottom line: Spectacular mobile imagery is well within your reach by following the straightforward advice that Pakarklis provides. By doing so you’ll quickly realize that a modern iPhone is a “real camera” after all. And there’s much more to learn by paying a visit to the popular iPhone Photography School YouTube channel.
Be sure not to miss the tutorial we featured recently with a very accomplished street shooter who reveals three photography mistakes that may be holding you back and how to correct them fast.
When it comes to selections in Lightroom the task of creating “complex” masks doesn’t have to be difficult if you follow the instructions in this tutorial from the PHLOG Photography YouTube channel. And one way to get the job done to perfection is by using what one of our favorite prost-process experts calls a “hidden” Insect” tool.
Instructor Christian Mohrle is a professional landscape photographer based in Germany who specializes in simplifying seemingly complicated post-processing tasks. In today’s 13-minute episode you’ll learn when, why, and how to take advantage of this oft-ignored masking tool. Be sure to download the sample Raw file with a link beneath the video so you can follow along and mimic the simple steps as they’re explained.
The image at hand is an interesting snowy landscape scene with a small lake in the foreground and a looming mountain in the distance. The original shot is nicely composed but the exposure is off and colors are muted and dull. Mohrle’s ultimate goal is to apply local adjustments to different areas within the frame to dramatically boost impact while keeping things looking realistic.

Mohrle begins by merging a five-photo HDR. He does this by right-clicking on one of the images, selecting Photo Merge and choosing the HDR option from a dropdown menu that appear. From there, just follow his simple instructions before making any further enhancements.
Next comes a few global adjustments to prepare the HDR file for the selective enhancements that follow with the Intersect tool. Mohrle expands the Basic panel and changes the profile from Adobe Color to Adobe Landscape which immediately boosts saturation. He also increases overall exposure and opens up shadows to fix the darkest areas within the frame.
Other preliminary adjustments include modifying White Balance to eliminate an unsightly blue cast, introducing more Texture, boosting Clarity for more midtone contrast, and increasing Vibrance.

With the basics out of the way, Mohrle turns his attention to Lightroom’s transformational Insect tool for some amazing masking magic, and he walks you through the step-by-step process. He completes the edit with subtle color grading adjustments and a bit of cautious sharpening. Check out the before/after examples and you’ll be duly impressed.
Mohrle’s instructional YouTube channel is full of helpful lessons for all outdoor photographers, so don’t forget to take a look.
We also recommend watching an earlier tutorial we posted in which another accomplished pro demonstrates how to imbue outdoor photographs with a moody and realistic fog effect by using a straightforward Lightroom technique.
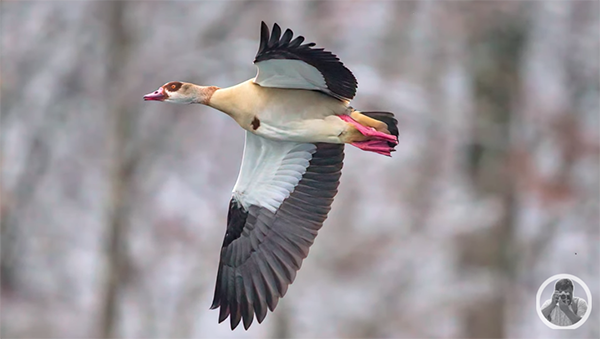
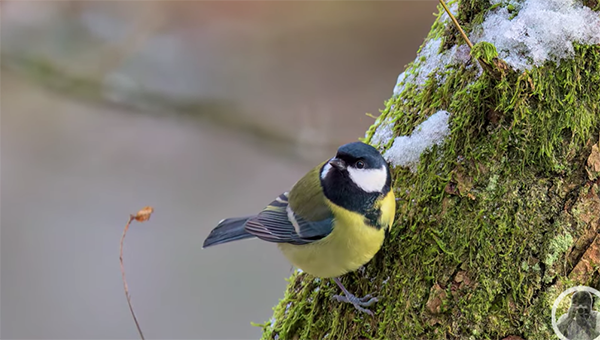
Outdoor photographers love photographing birds because it’s an accessible genre that you can pursue at a nearby park or even in the comfort of your own backyard. The problem is that many shooters set aside this passion in winter, even though there are many breathtaking opportunities to be found.
This video from one of our favorite instructors represents a complete to mastering winter bird photography for shooters of all skill levels during cold, harsh conditions, and most of what you’ll learn easily translates to other forms of wildlife imagery. Mario Kilian is an acclaimed German nature photographer and he provides little-known tips and techniques that will enable you to easily shoot stunning photos of our feathered friends.
Snow, frost, and freezing temperatures may test your endurance, but this 16-minute primer includes everything you need to know, from composition techniques and gear recommendations to suggestions for keeping your equipment safe from the from snow, sleet and moisture.

Appropriate camera settings during winter differ from those you use at other times of year, and Kilian provides a very helpful overview for getting things right. Personal comfort strategies are also worthy of consideration because it’s difficult to capture incredible photos when you’re uncomfortable in the field.
Kilian demonstrates how to elevate your skills by taking advantage of winter’s unique lighting and weather conditions. You’ll also learn several advanced techniques, like harnessing the power of reflective surfaces such as ice-covered elements and frozen puddles, lakes, or ponds.
The eye-opening lesson includes a discussion of adjusting White Balance to achieve perfect snowy contrast, while leveraging animal behavior during rain or snow to capture rare and dynamic moments of stationary birds as well as those in flight.

So dress up warm, get out there, and turn winter bird photography challenges into amazing photo opportunities. One you’re done take a look at Kilian’s popular YouTube channel that includes many more instructional videos for nature and wildlife shooters.
And on a related topic, don’t miss the earlier tutorial we featured with accomplished landscape photographer who demonstrates how to capture snow-covered scenes in the camera with perfect exposures and balanced colors throughout the frame.
