
Time Blending: When, Why & How to Use it to Create Perfect Outdoor Photos (VIDEO)
Time blending is one of the most powerful post-processing techniques for making sense out of complicated landscape scenes with a wide range brightness values throughout the frame. Today’s instructor Austin James Jackson explains the concept like this: “Capturing stunning wide-angle scenes can be easy when you’re willing to do a time blend,” and this is what you’ll learn how to do in the next 15 minutes.
Jackson is a notable Utah-based landscape pro who posts weekly how-to videos covering practical in-the-field techniques, gear reviews, and image-editing tutorials. Today’s 15-minute episode falls into the latter category, and Jackson’s interesting method really delivers the goods—no matter the level of your post-processing skills.
The straightforward technique involves taking multiple exposures of the same subject and blending them together to achieve a single image with spot-on exposure and perfectly balanced tones. There’s also a link in the description beneath the video for downloading Jackson’s most popular tutorial, “10 Photo Tips in 10 Minutes.”
Jackson explains why he prefers not to shoot the required three or four shots in rapid succession: “We often want to capture the light on the landscape and great clouds in the sky, but these things usually happen 10-15 minutes apart.”
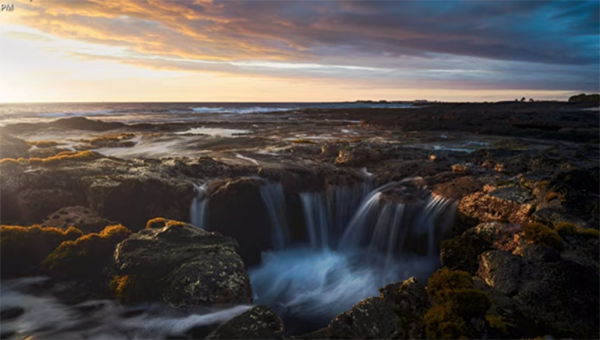
A sunset scene is a great example, and Jackson’s strategic approach is to make an initial photo when the last light hits the scene. Then he leaves the camera on the tripod in the same spot and captures a second photo 15 minutes later when the clouds are absolutely fantastic. In essence, this simple two-shot blend combines the best of both worlds.
Jackson’s demonstration image is a seaside scene, so he also strives to capture a peak moment when waves are at their most dramatic. He has some very helpful tips for getting things as good as possible in the camera, with composition tips, appropriate camera settings, and other simple techniques.

The real meat of the tutorial comes next as Jackson walks you through the post-processing procedure for creating a precise, seamless blend. His approach is unique because it begins with a quick setup in Lightroom Classic, and then concludes with time blending in Photoshop.
Jackson’s popular YouTube channel is a great source of shooting and image-editing tips and techniques for everyone who ventures into the field, so pay a visit when you have time to explore.
We also recommend watching the tutorial we featured last week with another Adobe expert who demonstrates four amazing post-processing tricks for creating spectacular nature and landscape photographs that jump off the screen.


