Wildlife experts issue warning to gardeners if they find a baby bird in their garden this summer
They’re more resilient than you think

Are you ready to expand your mobile photography skills by learning how to shoot eye-popping spots/action photos with an iPhone? This comprehensive tutorial from the iPhone Photography School explains everything you need to understand for capturing the moment with precision and ease.
The behind-the-scenes episode at Latvia’s Dzintari Beach features instructor Emil Parkarklis whose motto is that “you don’t need an expensive camera or heavy gear to capture jaw-dropping photographs.” The topic of the day is the iPhone’s game-changing Burst mode and you’ll learn how to use it to avoid missed opportunities and blurry shots.
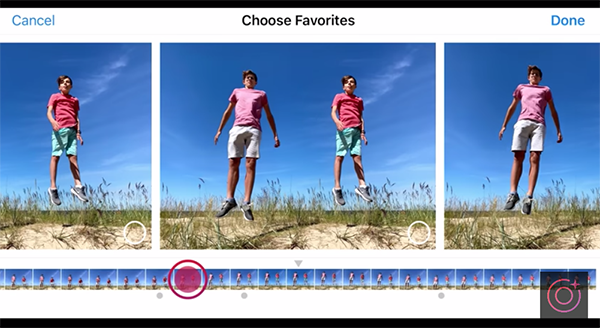
There’s plenty to digest in the 19-minute video, so prepared to take a few notes. Emil explains various ways to shoot fast-moving subjects, whether they’re birds in flight, pets, athletes, speeding cars, or “just real life as it happens.” You’ll see how to determine the best shot from a sequence, along with Emil’s recommended method for deleting the rest and keeping your gallery organized and clean.
As Emil says, “understanding the iPhone’s Burst mode provides you with maximum control for freezing the peak moment of action every time. The best way to learn this technique is to grab your phone and follow along as he explains how to configure the phone appropriately and combine these essential settings with a variety of straightforward shooting variables like focus, composition, and exposure.

Emil’s culling and organizational tips are also well worth watching and emulating. Once the lesson concludes it’s time to explore Emil’s instructional YouTube channel and learn everything your iPhone camera is capable of doing.
And don’t miss the earlier beginners guide we featured that provides a detailed overview of the best camera metering mode to choose for various conditions and situations.
It doesn’t matter whether you’re a casual family/pet/food/travel snapper, a passionate enthusiast, or a working professional:
Taking photos is fun, exciting, and deeply rewarding.
Keeping those photos organized and accessible, however, is not. In my view, photo organization takes up too much time, and it’s often infuriatingly hard—especially if you’ve struggled to maintain a consistent photo-management workflow and are now dealing with thousands of un-reviewed files from months or years ago.
(Yes, I’m speaking from experience!)
It’s a huge problem, because if your photos aren’t carefully organized, then you’re going to waste a ton of time searching for specific files. You also won’t fully appreciate (and learn from) the images that you’ve already taken, since they’ll never receive your full attention. And you may even find yourself feeling less motivated to take new photos; after all, if your images are only ever destined for some untouched folder in a shadowy corner of your hard drive, what’s the point in adding to the pile?
But here’s the good news:
Over the last few years, software companies have started incorporating AI tools into their image-management programs—AI tools that make it so much easier to organize and catalog photos, search for photos, and even cull photos more efficiently.
Below, I share the five best AI photo-management features that I use in my own workflow. I explain how they’ve helped me get organized over the last few years, and I discuss reasons you might want to consider investing in an AI image-management program.
Throughout the article, I reference Excire Foto 2025; it’s the AI-powered photo manager that I use most regularly, and I’ve yet to find a more capable alternative.
However, if you like the idea of AI image-management tools but you aren’t quite sure which program is right for you, I’ve created a rundown of the best photo managers, which offers a comprehensive comparison of the image-management field (both AI-powered and manual).
So with that out of the way, let’s dive right in!

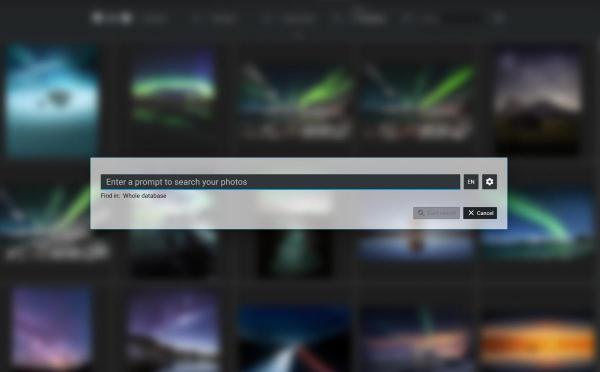
This feature has been given various labels—”Prompt-search AI,” “Find by text prompt,” “natural-language search,” “free-text search,” to name just a few—and it is the single best photo-organization tool I’ve ever used. (Yes, really.)
Prompt search has saved me hundreds of hours over the last couple of years. It’s designed to help you find specific photos, no matter where they’re hidden on your computer. To do this, prompt-search tools rely on AI image-recognition models, which analyze the contents of the thousands (or even millions) of images on your computer, and then return particular images in response to the relevant prompts.
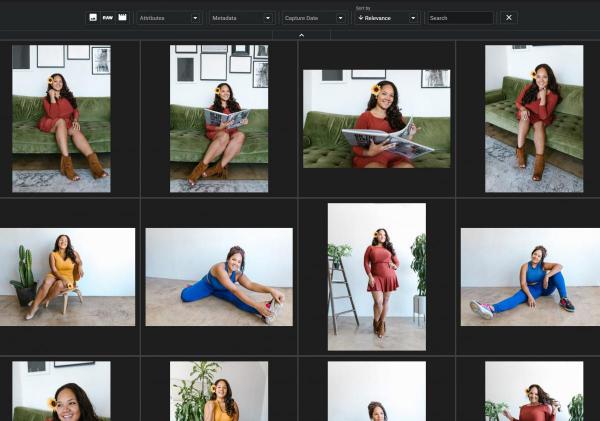
This might sound complicated, but in Excire Foto 2025, it’s exceedingly simple to use. If you want to find an image of a dog playing in a field, you type a free-text description into the field, such as “puppy in the grass,” hit the Search button, and then watch as the corresponding images appear:
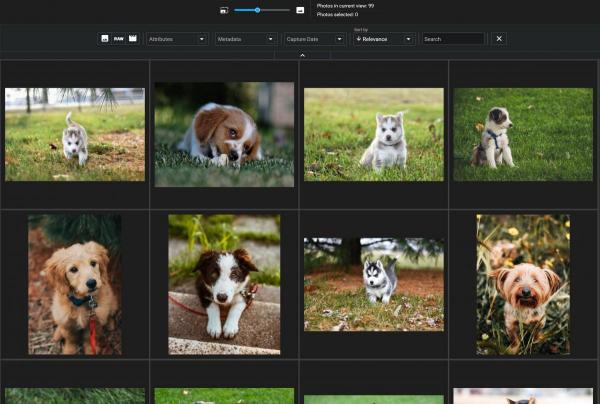
Excire’s prompt search is astonishingly accurate, and I regularly use it to find images that I can’t locate but that I know exist somewhere in my catalog. Here are a few prompts that work really well with Excire’s free-text search (provided that you have the corresponding type of images in your catalog):
Prompt search is also a great way to find images based on a theme, using searches such as:
Basically, if you’ve ever found yourself scrolling through your image archives or just opening folders at random in search of specific files, prompt search is an AI-powered tool you should definitely try. It’s available in Excire Foto 2025, and if you’re a Lightroom Classic user, you can also access it via Excire Search 2024 (a Lightroom plugin that integrates nicely into the standard LrC interface).
AI keywording features have been popping up in a number of different programs, and it’s easy to see why: Descriptive keywording is one of those crucial workflow tasks that we all know we should do, but that we often still skip entirely.
I’ve tried to do regular keywording in the past, but I’ve never managed to stick with it. Applying multiple keywords to every photo is time-consuming, not to mention exhausting. Maybe my dislike of keywording is unusually strong, but after half an hour of applying tags to my files, I often just want to bang my head against the wall and admit defeat.
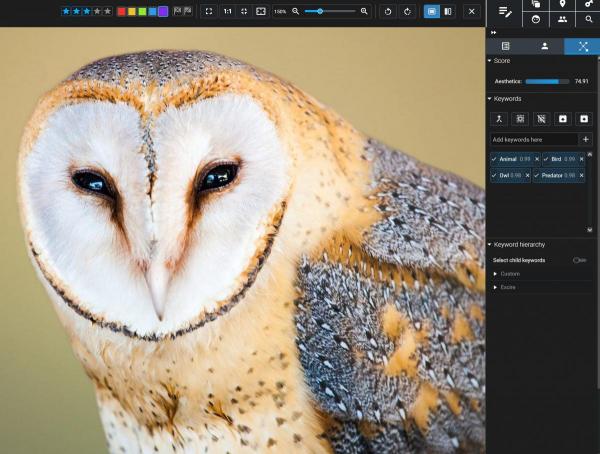
Smart keywording changed all that for me. Now when I take new photos, I let Excire’s AI handle all the tagging. It analyzes my images and adds a variety of descriptive keywords, and while some are more useful than others, they’re usually specific enough to allow for basic-to-mid-level photo categorization.
Before Excire introduced prompt search (see above!), I used AI keywording to make my images searchable.

That’s less of a concern for me at the moment, since Excire’s prompt-search tool is so good at finding images without any keywording. But I do still like to ensure that my images are effectively keyworded; for one, I can tell Excire to save its AI-generated keywords alongside (or embedded in) my files, and those keywords can be accessed by other programs.
I also like to keep my images keyworded because, in the rare cases that prompt search fails me, keyword search offers an alternative method for sifting through my images. And since Excire allows for layered searches, it can be useful to start with a keyword search, then apply a prompt search to further refine the results.
If you photograph people even semi-regularly—family members, friends, portrait clients, or event guests—then you’ve probably run into the same issue I have:
You want to find a specific photo of a specific person, fast. And you have no idea where it’s buried in your image collection.
Now, Excire’s prompt-search AI can help with this. If I’m looking for an image of my mother-in-law on a beach in Wales, I can type in “Woman in a dress on the beach at sunset,” and I’d get a good result.
But I’ll start to run into issues if I only remember vague details of the photo I’m after, or if I take a lot of portrait photos in similar circumstances. (For instance, if I often did portrait sessions at the beach around sunset, my example prompt wouldn’t be especially helpful.)
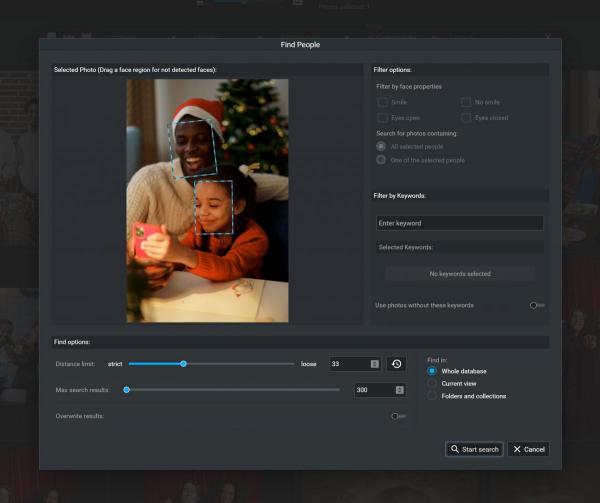
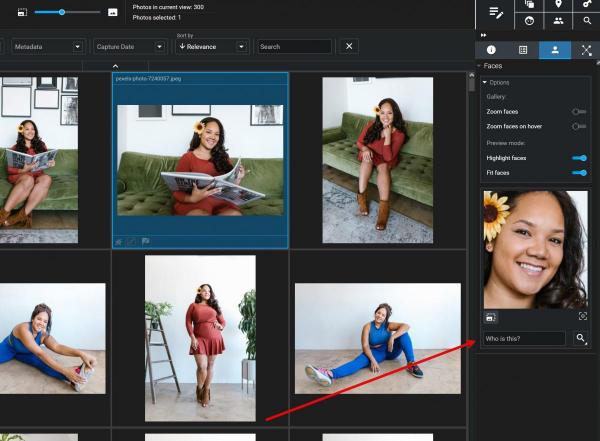
That’s where face recognition comes to the rescue. The implementation varies depending on the software you choose, but in Excire Foto 2025, it works like this:
You select a reference image that contains the person that you’re looking for.
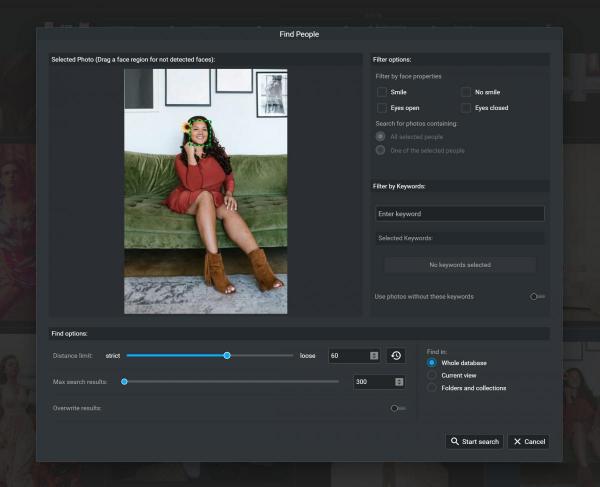
The program returns all other images in your library (or a specific folder or collection) that contain the same person.
Finally, you can apply a name tag to those photos; they’ll be automatically added to a People collection for easy access in the future.
That way, the next time you’re looking for an image of a particular client, friend, or family member, you can grab the relevant shot in just a couple of clicks.
Plus, like Excire’s other search tools, face recognition integrates beautifully with the other search features. So you can use a reference image for a People search, then narrow down the results using a detailed prompt search, and so on.
If you’re anything like me, your hard drive (or hard drives, plural) probably contains more duplicate photos than you’d care to admit.
Maybe you imported the same memory card twice. Maybe you exported multiple JPEG versions of the same RAW file. Or maybe you backed up your folders a few too many times, and now you’re stuck with triplicates across half a dozen locations. (That last one is responsible for an absolute mess on my old external drives…)
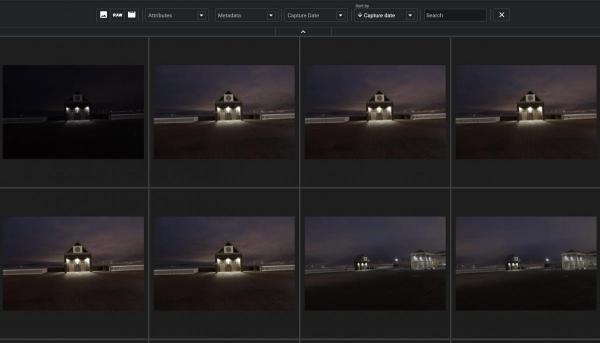
Here, AI-powered duplicate search is a lifesaver. Excire Foto 2025 offers a fast, highly configurable search tool that scans your photos and identifies duplicate or near-duplicate files for review.
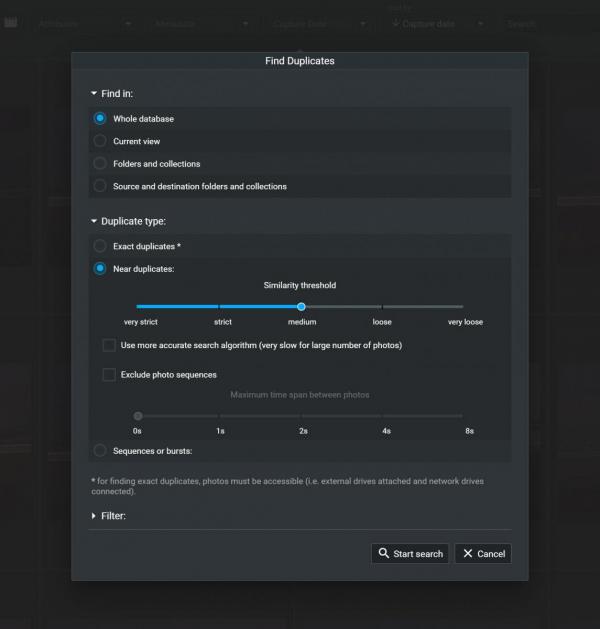
What makes this feature especially valuable is its flexibility. You can choose exactly how strict you want the matching criteria to be—and you can tell the software which folders to compare, too.
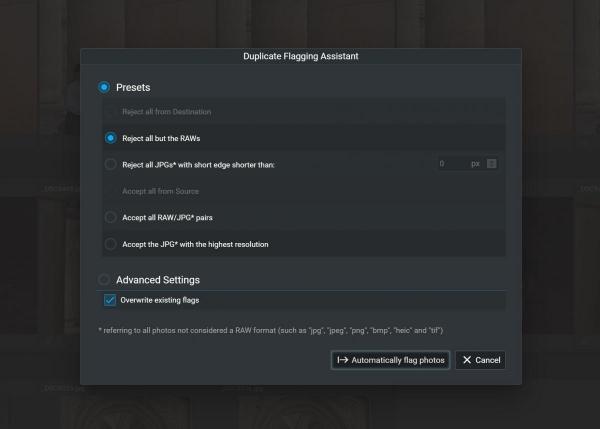
Once the duplicates are identified, Excire also offers a handy flagging assistant so you can quickly choose which files to reject and which to keep around:
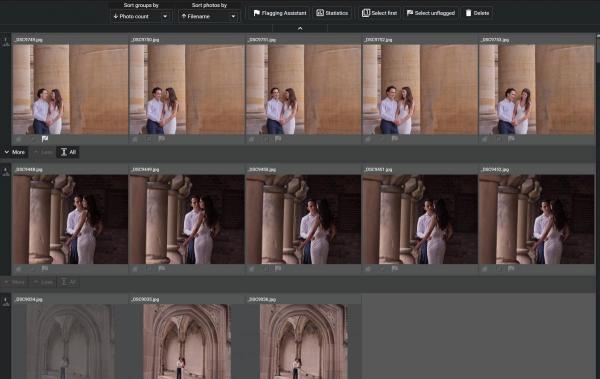
And you can also review images side by side and make manual determinations:
In my own workflow, duplicate detection has saved me hundreds of gigabytes of storage space—not to mention the sheer mental relief of knowing that my archives aren’t clogged with unnecessary copies of the same files.
So far, I’ve discussed AI photo-management features that help with image search and organization.
But culling—the process of selecting a few “keeper” images from the rest—is also a major time suck. If you’re a professional, then you probably spend several hours every week simply reviewing and selecting photos prior to editing and/or sharing with clients.
And if you’re an enthusiast, while you may not be forced to cull as intensely or as regularly, photo selection is still an important part of the image-management workflow.
(Of course, failing to go through a few batches of images isn’t a huge problem for most passionate photographers. But once you’re faced with 5,000 or 10,000 or 100,000 files, all of which require manual review, it’s tough to motivate yourself to move forward.)
I’m happy to report that AI culling tools are improving all the time—and while no software is perfect, I’m extremely pleased with the culling module in Excire Foto 2025, which offers an array of photo-selection tools that can be configured to fit your existing culling workflow.
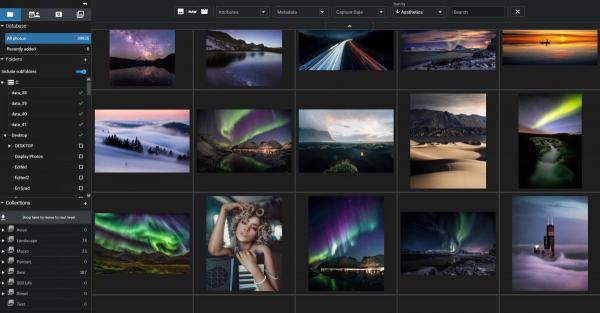
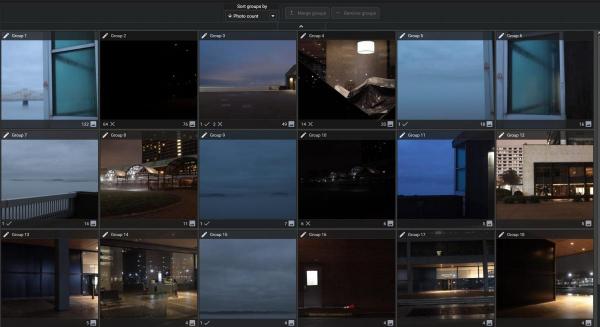
Basically, Excire’s AI analyzes a batch of your images and automatically groups the shots based on a variety of characteristics: The people they contain, their visual similarity, their image content, and so on.
For me, this AI grouping is often all I need. If I’ve photographed various street scenes in New York City, I don’t spend time going through each shot individually. I’ll simply run an Excire culling project, then browse through the visually similar groupings and pick my favorites.
(Quick tip: When you add a Pick flag to an image in a culling project, the photo automatically appears in the “Selection” bin on the left-hand side!)
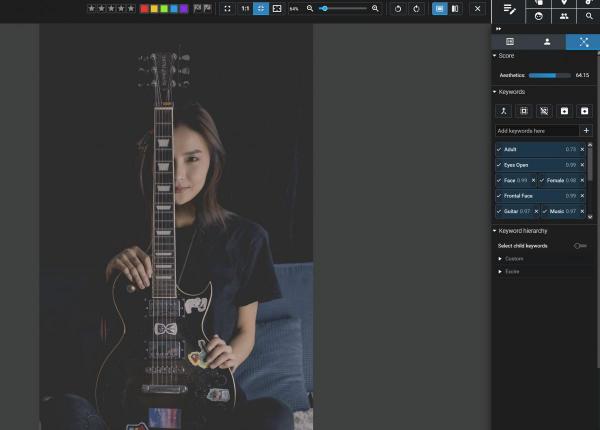
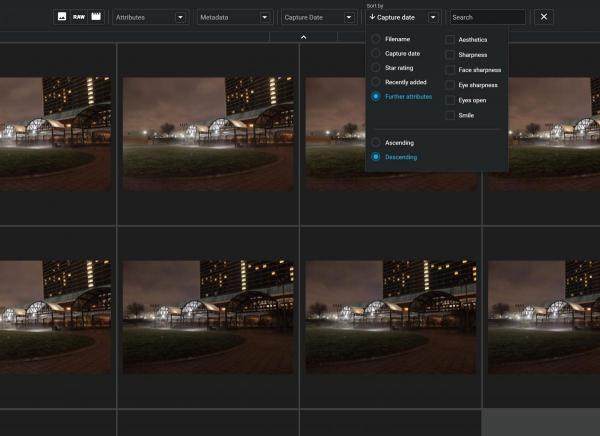
If you require more in-depth AI-powered culling, Excire offers that, too. You can sort images based on aesthetics, overall sharpness, face sharpness, eye sharpness, and more:
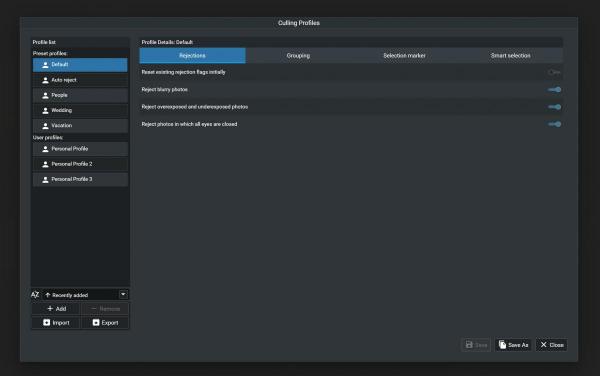
And you can even create custom culling profiles that tell the AI to automatically select and reject images based on blur, exposure, and facial expression (such as whether your subject is smiling or has open eyes):
When I recommend AI culling tools to other photographers, I get mixed reactions. Some are reluctant to let an AI handle aesthetic decisions, which I definitely understand. But that’s one of the great things about Excire’s culling tools: You can give the AI as much or as little control as you like. You can let the AI select images for you—but you can also instruct the AI to do its grouping while you handle the rest of the process yourself.
Ultimately, it depends on your workflow and your level of comfort. My suggestion is to simply give it a try and see what you think. (Excire does offer a 14-day free trial, which you can download here; just note that AI culling is currently only offered in the standalone Excire Foto 2025, and not in Excire Search 2024, the Lightroom Classic plugin.)
AI applications in photography is a hot topic, but most of the focus is placed on image generation and AI-powered photo editing. AI-powered photo management is often ignored, and I think that’s a mistake.
Sure, AI photo-management tools might not be as eye-catching as an application that can generate a pixel-perfect photo from scratch. But it’s features like prompt-search AI, AI-assisted culling, and duplicate search that have made the biggest difference to my workflow over the last few years.
Since I started using Excire, photo management has become dramatically faster and more enjoyable. I skip keywording entirely. I can completely avoid digging through folders. I don’t worry about reviewing hundreds of similar shots. And I spend way more time doing what I actually care about: making photos!
If you’ve been struggling with photo-organization bottlenecks—or if you’re just curious to see how much AI can streamline your workflow—I highly recommend giving AI photo-management software a chance. You can download a free trial on the Excire website (for both the standalone version and the Lightroom Classic plugin). And since Excire’s software works locally, you don’t have to worry about data security issues.
Test it out and see what you think. You might be surprised by just how much time (and frustration) you save!
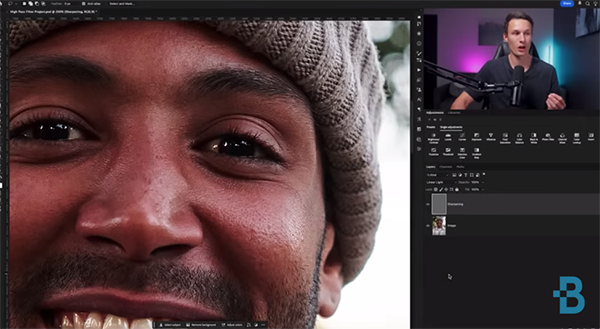
The video below from instructor Brendan Williams begins with a quote that will stop you in your tracks: “Throw everything you know about sharpening out the window because there’s only one sharpening tool in Photoshop you need for pro results, but it’s hidden in an unlikely place.”
The topic of conversation is Photoshop’s oft ignored High Pass filter and this tool id sort of hidden because it’s neither under Sharpening nor within the Camera Raw filters. Instead, it’s found by clicking the Filter tab top the screen, choosing Other from the first dropdown menu you see, and selecting High Pass from the second dropdown that appears next.
Williams says you can apply this filter directly on you image and it typically works really well. He adds that, “If you ever find that the results display a little bit of a color change, then you’ll want to first click on the image layer, use his keyboard shortcut to make a duplicate, and desaturate the image in the way he explains.
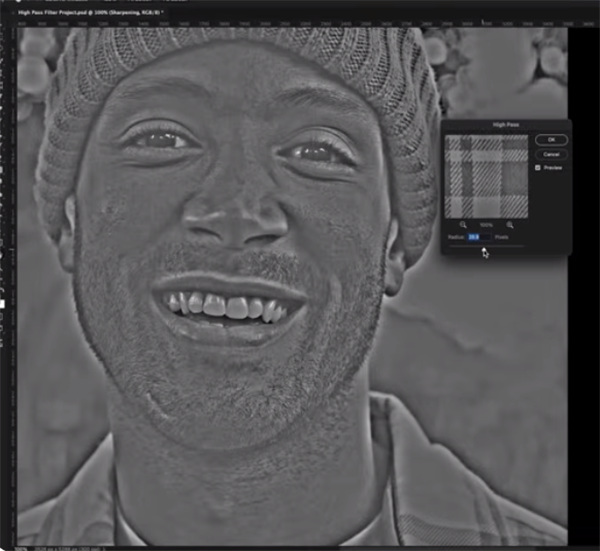
This second layer is where you’ll apply the easy-to-use Unsharp Mask effect. Williams explains what going on under the hood because you’ll be presented with a plain gray window and wonder how this can possibly help you to sharpen the original shot.
The secret it this: “Sharpening, at the most basic level, is nothing more than edge contrast because every edge in an image has a light and dark side.” The High Pass filter works by accentuating these opposing light and dark areas.
This is where your plain gray layer becomes very useful. This is because as you increase the Radius of the filter you get more and more of your subject pops through the gray. The trick is taking a very subtle approach by carefully moving the Amount slider until details just begin to appear. Going any further is likely to result in an overcooked mess.
There are a few other important considerations for maintaining a realistic look, and Williams demonstrates how to avoid any image-killing mistakes. Be sure to add this transformative technique to your everyday Photoshop workflow. Then head over to the Brendan Williams YouTube channel that has over 18 million views.
We also recommend watching the tutorial we posted easier from another post-processing expert who demonstrates how to repair outdoor photographs with uneven, blotchy, polarized skies in both Lightroom and Photoshop.


