Argos has slashed the price of its 5-star rated rattan garden furniture sofa set to £160 – act fast before it sells out
You won’t want to miss this deal

This is another of our “fix-it-don’t trash-it” post-processing tutorials than can quickly turn an unimpressive outdoor photograph into a spell-binding image that really grabs attention. In the video below you’ll learn how to introduce natural-looking light to photos that don’t quite make the grade.
Instructor Nicholas Warner is a globe-trotting landscape and travel photographer whose popular YouTube channel has almost 7K subscribers who appreciate his insight on a wide variety of Lightroom and Photoshop techniques that are appropriate for beginners and experienced users alike.

He kicks off today’s eye-opening episode like this: “The simple trick of changing the color of your dodge layer makes a massive difference when creating believable light in a photo. You’ll learn how to brush realistic direct light into your photographs.” And it all happens in barely eight minutes.
The demonstration image was captured in the Mohave Desert during one of Warner’s tours, and he begins by explaining his mindset for getting the shot prepared in Lightroom with simple masks before opening Photoshop to strategically apply a creative lighting effect.
As you’ll see, he uses a mask entering the frame from the right, another inverted mask in the middle that creates a “pseudo vignette,” a third for darkening the cactus in the foreground, another to selectively cool down color temperature, and three others for purposes he explains.
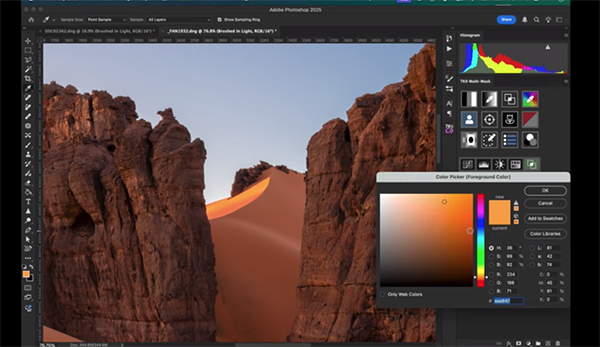
Overall, these masks are intended to “direct a viewer’s eye through the frame and harmonize the various colors.” With all the prep work completed Warner opens Photoshop and demonstrates his transformational process for giving Mother Nature a big boost, and he’s careful to note that this method doesn’t involve dodging, but rather creating direct light exactly where it’s needed.
Once you’re done watching head over to Warner’s YouTube channel for more Lightroom and Photoshop tips and techniques.
And don’t miss the tutorial we featured with another image-editing specialist who demonstrates how to achieve amazing results when using Photoshop’s new AI-powered upscaling tool to enlarge photographs by up to 400% while recovering lost details and improving sharpness.


