Canadian photographer Davey Gravy has completed an exhaustive review of hundreds of mobile apps for capturing both stills and videos. He first narrowed down the choices to 50, and today he presents what he says are the top six of the bunch.
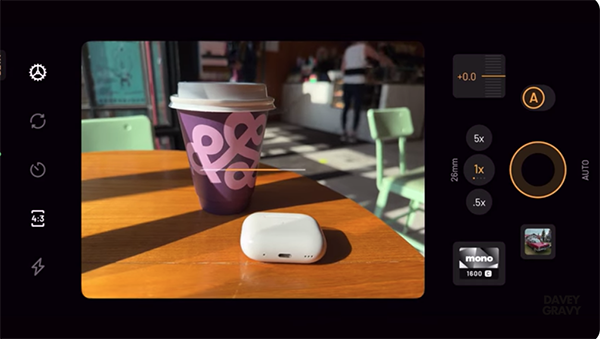
The first pick on Davey’s list is Moods and he says that what first stuck out to him is the superior design of the app. He goes on to explain that the photos you take with Moods look like they were captured with a film camera, thanks to all kinds of film simulations that can easily be customized however you like.
As he says, “think of it as the whole Fuji X100 recipe thing meets the iPhone.” Moods also has a clean and straightforward shooting interface with focal length choices for precise framing. It also offers ways to mimic the 35mm experience, including an option to turn off “chimping.”
Another favorite app is Lampa that prides itself on keeping things simple and realistic. Hence, the images you capture won’t appear over-processed or over-sharpened—”they’re going to look as natural as possible when shooting with an iPhone.” There are only a few filters available, including those for b&w and basic film emulation. Be sure to check out the monochromatic “Graphite” option that Davey find so compelling.
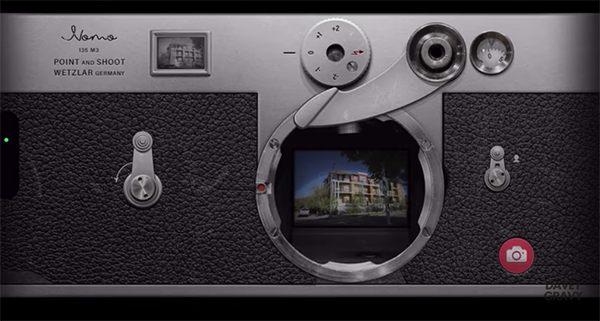
Nomo Cam is the app Davey uses most often, even more frequently than the stock camera app for his iPhone. He say he’s attracted by the broad assortment of cameras Nomo Cam provides and the precise way it processes his photos. He been using the app for years and appreciates how often it’s updated.
At this point there are three top picks remaining in Davey’s presentation of favorite mobile photography apps, and you’re guaranteed to find one that’s perfect for you, the type of images you shoot most, and your level of skills. Happy hunting! You can find links to all the apps discussed in the description beneath the video.
On a related note, be sure not to miss the recent tutorial we posted from another expert instructor who demonstrates how your smartphone photographs are impacted by the critical difference between optical and digital zoom settings. The same holds true when shooting with a “real” camera.
If you’re new to post-processing and shy away from employing adjustment layers you’re in for a big surprise. That’s because these transformational tools are much easier to apply than you think. We’ll bring youup to speed in the next four minutes and your workflow will instantly improve.
Instructor Isaac is a Serbian expert at all things Adobe whose new YouTube channel is devoted to fast-and-efficient editing techniques for beginners. He promises that today’s basic primer will teach you everything you need to know about adjustment layers in Adobe Photoshop so you can significantly improve the enhancements you make.
Isaac explains the concept and benefits like this: “adjustment layers are non-destructive edits that sit above your layers and apply effects without changing the original image. And you can turn them off or tweak them at any time.”
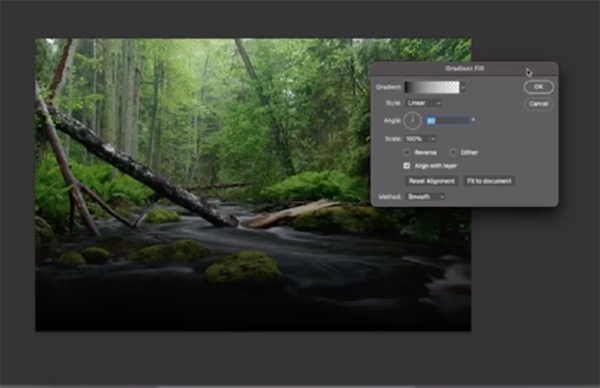
The process begins by clicking an icon in the panel on the right side of the Photoshop workspace. This brings up a dropdown with a list of the various options available. These include Solid Color, which is very useful for backgrounds, Gradient which fills the layer with a smooth color blend, Pattern for repeating textures, and others.
Isaac walks you through all of the possibilities, explains what they’re intended to accomplish, and provides practical recommendations for when and how to put them to work. You’ll see how they balance exposure, improve vibrance and saturation, add a “photo filter,” and create a wide variety of realistic or surreal effects.
Once you understand how easy adjustment layers are to use, you can employ them to refine all sorts of images from landscapes, portraits, nature photos, and just about any other genre that you enjoy. Once you’re done watching head over to the Edited by Isaac YouTube channel for more quick explainers on popular topics.
And don’t miss the tutorial we featured earlier with a British image-editing expert who demonstrates the amazing photographs you can create by using Photoshop’s new AI-powered Upscaler to make sharp, clean enlargements.