Lightroom Basics: How to Dodge & Burn Photos for Optimum Balance (VIDEO)
Earlier today we posted a tutorial with a foolproof in-camera method for shooting photos with perfect exposure. But what if you want to improve photos you shot in the past that don’t quite hit the mark? The lesson below from the FJR YouTube channel demonstrates how easy this is to do with Lightroom’s powerful Dodge and Burn tools.
This straightforward technique enables you to selectively darken or brighten different areas within an image for balanced tones through the frame. In short, you can open up crushed shadows or retrieve details in overly bright highlights. Instructor Francisco Hernandez explains how to get the job done in barely 11 minutes.
By downloading the demonstration image via a link beneath the video you can follow along, make the adjustments yourself, and then use this simple method to rehabilitate improperly exposed images whether they’re portraits, landscapes, or just about any other photos that need work.

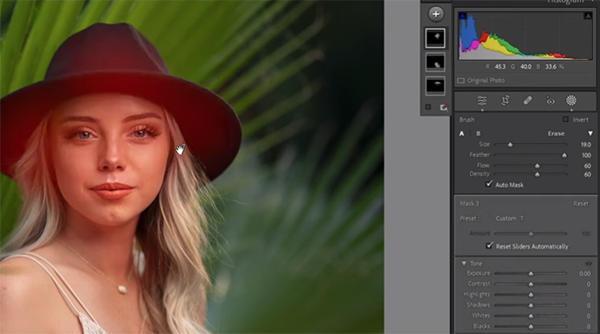
Hernandez pulls up his photo of pretty model Sarah, opens Lightroom’s Develop module, makes a few basic color enhancements, and then explains the Dodge and Burn techniques that dramatically improve the shot.
The Dodge and Burn magic occurs within Lightroom’s masking section, and the first step is to click on the Brush icon. Unlike with Photoshop that offers layers, with Lightroom the method relies upon various brushes to mimic the layering process—with different enhancements stacked atop one another.
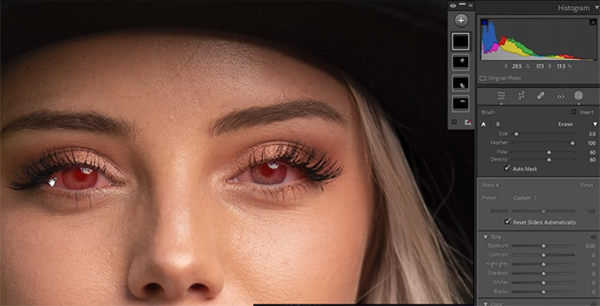
Hernandez recommends the settings he prefers for Feathering, Flow, and Density. You’ll also see how to choose the proper brush size for the specific task at hand. Once everything is configured properly, it’s easy to paint in whatever Dodge and Burn adjustments are required to even out the exposure.

Hernandez first concentrates on different areas of Sarah’s face and the underside of her black hat that is devoid of detail. He then examines the portrait further, finds a few other areas on her face, body and apparel that can be improved, and quickly refines those.
A long the way Fernandez provides before/after examples of each step in the process so you’ll have a full appreciation of the ease and effectiveness of this streamlined approach to Dodge and Burn. After watching the video take a look at his popular YouTube channel, where you’ll find lessons on other simple editing methods.
And don’t forget to watch the tutorial mentioned above, with another pro’s tricks for shooting perfectly exposed nature and wildlife photos every time.


