The Easy Way to Shoot & Edit Breathtaking Panorama Photos (VIDEO)
Have you ever come across an expansive landscape that can’t be captured in one shot, even with an ultra-wide lens? This tutorial explains a super-easy shooting and editing technique for creating a breathtaking image that faithfully replicates the entire vista you witnessed with your eyes.
Instructor Neil Borg is a notable travel and landscape photographer, a very adept visual storyteller, and a post-processing expert. The method he describes today in less than seven minutes delivers impressive results when shooting landscapes, cityscapes, seascapes and more. By following his straightforward advice you’ll be able to transform everyday outdoor photos into attention-grabbing images with a unique look.
The simple process involves shooting multiple images that slightly overlap and stitching them together in Lightroom. Cameras with a Panorama mode take care of the first step for you, but you can easily accomplish the task yourself by mounting the camera atop a tripod and making a few overlapping shots‚ being careful to keep the horizon as level as possible.

The lesson begins with Borg’s the five-shot sequence already on the screen. As you’ll see, there’s a prominent tree on the left edge of his last photo that appears on the right side of the previous shot—and that’s the point at which these images overlap. The same holds true for consecutive shots earlier in the sequence.
Borg explains a few things to consider when composing your shots because Lightroom needs recognizable information in order to merge photos together when looking for similar elements in adjacent images—like the tree mentioned above.
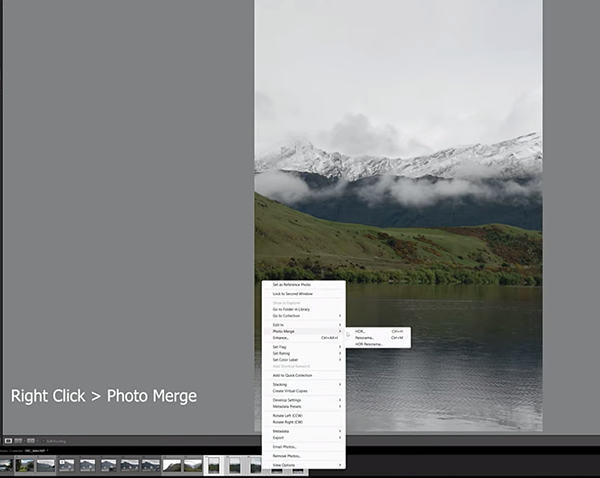
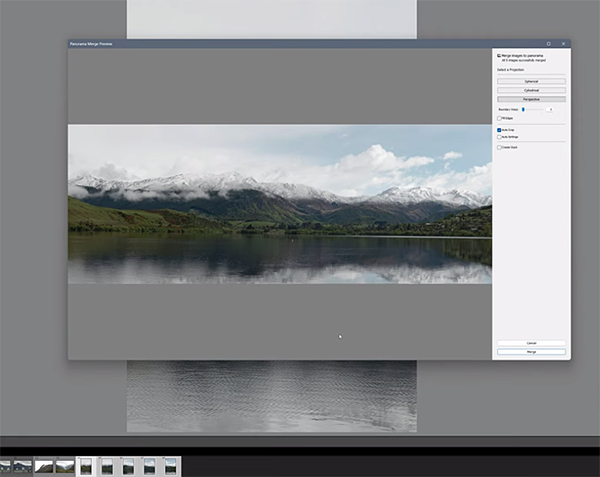
The stitching process begins by importing your sequence of photos into Lightroom and selecting them all using the keyboard shortcut he provides. Next, click on one of the images, select Photo Merge from the dropdown menu and choose the Panorama option. You’ll then be presented with a Panorama preview screen that enable you to select f that determine the manner in which your images will be combined.

Borg recommend the best choice to make, depending upon the specific subject at hand. There’s also a Boundary Warp option that works by filling in more of the image within the frame. There’s another helpful tool for filling missing edges around the periphery of the shot.
The rest of the tips are so simple that we’ll let Borg provide step-by-step instructions for completing the transformation. Be forewarned that this technique can be very addictive. Once you’re done watching head over to Borg’s popular YouTube channel, with its two million subscribers, where you’ll find many more helpful tips and tricks.
We also suggest watching a tutorial we posted earlier explaining how to use Intersect Masks that one professional landscape photographer refers to as one of Lightroom’s most important often-ignored tools.


