
The Power of Profiles for Better & Faster Edits (VIDEO)
By ignoring Lightroom Profiles you’re missing out on a quick and easy way to achieve more effective edits in less time. These one-click settings enable you to establish a neutral starting point for a realistic look or apply creative effects to imbue photos with various moods and emotions.
Instructor Julieanne Kost is an expert at all things Adobe and a self-proclaimed “digital-imaging evangelist” whose tutorials describe tools, techniques, and helpful shortcuts for the best-looking results possible. Today’s nine-minute episode describes what you’ve been missing by not using Profiles, and how to quickly unlock their power.
She describes the concept like this: “A profile is just a set of instructions that determines how the information in a photo is processed.” One advantage is that Profiles are non-destructive and can be changed at any time without any loss in quality. Kost explains that Profiles can use Lookup Tables to remap colors and tones which is why they’re so useful for achieving the aforementioned neutral look and special effects.
Kost takes a two-pronged approach to this lesson by first demonstrating some of the Profiles deigned to work with Raw files. Then she turns her attention to Profiles that can be employed when processing other file types.
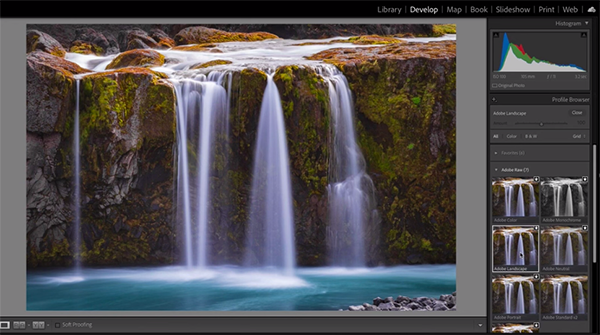
The default profile when editing in Raw is called Adobe Color. With Jpegs the default is just identified as Color because you can’t apply a Raw Profile to files of a different format. In cases when you’re working on a legacy file you’ll see the previously embed Profile which you can change at any time to suit your needs.
Kost notes that Adobe Color was designed to be an ideal starting point for just about any Raw file—with the intent of rendering “a neural baseline image that closely matches the original color and tones in the original scene.” As you’ll see, however, there are other options from which to choose like Adobe Monochrome, Adobe Landscape, and others.
You can easily preview how any given Profile will affect an image by hovering your cursor over thumbnails in the panel. Then simply click on a Profile when you like what you see and your choice will be instantly applied. Then you’ll see the resulting impact on both the screen and in Lightroom’s histogram.
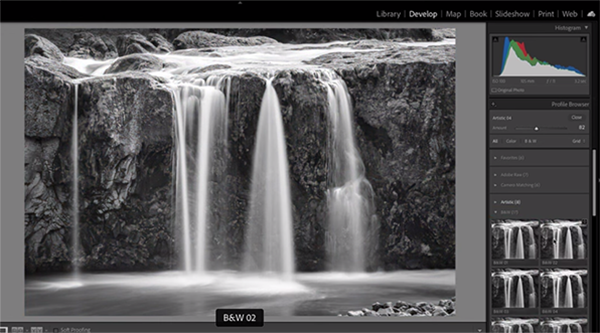
There are a few more concepts to understand, including the fact that any given Raw file can only have one Profile. If you click on another Profile, the first one will automatically be removed. Kost quickly illustrates how various Raw Profiles affect how an image appears. For example, Adobe Landscape bumps up saturation “and it enhances blues and greens, along with a slight, overall increase in contrast.”
At this point Kost is only halfway through the lesson, and there’s much more to understand. So take a close look and jot down a few notes for future reference. By following her advice you’ll significantly improve your Lightroom workflow and save a bunch of time creating the exact result you envision.


