
Want Stunning Blue Hour Photos? This Lightroom Edit is Amazing (VIDEO)
We all know that Blue Hour is one of the best times to shoot attention-grabbing images in the field. The challenge, however, is that sometimes our results fail to capture the magic and whimsy that we saw through the viewfinder as the sun dipped below the horizon.
The solution is careful, thoughtful editing that accentuates the peaceful mood of twilight when the scene is bathed in soft blue light. Today’s tutorial from the PHLOG Photography YouTube channel demonstrates a straightforward Lightroom workflow that anyone can master in the next 12 minutes.
Instructor Christian Mohrle is a notable German landscape photographer and image-editing expert based in the southern region of the country near beautiful Lake Constance. Be sure to download his sample file, from a link in the description beneath the video so you can follow along and make the changes yourself as the steps are explained.
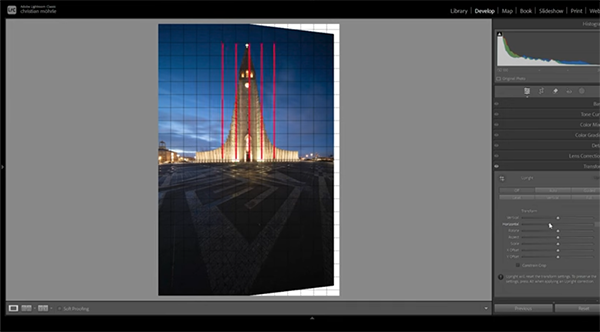
If you’ve followed Mohrle in the past, you know that he always makes several basic, global adjustments to refine the image as much as possible before moving on to selective masking techniques. He begins by opening Lightroom’s Transform panel and fixing the skewed horizon that causes unwanted distortion to a prominent church in the middle of the frame. A bit of cropping is also required.
The next step takes place in the Basic panel where Mohrle changes the profile from Adobe Color to Adobe Landscape which significantly boosts base saturation. He then modifies highlights and shadows in a way that makes details more visible. Other preliminary adjustments include increasing Texture, Clarity, Vibrance, and Dehaze to boost sharpness, midtone contrast and introduce a bit more “pop.”
White Balance is a critical aspect when editing Blue-Hour photos, and Mohrle demonstrates how to get it just right while retaining a natural look. After few more simple adjustments you’re ready for the transformational selective enhancements to different portions of the shot.

Mohrle walks you through every step of the way from masking, final color grading and careful sharpening, to a final cleanup in Photoshop. Compare his before/after images and you’ll be duly impressed. Then head over to the PHLOG Photography YouTube channel which is a great source of tips and techniques for anyone who photographs in the field.
We also recommend watching a tutorial we featured earlier with another post-processing expert who reveals his five top picks for the best FREE online software options in 2025. No more subscriptions or downloads required!


