
Use Color Contrast for Outdoor Photos with Drama & Punch (VIDEO)
Dull, flat landscape photos will be a thing of the past if you take advantage of the color-contrast techniques described in today’s transformative Lightroom tutorial from the popular PHLOG Photography YouTube channel that’s guaranteed to “make your images POP!”
Instructor Christian Mohrle is a notable German landscape photographer and post-processing specialist who is very adept at simplifying seeming complicated Lightroom tasks. As always, you can follow along by downloading his demonstration image with a link in the description beneath the video.
The shot is a nicely composed landscape scene with imposing mountains in the distance and a sublime alpine lake in the foreground—all beneath a clear blue sky. The image lacks impact, despite Mohrle’s perfect framing, but watch what happens when color contrast adjustments come to the rescue.

Mohrle prefers to begin his edits with a few global adjustments to prepare an image for selective color grading and masking enhancements that follow. The first step here is using Lightroom’s healing tool to remove ugly sensors spots that detract from the photo. He then opens the Basic panel and changes the profile to Adobe Landscape which boosts saturation and facilitates the “super vibrant” effect he has in mind.
Other basic adjustments involve cutting exposure in both highlights and shadows, increasing whites and blacks, slightly raising overall contrast, and modifying white balance in a way that retains realistic blues in the sky while making the alpenglow on the mountains more visible. He also boosts clarity and texture for a sharper effect.
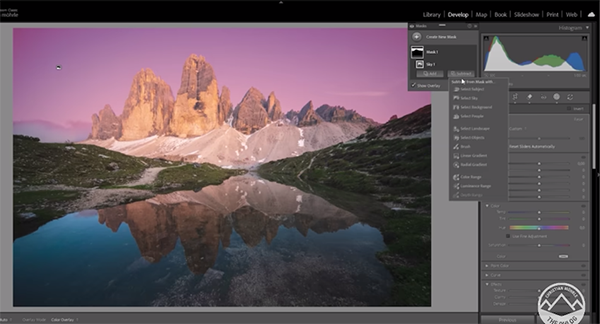
Now that the original shot is significantly improved it’s time to dive into selective adjustments to separate areas within the frame. Mohrle does this with several well-placed masks and he walks you through the simple steps required.
All that’s left to complete the impressive transformation is a bit of final color grading and very careful sharpening. Take a look at Mohrle’s before/after examples and you’ll be very convinced of how this workflow can save the day.
We also recommend watching the earlier tutorial we featured with another post-processing expert who demonstrates a straightforward Photoshop workflow for restoring old, damaged photographs with scratches, dusts spots, and faded colors.


