
A 4-Step B&W Lightroom Edit That Delivers Dramatic Results Fast (VIDEO)
Have you ever looked at one of your landscape photographs and thought to yourself, “I wish I would have captured this image in monochrome?” Well, all is not lost as you’ll see in this tutorial from the PHLOG Photography YouTube channel that demonstrates how easy it is to convert a color image to b&w and enhance it in Lightroom for maximum effect.
Instructor Christian Mohrle is an amazing German landscape photographer who is just as accomplished behind the computer as he is when shooting in the field. In this episode he discusses everything from making a b&w conversion to basic editing, selective enhancement with masks to adjust important variables like contrast, and proper sharpening techniques.
As with all of Mohrle’s lessons there’s a link beneath the video for downloading his sample Raw file so that you can follow along and make the changes yourself. He recommends a specific sequence that begins with the b&w transformation, then making basic global adjustments to prepared the file for the masking techniques that follow. The final step employs Lightroom’s Color Mixer to tweak contrast.

The first step is about as easy as it gets: simply open Lightroom’s Basic panel, click on the b&w button, and the conversion from color to monochrome happens in an instant. Next on the list are a few simple tonal adjustments that will make masking as easy and effective as possible. These include dropping highlights to enhance detail, slightly increasing blacks, and boosting Texture, Clarity, and Dehaze.
You’ll also see why Lightroom’s White Balance sliders will help improve the impact when working on a b&w shot. Here he bumps up temperature and plays around with tint to enhance the sky.
With the preliminaries out of the way, it’s now time to apply simple masking magic to enhance selective areas within the frame. Mohrle typically begins this process with the sky. He creates a simple selection and subtracts a Linear Gradient moving up from the foreground to darken the top portion of the sky without affecting areas closer to the horizon.
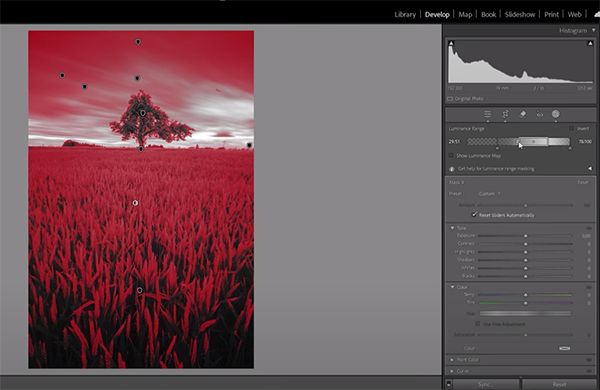
A few other masks follow and the adjustments are as effective as what Mohrle accomplished with the sky, He holds your hand throughout the entire process—as he does when adjusting color contrast and sharpening to complete the transformation. Compare Mohrle’s before/after images and you’ll be duly impressed.
Mohrle’s instructional YouTube channel is full of pro tips for everyone who shoots in the great outdoors, so make it a point to pay a visit and explore all of his very helpful videos.
We also suggest watching the tutorial we featured with another image-editing expert who demonstrates how to transform boring outdoor photographs into spectacular images by using five quick Lightroom techniques that anyone can master.


