A Big PROBLEM with the HEALING Tool in Lightroom & How to FIX it (VIDEO)
Sorry to spoil your afternoon with what one imaging expert calls a “huge” problem for those who process photos in Lightroom. But don’t despair because you’ll learn about this dilemma and how to fix it in barely five minutes.
Anthony Morganti is a widely acclaimed image-editing impresario who says that if you’ve never encountered a problem with Lightroom’s frequently used Healing tools there’s a good chance you will—unless you follow the simple advice he provides in this very quick episode.
As Morganti explains, the issue under discussion today occurs when using masking in tandem with any of Lightroom’s Healing tools. He demonstrates the problem with an unedited Raw file and then explains how to avoid it so you can cross this one off your list.

The episode begins with few a very simple edits in Lightroom’s Basic tab. Morganti opens up the shadows, brings in the highlights, finds a white point and black point, and adds a bit of texture, vibrance and clarity. So far so good.
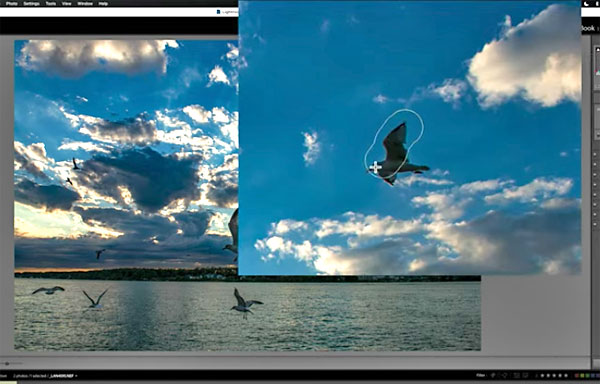
But watch what happens after Morganti uses a simple mask to enhance the sky. These adjustments go according to plan, until he goes to Lightroom’s Healing tools panel and attempts to remove one of the small birds in the sky.
Now things get a bit dicey and it doesn’t matter which Healing tool you use, whether it’s the Content Aware brush, the Heal brush, or the Clone brush. He uses the Clone brush to illustrate the problem. Once he removes the bird, a visible outline remains. As you’ll see, the same thing occurs when Morganti uses the other two tools to get the job done.

Try it, you won’t like it. Even changing Opacity and Feathering doesn’t solve the problem. The good news is that this is the end of the bad news, as the last three minutes of the video demonstrate a quick and foolproof method to avoid ever encountering this dilemma.
You can find a wealth of editing tips and tricks like this one by paying a visit to Morganti’s popular YouTube channel, so do that as soon as you have time.
And check out last’s month’s tutorial, explaining how to use a “forgotten” Lightroom tool to banish ugly sensor spots.


