
Camera Settings Checklist: Optimize Your Setup Now (VIDEO)
When photographers use the term “workflow” they’re usually referring to the process they use when editing their photos, but there’s another essential workflow to consider that doesn’t get as much attention. And that’s the shooting workflow that relies upon key camera settings to capture the best possible images in the field
The video below provides what is essentially a camera-settings checklist that can significantly enhance your photography experience by making sure that your camera is properly configured for the types of images you shoot. Landscape photographer Jalen Oban begin this episode with a question: “Out of all the settings in your camera’s menu do you know which ones are the most important?”
Or maybe you just got a new camera and you’re confused by which default options you should change. Another possibility is that you just need a reminder of what various settings do. In any case, Oban will set you straight in just about eight minutes.
Oban puts it like this: “Whether you’re a beginner or a seasoned photographer, adjusting your settings can significantly improve the quality of your images.” This is the type of smooth workflow you’ll learn today and likely use in the future with great results. Physical buttons and menu items differ in location and nomenclature from one brand to another, but their functions are essentially the same.
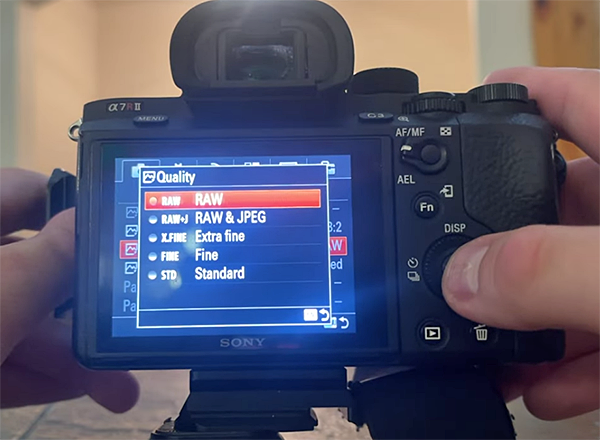
One of the most important decisions to make has to do with file format; namely whether you want to shoot Raw files or Jpegs. Oban explains why the former offer better image quality and more flexibility during the editing process. However, there are times when the much smaller Jpegs will suffice— depending upon how you intend to use the photos you capture. In some cases you may want to configure the camera to capture both Raw files and Jpegs at the same time.
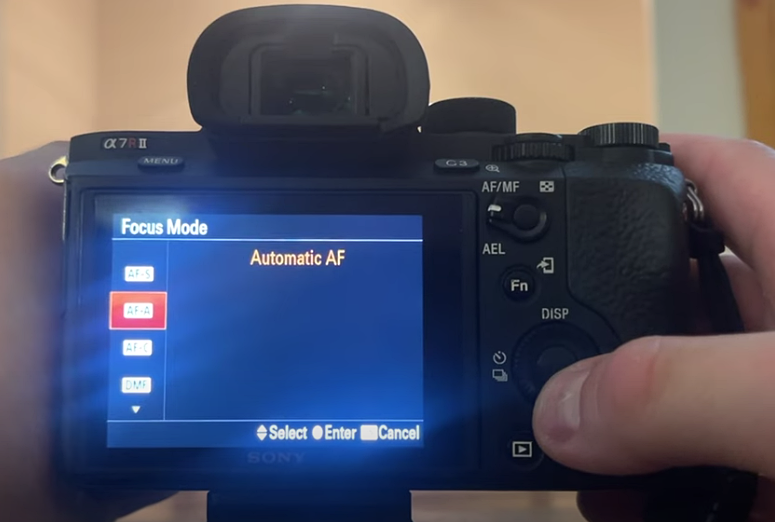
Another important task is to dial up the most appropriate focus mode, and this setting has a lot to do whether you shoot static scenes like landscapes or photos with motion like wildlife or action sports subjects. Here, Oban describes the various options available for boosting your odds of success
The foregoing is just a couple examples of the key choices that Oban describes. Some of these are of the set-it-and-forget-it variety, while others depend upon the specific task at hand, light levels, and other important variables. So grab your camera, start the video, and customize your settings as the lesson proceeds.
Oban’s instructional YouTube channel is a great source of information for everyone who shoots in the field, so take a close look and elevate your skills.
We also recommend an earlier tutorial we posted from another accomplished landscape photographer who provides several pro tips for protecting your camera and lenses from damage when shooting in the great outdoors..


