
Transform Your Photos with Shadows, Silhouettes & Bold Shapes (VIDEO)
This comprehensive tutorial from the Photographic Eye YouTube channel is for those of you whose images lack the drama and impact that’s required for an outstanding shot. You’ll learn how to employ shadows, silhouettes and interesting shapes to transform photo in a very compelling way.
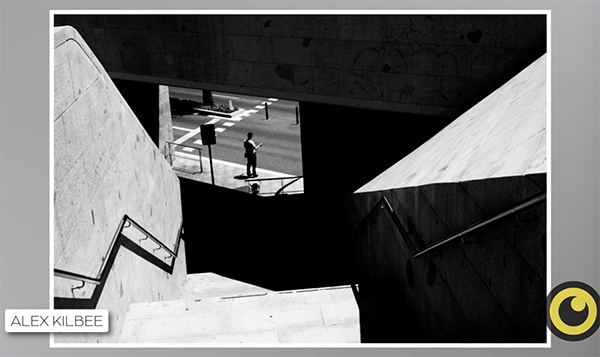
Instructor Alex Kilbee is a British portrait photographer who specializes in empowering lessons for photographers of all skill levels without requiring expensive gear or years of experience. He illustrates these techniques with the stunning work of awarding-winning Austrian portrait artist Wolfgang Gangl, but much of what you’ll will work wonders for just about any types of photos you shoot.
Gangl’s inspirational work provide a rare treat with regard to incorporating these powerful but oft-ignored elements that really grab attention. Or as Kilbee says, “these images are a wonderful example of how to combine technical skills with artistic vision to create something that’s truly extraordinary.”
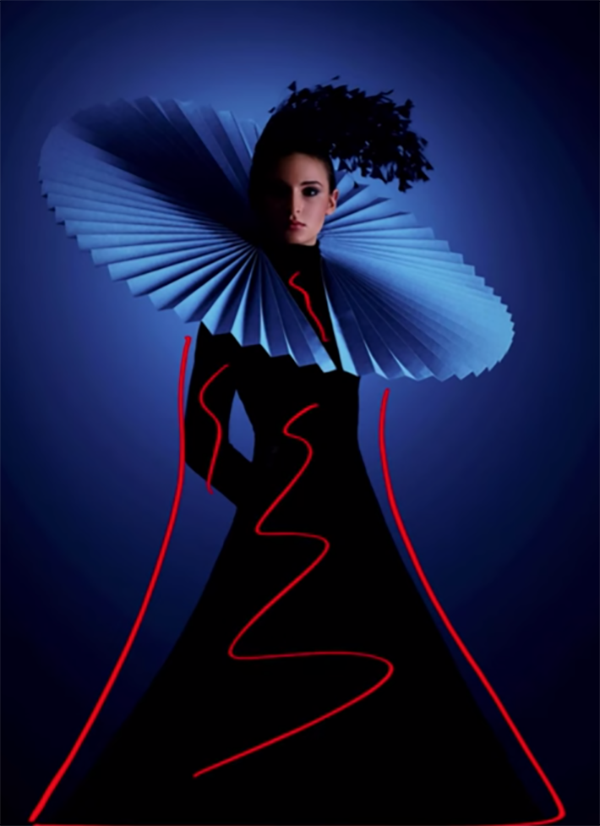
The overlooked aspect of shadow play is at the top of the list and Kilbee illustrates how this method will imbue images with eye-catching contrast and depth. Many of us were taught to expose photos in a way that provides detail in the shadows, midtones and highlights in a scene. But here the singular goal is to embrace deep, dark shadows that create head-turning images, and Kilbee’s careful analysis describes exactly how it’s done.
The intentional use of strong shapes and bold lines is another method for capturing photos that stand out from the crowd. As Kilbee says, these compelling graphic elements contribute to “photos that really look designed.” While Gangl’s imagery typically involves angles and linear shapes, he sometimes combines these with curves and circles for an imposing juxtaposition.
And then there’s the introduction of negative space and creative silhouettes that can transform a ho-hum photo into one that screams WOW. Kilbee explains how the foregoing techniques, taken to the extreme, will result in compelling images with dark negative space and silhouettes that “Gangl uses to great effect.”
None of these methods are particularly difficult; rather, putting them to work is merely a matter of looking at scenes differently with intent, and having the confidence to do a bit of experimentation. So take a close look, give all this a try, and then head over to the Photographic Eye YouTube channel for more innovative tips and techniques.
We also suggest watching the tutorial we featured earlier from another accomplished pro who takes a deep dive into your camera’s focus modes, with a demonstration of the difference between Continuous AF, Single AF, Hybrid, and Manual.
Reading time: 2 min
Change These 7 Photoshop Settings Today & Update Your Workflow (VIDEO)
Adobe is constantly updating Photoshop with improved features, new tools, and other capabilities that enhance the image-editing process. Every time they do it’s necessary to change a few key settings and modify your everyday workflow—a task that many photographers neglect.
Today’s quick tutorial from the Photoshop Café YouTube channel discusses seven Photoshop settings that one of our favorite instructors urges you to change “right now.” So check your most recent install to make sure it’s the most current, and then follow Colin Smith’s succinct advice in the video below.
Smith is a photographer and post-processing expert who makes a living teaching Lightroom and Photoshop techniques to users of all skill levels. His goal for this episode is “to help you work faster and smarter in Photoshop,” and he does so in barely six minutes.

As Smith says, “There’s a few settings you can change in Photoshop that can remove frustration and save you a ton of time by eliminating repetitive tasks.” His first suggestion is a no brainer, unless you’ve already made the change; namely, “get rid of the Welcome Screen” that few of us ever use. By default, every time you close all your documents, Photoshop reverts to the rather annoying home screen instead of keeping your workspace prepared for the next task at hand.
Tip #2 enables you to make more effective AI Selections. As you’ll see, Photoshop offers two Select Subject options, with the default setting labeled “Device.” This is intended for quicker results, but Smith recommends choosing the “Cloud” setting instead because this approach delivers cutouts that are considerably more precise.
Next you’ll learn how to “load up the bags of free goodies” with a bunch of helpful but oft ignored assets that are available in Photoshop. These include a variety legacy tools a that you may have forgotten. He demonstrates how this works by navigating to the Gradient panel and illustrating a bunch of cool features that are still valid today.

Smith’s other worthwhile tricks include customizing the workspace by putting your most commonly used tools at your fingertips where they belong, as well as other methods for personalizing Photoshop’s interface. There are also several Color settings to change in a way that will greatly improve the look of your images.
There’s an abundance of straightforward Photoshop and Lightroom videos like this one on Smith’s instructional YouTube channel, so be to pay a visit when you have time to explore.
And don’t miss last week’s Photoshop primer with a beginners guide to Focus Stacking that will help you maximize depth of field from foreground to background and everything in between.
Reading time: 2 min
Top Content Creator Tools from 3 Legged Thing, Nikon and SmallRig
Everyone is a Content Creator to one degree or another. Some earn their daily bread; others dribble out their daily dread. No matter where you fit on this spectrum, using top creator tools can help you up your game.
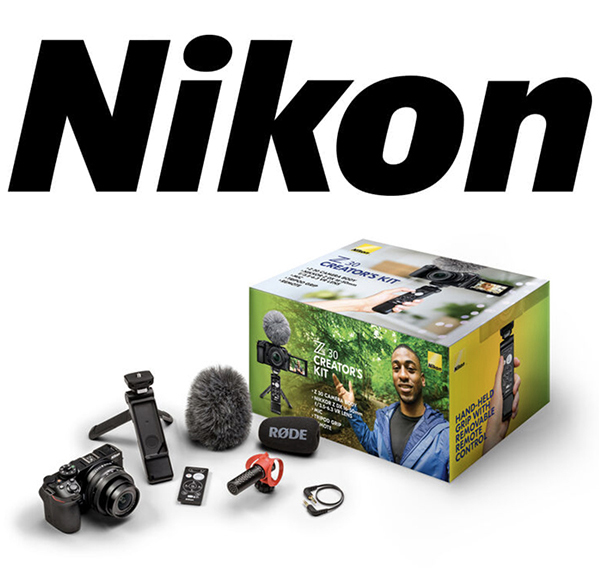
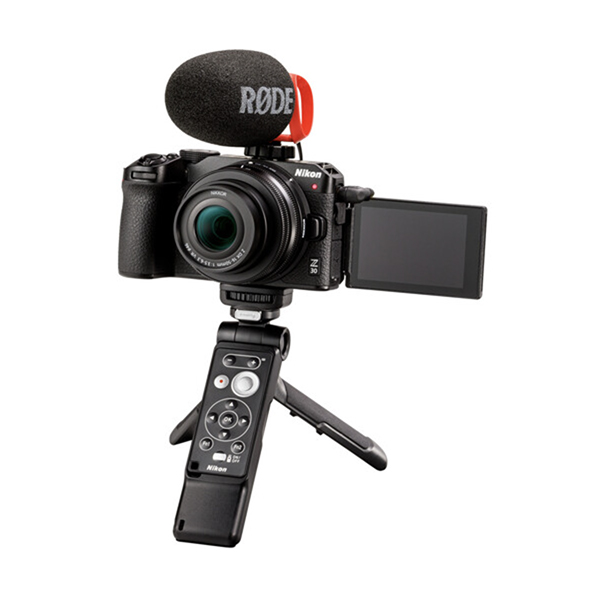
Nikon Z30 Creator’s Kit
Nikon makes it easy to assemble everything you need. At the heart is the popular Nikon Z30 camera with a Nikkor 16-50mm f/3.5-6.3 VR zoom lens. The Z30 has a 20.9-megapixel APS-C format sensor and can produce UHD 4K30p and Full HD 120p video, and it can live stream at 60p. It features a 3-inch Angle-Free touchscreen, tally lamp and dedicated selfie controls. Included in the kit with the Nikon Z30 is a Nikon ML-L7 Bluetooth remote control, Rode VideoMicro II microphone and a SmallRig tripod grip.
The Nikon Z30 Creator’s Kit is currently $746 at B&H (this may be a temporary promotional price). Alternatively, this Nikon Z30 bundle is sometimes available from Amazon. Visit the Official Nikon Store on amazon.com for more Nikon deals.

SmallRig All-in-One Smartphone Video Kit
SmallRig has become a Big Name in camera accessories, especially when it comes to tools for content creators. Their portfolio includes multiple lighting options, camera rigs, tripods a tons more.
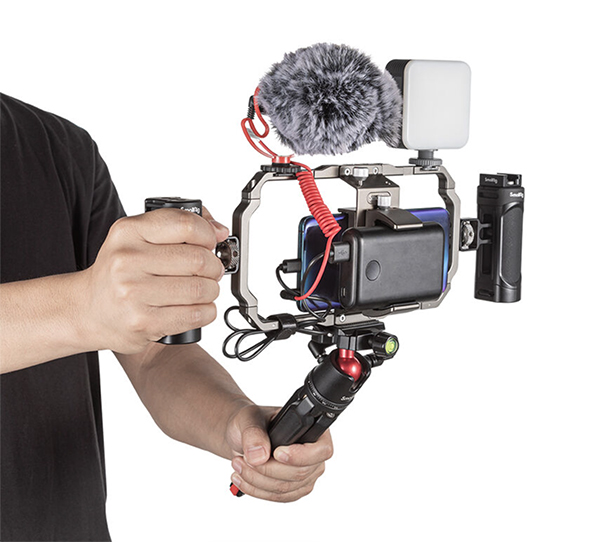
The SmallRig Smartphone Video Kit includes a smartphone cage, desktop tripod, power bank holder, dual side handles, adjustable LED light, enhanced cardioid microphone, microphone shock mount, cables for smartphone and required mounting hardware. All in all, you get an awful lot with this all-in-one at a very affordable price: just $169.95 directly from SmallRig. SmallRig also has an Official Store on amazon.com.
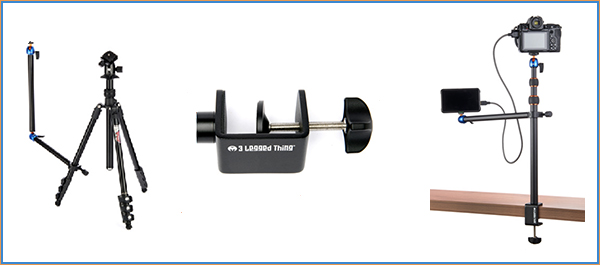
3 Legged Thing Camera Desk Mount System
From the 2-legged mad (but brilliant) scientists at 3 Legged Thing comes the CDMS (Camera Desk Mount System) that’s the perfect addition to any content creator’s production studio. It’s available in three flavors (we recommend the biggest, Kit 2A) and it’s hyper-useful whether you’re selling via online auctions or creating content for social media.

The CDMS Basic Kit includes a vertical pole (similar to a center column on a tripod) that clamps to a table or desk and features a small omni-directional ball head with a strong rotational lock. Use it to support cameras, lights, microphones, compact monitors and other items with a standard 1/4×20 inch thread. Load limit is 2.2 pounds (1kg). Price is $34.99.
Kit 1A expands utility. It includes everything from the CDMS Basic Kit and adds an auxiliary arm that can be attached to the main pole, or used on its own on a tripod leg or center column. It features a ball head at the end for attaching accessories or smaller cameras. Price is just $15 more than the Basic Kit, $49.99.
We recommend the full-blown Kit 2A that features an extra arm that connects to the auxiliary to create an articulated horizontal arm. Price is $59.99. Go with the big kit.
All three kits are available at 3leggedthing.com and from authorized camera retailers online and in stores. To find your nearest 3LT retailer, visit their website. Take a look at 3 Legged Thing’s complete line of tripods, L-brackets and other photo accessories at the Official 3 Legged Thing store on amazon.com.
Want to Become a Better Photographer?
Begin by taking more pictures. Carry a camera everywhere you go and shoot even when you’re 100% sure the picture won’t turn out. Review all of your images with a critical eye and share them with others – and that includes posting the best on our Photo of the Day Gallery. Subscribe to our newsletter (see sign-up form on our homepage) and bookmark Shutterbug as a Favorite on your browser so you can check back often. We’re in this for the same reason as you – we love photography, and we’re learning more about it every day.
—Jon Sienkiewicz
(As an Amazon Associate, Shutterbug earns from qualifying purchases linked in this story.)
Reading time: 3 min
Popular Posts


Advertisement
