The infamous Mississippi Delta is the home of cotton and the Delta Blues – True South. This was the region that almost defined slavery in America in the 19th and early 20th century when droves of black Africans were taken into the cotton fields for a life of hard labour. They would sing their hearts out on the fields and in church to ease the pain; songs that were laced with African rhythms, and these musical styles were the foundation of the Blues.
The King of the Blues in Indianola
Indianola, Mississippi, a small settlement of a few grocery stores, bars, and diners, is legendary American blues guitarist and singer, BB King’s proclaimed “hometown”. It is also home to the BB King museum, which gives an immersive narrative of the Delta’s cultural and social history through the life of the man himself.
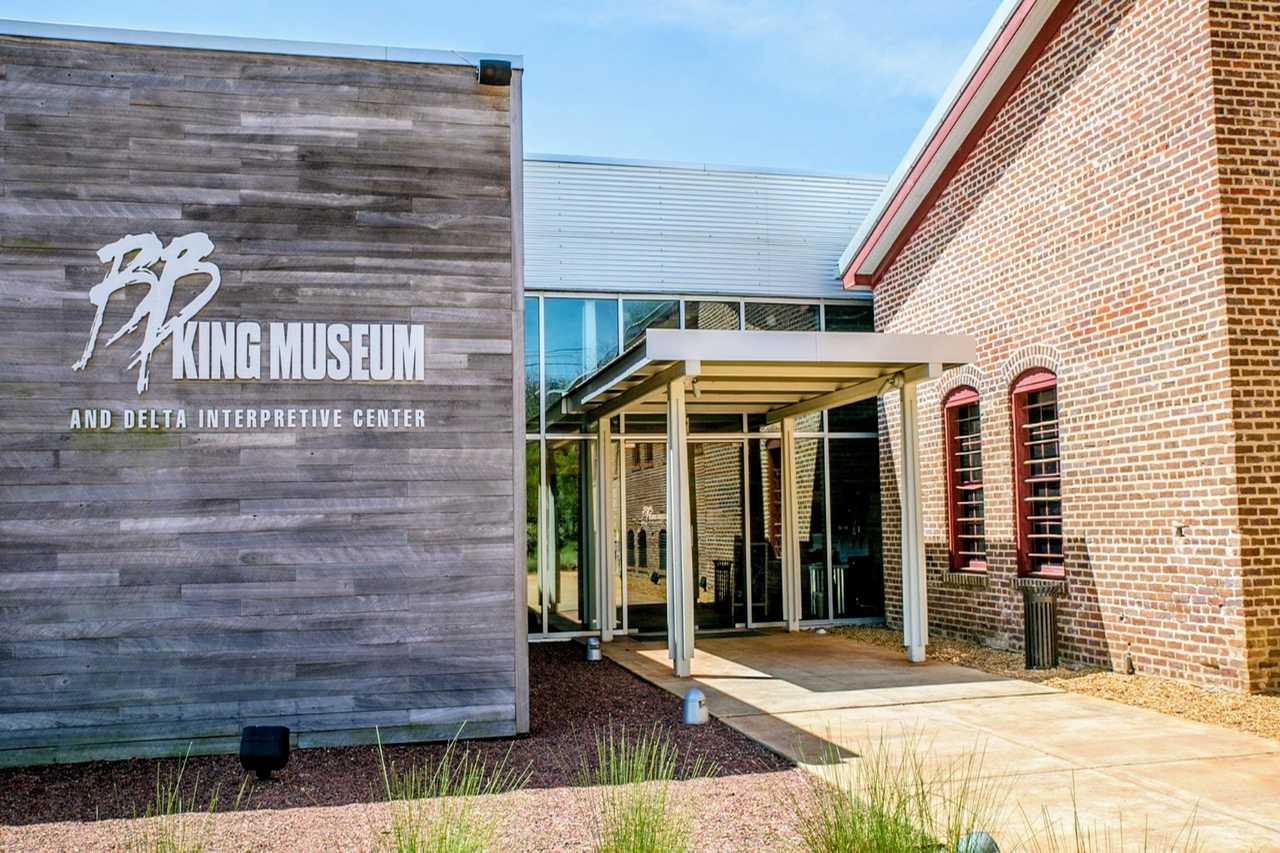
BB King Museum
The museum traces the life of Riley B. King from his humble beginnings on a cotton farm near BerClair, his life as a tractor driver, to his rise as the globally recognised “King of the Blues”. It’s a journey through the Delta in the 1930s, highlighting economic and social challenges, the sharecropping system and the poverty from which the blues emerged.
From then onto the golden age in Memphis, where King broke through to international stardom, including his time as a Radio WDIA Disc jockey, where his famous moniker of “BB” first came about. The exhibits chronicle his demanding years touring the “Chitlin’ Circuit” during the segregation era, performing for Black audiences across the South, and his eventual crossover success that broke racial barriers. The displays feature a vast collection of memorabilia, including gold records, King’s personal effects, photographs, one of his famous “Lucille” guitars and an actual tour bus.
It is one of the most interesting, enjoyable and emotive museums I have ever been to in America. Amongst the British and Irish musicians he inspired, you can count Eric Clapton, George Harrison, Jeff Beck, Peter Green, plus bands including The Rolling Stones, Cream, Led Zeppelin, Fleetwood Mac, The Animals and U2.
BB King is laid to rest just outside the museum, providing a place for respectful reflection and a final farewell to a true musical legend.
Tragedy and Song in Greenwood
A thirty-minute drive northeast of Indianola lies Greenwood, a beautiful Delta city with a historic downtown and the stunning Grand Boulevard, lined with classic Southern architecture.
Greenwood is full of individual shops, restaurants, and the outstanding Alluvian Hotel, a luxury boutique hotel in the historic downtown area, where I stayed the night. It is an absolute gem of what one would imagine a Delta settlement to look like. But here, as in the rest of Mississippi, you are never far from the past, for it was here in Greenwood that Emmett Till, a 14-year-old Chicago boy, was brutally murdered in 1955, which became one of the many catalysts for the Civil Rights Movement and is central to the area’s identity.
This is where more famous Delta music was created by Mississippian singer-songwriter Bobbie Gentry, whose haunting 1967 hit “Ode to Billie Joe” immortalised a local landmark.
 At the north end of Greenwood’s Grand Boulevard, you will find the bridge over the Tallahatchie River mentioned in the song. The exact bridge has been replaced, but it is the location where the narrator and her family discuss Billie Joe McAllister’s tragic jump is marked by a Mississippi Country Music Trail marker dedicated to Bobbie Gentry.
This is a must-see for music fans, capturing the blend of Southern Gothic storytelling and Delta atmosphere that defined Gentry’s work. Just outside of town, you can find the ‘mocked up’ version of Billie Joe’s grave, a few hundred yards from the infamous river.
A fifteen-minute drive north of the downtown area, you will find Money Road, County Road 518, and the ruins of Bryant’s Grocery and Meat Market. This is where Till allegedly whistled at a white woman, leading to his abduction and murder days later.
A further short drive will bring you to the most sombre site, Graball Landing, where Till’s mutilated body was recovered from the Tallahatchie River. This site is now part of the Emmett Till and Mamie Till-Mobley National Monument, a quiet, natural spot that offers a profound moment of reflection on the cost of racial hatred.
In downtown Greenwood, at Rail Spike Park, you can visit the larger-than-life bronze statue dedicated to Emmett Till, unveiled in 2022. This powerful, nine-foot sculpture serves as a local memorial to ensure his story is never forgotten.
This journey is a powerful convergence of music, memory, and history, underscoring the Mississippi Delta’s indelible and incredible influence on American culture and social conscience.
How to do it
America As You Like It (www.americaasyoulikeit.com / 020 8742 8299) has a seven night Mississippi fly-drive from £1390 per person, including return flights from Heathrow to Jackson on Delta, seven days fully inclusive car hire, two nights in Jackson, one night in Greenwood, two nights in Natchez and two nights in Ocean Springs.
The post Mississippi Delta and the Blues of Indianola and Greenwood appeared first on The Travel Magazine.



 At the north end of Greenwood’s Grand Boulevard, you will find the bridge over the Tallahatchie River mentioned in the song. The exact bridge has been replaced, but it is the location where the narrator and her family discuss Billie Joe McAllister’s tragic jump is marked by a Mississippi Country Music Trail marker dedicated to Bobbie Gentry.


