Is it actually safe to drink water from the bathroom tap? The experts share their thoughts
It can feel kind of icky, but is it all in our heads?
In addition to the usual suspects, we’ve rounded up a couple lesser-known options. It’s time to get those images off your phone and out into the world for others to enjoy.

Xpozer Wall Displays from Bay Photo
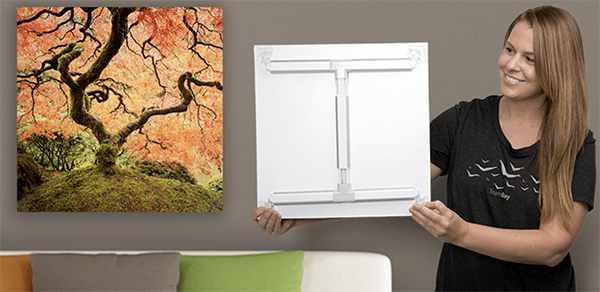
We fell in love with Xpozer Photo Wall Displays years ago when we first discovered them (review here). Unlike conventional prints, Xpozer Prints are light in weight, extraordinarily easy to hang, and offer a unique swap-out feature.
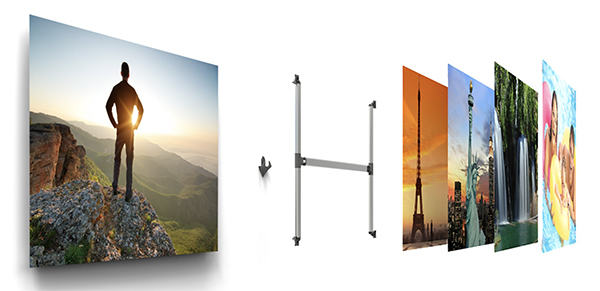
Images are printed on Bay Photo’s Radiant Satin fabric using a 12-color ink set and attach to any wall using their exclusive Aluminum Tension Hanging System. Xpozer Prints float a couple inches away the wall which gives them a dramatic gallery look. A tension bar in the center of the frame securely rests on the one-piece wall hanger which attaches to the wall with a single sheet metal screw with or without the included traditional wall anchor.

Once you own the same frame, you can change the fabric print easily and economically via Xchange Prints which are cleverly designed to be interchanged with other Xpozer Prints using the same patented aluminum hanging system.
From Bay Photo. More than 25 size options from 16×16 to 40×80 inches. Prices start at less than $50 for frame hardware and print. Replacement prints start at less than $35 (16×16). Easy online ordering, too. Watch this YouTube video and you’ll be convinced.
Hear visitors exclaim, “Wow! Did you shoot that?!”

Mobile Easy Books from Printique
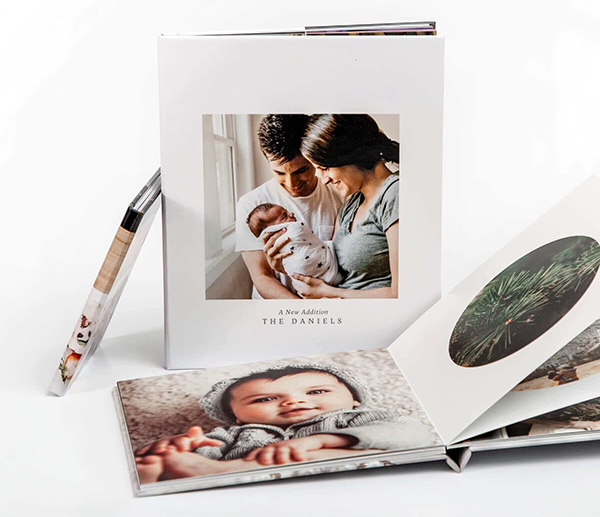
Printique, backed by Adorama, offers Mobile Easy Photo Books that empower you to liberate your best cellphone snaps and create lasting heirloom memory objects. With a few easy and intuitive clicks, you can design the perfect “Layflat” Easy Book photo album from your phone, and have it shipped right to your door or to a family member.
Print quality is exceedingly high, according to multiple user reviews.

Memorialize vacations, graduations, family holidays, special pets, secret girlfriends and other important image collections without ever leaving your smartphone. Great gifts for any occasion, and a fantastic way for a gig worker to promote their core competencies.
Mobile Easy Photo Books are available from Printique in 8×8 Hardcover, Deluxe Layflat configurations with Luster Photo Paper. Prices start at $43.99.
Check out Printique’s 12 and 18 month calendars, too.

Calendar
Boring, no? NO! Although Wi-Fi connected, digital date keepers have dampened the popularity of traditional calendars on the walls and desks of American homes, photo calendars steadfastly retain their dominance as genuine works of art that can help you stay on schedule.

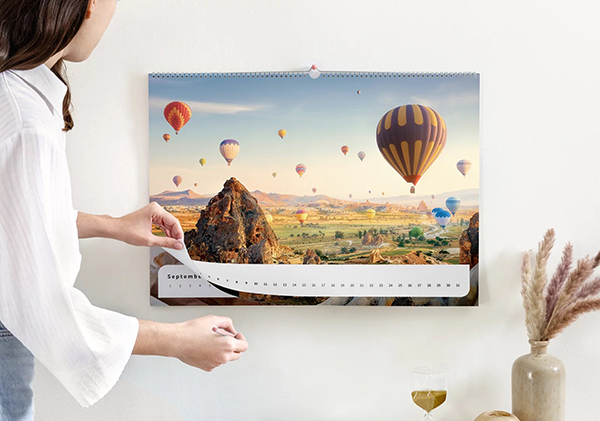
We like the photo calendars offered by Saal Digital. (In fact, we like everything offered by Saal Digital.) Their calendar options are seemingly endless, prices are very affordable and the ordering process streamlined and simple.

The Saal Digital Family Calendar option is a great gift any time of the year. Prices start at under $50 for the large 11.8 x 17.7 inch size, and first time buyers can save a significant amount (50% in some instances) using a Saal Digital Discovery Voucher. Take a look. Digital Photo Frame
There are a couple dozen digital photo frames for sale on Amazon, but when it came time to order one for myself and other family members, I did my homework and bought a model from Nixplay. It wasn’t the cheapest, no sir, but it had features I valued as important. That was more than eight years ago, and our Nixplay digital photo frames are still lighting up our kitchen and living rooms with shared images that were captured around the world.
Apparently, we’re not alone in our thinking. According to Amazon, Nixplay digital photo frames are America’s top brand, trusted by over 2.5 million customers. Other sources suggest more than 3+ million users. Nixplay digital photo frames have received more than 22,000 reviews on Amazon and currently have a 4.7-star rating on Amazon.

The biggest positive? Nixplay’s cloud storage is located in the US on secure, CCPA and GDPR compliant servers and uses AES 256-bit encryption, so you can be confident that your photos are safe and secure. Additionally, the Nixplay app interfaces offer multi-language support, important to us because some of our family live in other countries.
Visit the Nixplay Store on Amazon.

Smart Watch
If you own an Apple Watch you can easily browse pics in the Photos app. Additionally, you can share a photo via Messages or Mail.
You can use any photo to create a watch face, too, including a Kaleidoscope watch face based on the photo, or a Portrait watch face.
Detailed instructions are available on this Apple Support page.
Google Pixel Watch users can do about the same thing. Google explains how here.
Similar functions are available to wearers of Samsung Galaxy Watches.
If you own a Timex, Swatch or any other brand of strictly-analog timepiece, we’re sorry to report that you have to use the Cut & Paste method, using scissors and real paste. Not recommended for children under 6 or over 12.
—Jon Sienkiewicz
(As an Amazon Associate, Shutterbug earns from qualifying purchases linked in this story.)
Over the past year, I’ve frequently been asked the question: “Will public relations be effective for my interior design business?”
Today I’ve enlisted the help of interior design PR expert, Natalie Norcross of A Design Partnership to give you the break down of not only how PR works for interior designers but some valuable tips on how to get the best results for your design business.
Over to Natalie…
If you’re asking this question, you’re either just starting out in business, have had a bad experience with public relations, or really want to take your business to the next level!
In general, a great PR and marketing plan needs to incorporate a public relations strategy. With a good PR campaign and strategy, you will be able to build and maintain relationships with journalists, editors, publishers, and content creators, expand your brand awareness, and reach more of your ideal clients while targeting better quality clients as well.

Whether you’re a new business or an established brand, public relations is essential to propelling you further in your industry, gaining credibility, and positioning yourself as an expert. And while the right public relations strategy and execution can skyrocket your business, it takes time and patience. Brand awareness, increased press coverage, and relationship-building doesn’t happen overnight. Businesses are too-often expecting mountains to move in the flash of an eye, thus feeling discouraged when “nothing” seems to be happening.
Remember—public relations is about so much more than being published in all of the top magazines and managing crisis communications. With every connection you make, news release you share, email you send—you get the point—you are getting in front of your target audiences and getting your business/brand on their radars. Over time, your audience and others in your industry will remember your name, understand why you deserve recognition, and will know exactly where to go when they need you.
Be patient, stay educated, and don’t get discouraged. Public relations is a process, but a rewarding one at that!
To help you understand the business of PR, where to start, and the impact it can have on your business, we’ve outlined a few key notes for you below.

A common misconception is that PR is strictly for damage control, and this just is not the case. There comes a time where things might seem a bit repetitive and mundane—you’re promoting your brand and business and things are starting to feel stale.
Luckily, public relations can help maintain a relatable and “humanized” feel for your clients and potential business partners/customers. Just as relationships start off as a journey, so do businesses.
Showing a depiction of how the company started, where it came from, and where it’s going can help clients and customers resonate and want to know more. Through public relations, you can figure out the best ways to position your brand/business that will help you stand out amongst competitors, and who doesn’t love a good story?
Social media is one of the newest and hottest ways to promote your business and stay relevant, especially in regard to working with social media influencers. Influencers are incredible resources for your business and your audience, and a proper public relations strategy can help build these impactful relationships for you.
It’s important to keep an eye on influencers that reach your target audience and staying informed about that industry (design, in this case) will be helpful in building connections in that community.
If you connect with influencers that are relevant to your brand and business, they will become aware of you, which could lead to increased brand awareness through their audiences. You can start building these relationships by liking and commenting on their social media posts, blogs, connecting via email, etc.

In any industry, consistent research is key. Research is a broad term, but it can include staying in touch with the latest industry trends and tracking analytics, among other strategies.
Keeping yourself informed about your industry (hot trends and questionable issues, alike) can be a life and business-saver. You can count on other professionals in your industry keeping tabs on these items, too, so it’s bound to come up in conversation.
In business, there are few things as embarrassing as finding yourself in the middle of a conversation with a potential client or partner and they bring up an issue you haven’t heard of or know nothing about—especially when you know it’s a topic you really should have more knowledge about! Save yourself the embarrassment and stay on top of the industry news. We promise, it might take a little time, but knowledge is growth.
Speaking of researching and reviewing analytics, this is crucial to truly understanding how much your business is growing over a particular period of time. By reviewing analytics, you’ll have a better idea of what is working for your brand/business, as well as what’s not.

As discouraging as it can be at times, figuring out what is not working is a big eye-opener and can ultimately help you propel your business forward. Brainstorming new strategies and adjusting your efforts in those poorly performing areas will only lead to more growth and success. For example, you might be focusing too much time, effort and resources working on a specific social media platform that hasn’t gained too much traction, despite your hard work.
In this case, the solution would be to allocate your time, efforts and resources into another area that you are performing well in. By focusing on your strengths and understanding what areas you need to improve in, you can learn exactly how to boost your ROI.
Now it’s time for a quick Q&A that will help you tailor your PR strategy for your interior design business…
It really depends on the goals for the designer. If an interior designer is looking for more projects and wants to reach potential clients, then local and regional press publications are going to be best. But, if they have tons of projects and would rather reach the perfect audience and get better quality clients, then a nation-wide focus is more beneficial.
I really believe in the power of earned media, instead of paid media. Earned media is more personal. It is focused on beautiful content and about telling a story. It is more engaging. Ultimately, you get more for your dollar through earn media. Earned media actually costs less than paid media, and you’ll get better results.
Earned media can actually be easily tracked to see what is driving the most traffic to the interior designer’s website if it is done online. You can see how many people clicked on an article and went to the interior designer’s website. In fact, we just had one interior designer tell us that a single local article drove nine new client leads, and five of them were highly qualified, ideal clients. From my experience, Public Relations has the capacity to really enable interior design businesses to excel.

Absolutely. If an interior designer knows their specific, ideal client, all you need to do is research what types of publications your ideal clients read and target them directly. For instance, I worked with one Architect who knew that all of his clients were business travelers and flew first class, so we got him published in all of the airline magazines. And now his business is huge because of it!
At A Design Partnership we believe in surrounding ourselves with a talented team of content curators and storytellers. We craft content driven communication strategies that grow businesses and build enduring relationships between brands and humans. Marketing your brand is most effective when you work from multiple angles to attract your audience.
Our Public Relations team has an unwavering passion for building brands in the interior design, architecture, lifestyle and consumer markets. Combining our creative vision and editor relationships with the industry’s top publications allows us to drive organic growth, create content marketing strategies and secure powerful press placements with earned media.

