Half-Frame Frenzy! The Fujifilm X half is Full Fun
Half-frame frenzy! Fujifilm has made it possible for users to realistically experience nearly every aspect of shooting a 35mm half-frame film camera, downloading the results in a way that simulates an authentic analog adventure and—as a bonus—creating 2-in-1 (diptych) images in-camera or via the snappy Fujifilm X half app. Using it is truly a fun trip, but questions remain.

The Fujifilm X half (also known as X-HF1 in the manual and metadata) is an enormously fun, extremely capable capture device and provides a fantastic retro experience. But with an $850 price tag, this is not a casual, impulse purchase. On top of that, the plastic body will never be mistaken for the robust build-quality Fujifilm is famous for.
Moreover, I wonder how many people want to shoot vertical half-frame images (with or without diptychs) more than a few times, and how many of today’s consumers are even aware that half-frame photography was once a thing?

Fujifilm X half: What it is & How it Works
The Fujifilm X half is a super-compact digital camera made by Fujifilm. It captures vertical-format images 3648 x 4864 (3 x 4 aspect ratio) and, upon command, diptych (i.e., 2-in-1) images 7296 x 4864 pixels. Diptychs are about 35 megapixels—more than respectable resolution—and single images are 17.74 megapixels.
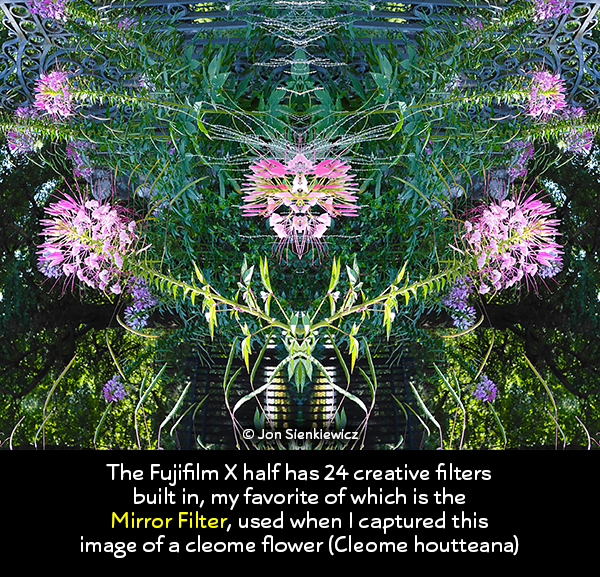
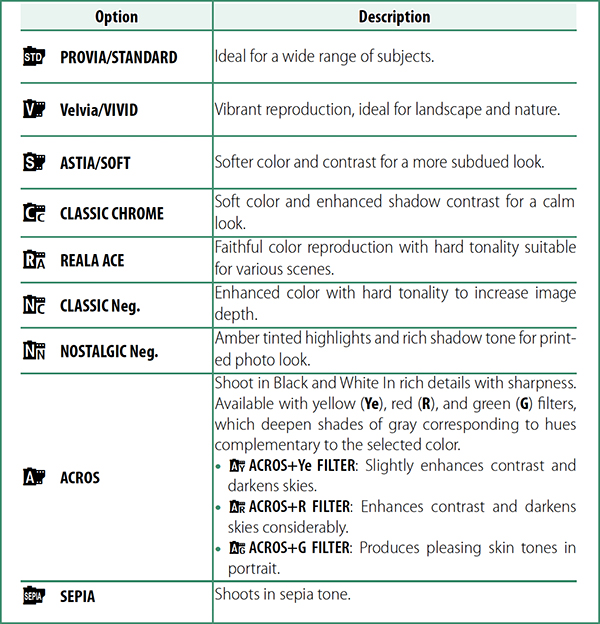
It offers 24 fun and creative built-in filters (including a fascinating Mirror filter) and 13 built-in Fujifilm Film Simulations. It does not have an X-Trans sensor, so if you’re looking for the legendary “Fuji Colors,” this isn’t your train ride.
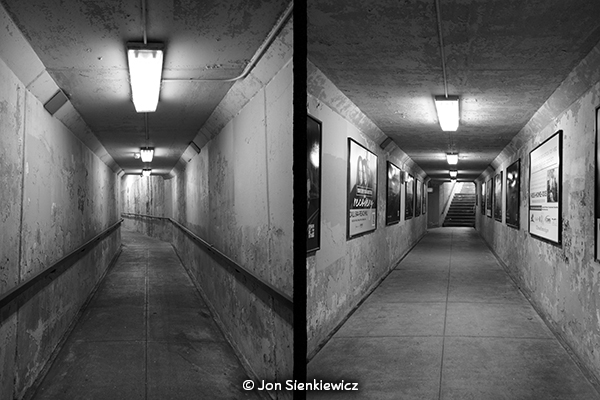
The single most intriguing feature is the Fujifilm X half’s ability to capture “diptychs,” 2-in-1 images that merge two half-frames into a single 7296 x 4864 photo. These can be created in real time within the camera by actuating the mock film advance lever, or after the fact via the Fujifilm app.

Creating a diptych in the Fujifilm app is a simple as can be. Pick the images you want on the left and right sides, decide the color, thickness and style of the line that separates them, and click Done. Optionally, you can mirror either image (flip on its vertical axis) and swap the contents of the left and right panels.

Later, if you hate the dividing line, you can remove it later using the Generative Fil function in Adobe Photoshop.
Film Camera Mode
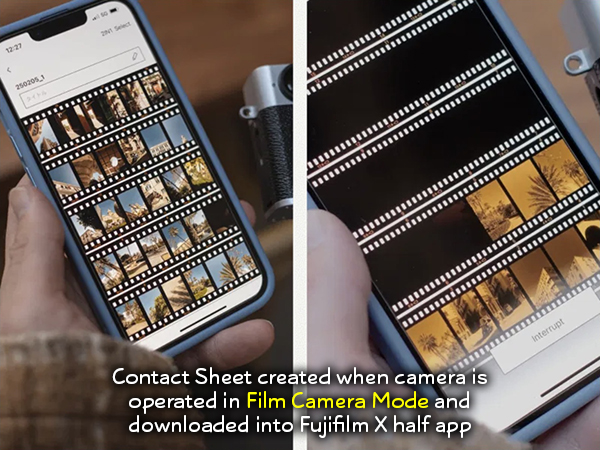
The Fujifilm X half also features an end-to-end 35mm film camera experience identified as the Film Camera Mode. Once selected, users are locked into a virtual roll of film (36, 54 or 72 half-frame exposures), that is exposed frame by frame. The faux film advance lever is used to advance to the next frame. When finished, the virtual roll can be “downloaded” to a smart device (tablet recommended) and a simulated 35mm film camera contact sheet is created, complete with fake 35mm frame perforations.
A couple things. First, this is a lot of work. I love the accoutrements, but after one or two executions, the joy begins fade. Second, bail from the 35mm simulation mode and you cannot go back (i.e., no changing Film Sims mid-roll). Third, and worst of all, in the Film Camera Mode, the LCD is inactive. You must use the optical viewfinder for composition.
Looking at it in a more positive way, the Film Camera Mode successfully captures all the pain and misery of creating half-frame pictures with a film camera. You must shoot a full roll of imaginary film without the ability to view images immediately after capture, and later pretend to download the “roll” to the virtual darkroom app. (To augment the realism, wait a week or so before downloading to experience the anticipation of waiting for your slides to be processed by Kodak.)
How Much for a Half?
Two questions continued to hound me as I used it. “Does this camera have enough features and pizazz to be worthwhile without the half-frame capabilities?”
Yes—at the right price. The size, image quality, film sims and filters, plus the 18-megapixel resolution, are sufficiently appealing. But not for $850. How much, then, are the half-frame and diptych features worth?
![]()
DIY Diptychs and Triptychs
There are, of course, other ways to make diptychs. It took me only a few minutes to create templates for diptychs and even triptychs similar to diptychs created in the Fujifilm X half app. Admittedly, the app is easier to use—especially on a tablet (not so much on a tiny smartphone monitor)—but going the full Photoshop route provides numerous editing possibilities including the Vertical Canvas Flip, which the Fujifilm app calls “Mirroring.”

Key Features of the Fujifilm X half
Excellent image quality
Large 1-inch sensor
18-megapixel sensor (35-megapixel equiv in 2-in-1 diptych mode)
10.8mm f/2.8 fixed-focal length lens, 32mm equivalent
Portrait orientation half-frame format
Optionally creates 2-in-1 diptychs in-camera
24 fun & creative built-in Filter Effects
13 built-in Fujifilm Film Simulations
Outstanding retro styling
Functional Film Advance Lever
Manual Aperture Ring with “A” setting
Close focus to 4 inches (10cm) from sensor
Exposure Compensation Dial on top (+3/-3)
Key Features of the Fujifilm X half (cont.)
Super small 4.2 x 2.5 x 1.8 inches (106 x 64 x 46mm)
Light—just 8.5 ounces (240 grams) with battery & card
Optical window viewfinder
2.4-inch touchscreen LCD
Secondary touch-LCD for Film Sim and Filter selection
1080 x 1440 video recording
Date stamp imprint option
Long battery life
Direct print capability with select INSTAX printers
Available in three colorways: black, silver & charcoal silver
Bluetooth and Wi-Fi connectivity
Pairs with smart device (phone/tablet) for download and more

The Two 900-pound Velociraptors in the Room
Build Quality
Hand it to me without explanation and I would never guess it’s a Fujifilm camera. Sorry. The many Fujifilm cameras I own are all solid, robust and have an excellent high-quality feel. The X half does not.
One the other hand, the physical appearance, fit and finish are all positively stunning. Available in black, silver-color or attractive charcoal silver, the camera is simply gorgeous.
Pricing
During this current maelstrom of indefinite import tariffs, it’s difficult to evaluate prices. Buckle up for future turbulence. Even so, $850 strikes me as a lot to pay for a narrow niche camera. But that’s just me. You know your pocket depth better than I do. For reference, today’s price for a Fujifilm X100VI, when in stock, is $1799 at B&H.

Pentax 17 35mm Half-Frame Film Camera REVIEW
Fujifilm Announces X-E5 & New Compact 23mm Lens
The BEST Fujifilm Film Simulation Resource
Small Wonder: Fujifilm GFX100RF
Fujifilm X-T5 Or X-H2? Which Is For You?

Identity Crisis
Is the Fujifilm X half for emerging creators? Probably not, because that group is not likely to have much knowledge of classic half-frame cameras. Besides, emphasis (in both hardware and in the app) is on creating 2-in-1 diptychs, not making images optimized for sharing on social media (although direct sharing is possible).
Gen Z? The aspect ratio is similar to the smartphones they use hourly, but—forget about it—they scarcely even know what film cameras are, let alone niche cameras. Why on earth would they be interested in replicating “the 35mm experience” they hitherto scarcely even knew existed? Particularly the hybrid variety of half-frame? Nope; not gonna get on the Gen Z radar.

Is the target consumer a person stepping up from a smartphone to a real camera? No, not if the Fujifilm X half is going to be that person’s one and only camera.
Then, for whom is the Fujifilm X half most appealing?
In my mind, the most likely candidates are older gear enthusiasts already familiar with the 35mm half-frame format. The Olympus PEN series and several popular compacts dominated this category back in the day. The high-quality, interchangeable lens Olympus models ruled from their introduction in 1959 through the 1980s. Devotees followed for years, and in any case, they are not likely to be youngsters.
If you’re not old enough to recognize the Olympus PEN half-frame reference immediately, you may be too young to fully embrace half-frame digital photography as a retro experience. But you may very well enjoy it as something entirely new with ancient roots. Sort of the same way a Gen-Z kid enjoys a 1950s recipe for tuna noodle casserole.

Conclusion
Mea culpa: I was predisposed to absolutely love the Fujifilm X half for two big reasons. I own and use several Fujifilm cameras, and count my X-T5 as one of my top favorites. Secondly, I began using half-frame cameras to create diptychs many years ago—dating back to my early adventures with a Canon Dial 35 (actually three Dials, all of which died in action). This all happened long before the label “diptych” was coined.
Rest assured there is an impenetrable firewall between my personal favoritisms and professional evaluations. Objectively, I really like the Fujifilm X half and thoroughly enjoyed using it. Despite the concerns I express above, it’s a fun camera that produces excellent images.

In the final analysis, I warn readers: Do not order this camera sight unseen, that is, without first handling it, operating the menus, and being satisfied that you’re making an informed decision. Go to your local camera store, if you’re lucky enough to have one nearby, and decide there.

Scorecard
PRO
• Very, very small—easily slips into a pocket or purse
• Excellent image quality, color balance and autofocus
• Optionally creates 2-in-1 diptychs in-camera
• Super fun and easy-to-use app for expanded functionality
• Outstanding close-up capabilities (10cm / 4 inches from sensor)
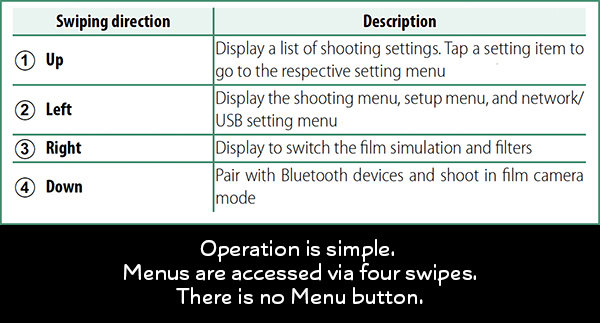
• Clever secondary LCD monitor to change film sims & filters
• 24 fun & creative built-in Filter Effects
• 13 built-in Fujifilm Film Simulations
• Long battery life (Fujifilm claims 880 frames on one charge)
CON
• Unsatisfying, plasticky touch/feel
• Lack of Raw format (which would enable film sim options in post processing)
• Very limited editing options in Fujifilm X half app
• High price ($849) limits potential audience (but this may be our new reality)
You can read more about the Fujifilm X half on the company’s website.
Fujifilm sells refurbished cameras and lenses directly to consumers. Inventory changes frequently so check their website often.
Join the Shutterbug Community!
Sign up for an account—it’s easy and FREE. Subscribe to our FREE newsletter (find the sign-up form on our homepage) and bookmark Shutterbug as a Favorite on your browser.
Visit our Gallery section and spend five minutes or less uploading your best shots once a week. You might even become a Shutterbug Photo of the Day photographer!
In the Galleries, you’ll see the incredible work of thousands of photographers from around the world. We encourage you to add your own images to our ever-growing collection. It’s an excellent platform to connect with other photographers and share your knowledge and passion for photography.
(If you’re worried that submitting images to the Photo of the Day gallery might be complicated, it’s not. Check out these short 1-2-3 directions.)
—Jon Sienkiewicz


