With two major rivers, two Roman theatres and an arena, and 2,000 years of urban architecture listed by UNESCO, Lyon also has two famous brothers to thank for putting the city at the forefront of modern entertainment. Gillian Thornton picks five of her favourite things to do in the heart of the Rhône Valley.
Enjoy the magic of the movies

Lumiere Museum
Think cinema was born in Hollywood? Wrong. The world’s first moving pictures were shot in Lyon, 130 years ago, by Auguste and Louis Lumière. The eldest of six children born to painter and photographer Antoine Lumière, the brothers invented the cinematograph in 1895, the first machine capable of recording moving pictures. Today, their former home is a fascinating museum to the early days of cinema, featuring archive film from around the world, a wealth of artefacts, and hands-on exhibits.
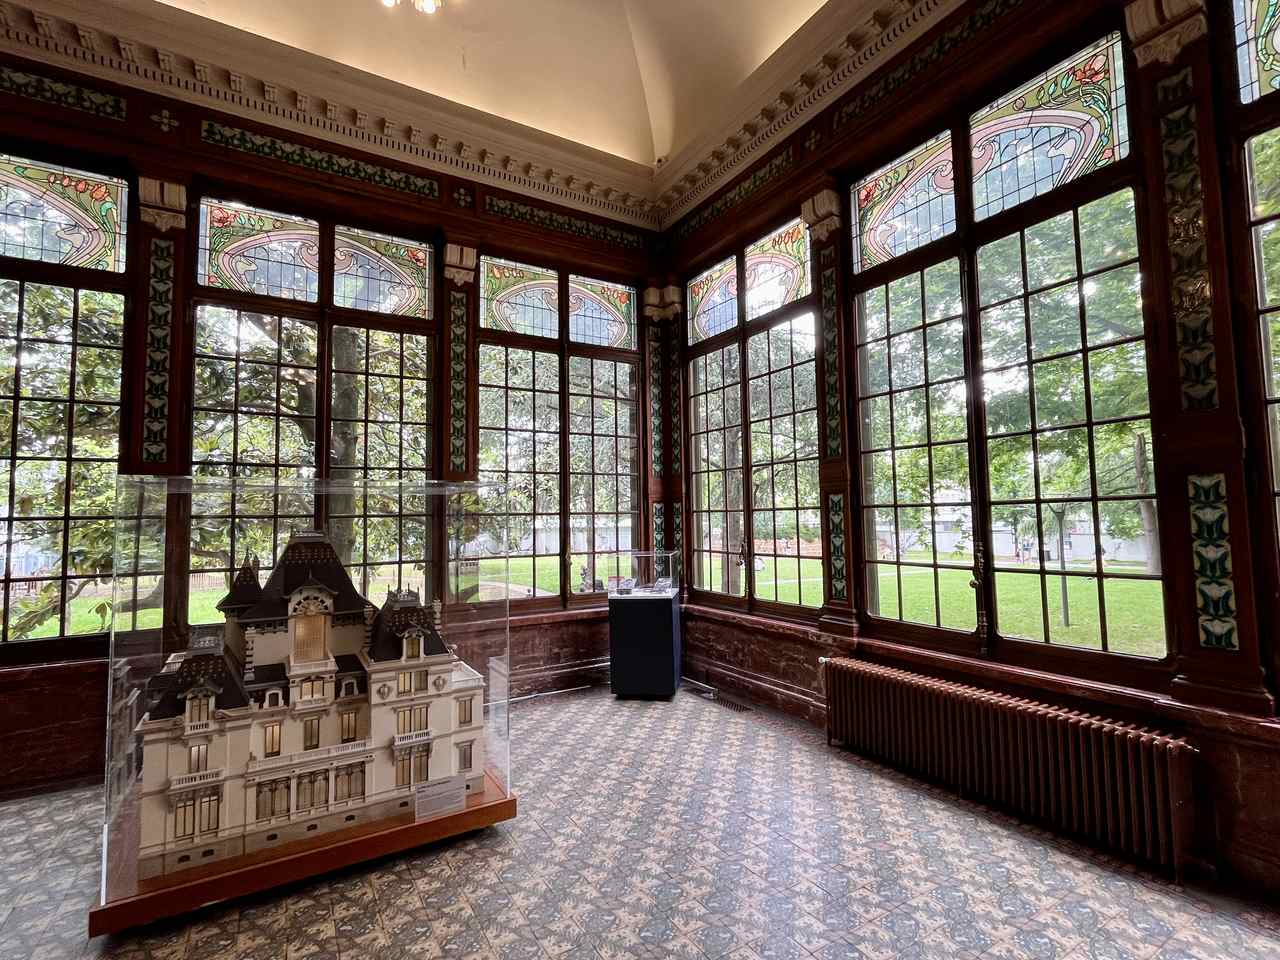
Lumiere family home
In an age when we can watch movies on a mobile phone, I am unexpectedly humbled to stand on the spot where the brothers placed the camera for that pioneering sequence of workers leaving the Lumière factory. This mini-movie lasted just 45 seconds but launched a global industry. The old factory is now the Hangar cinema, screening international movies and hub of the prestigious Lumière Festival every October.
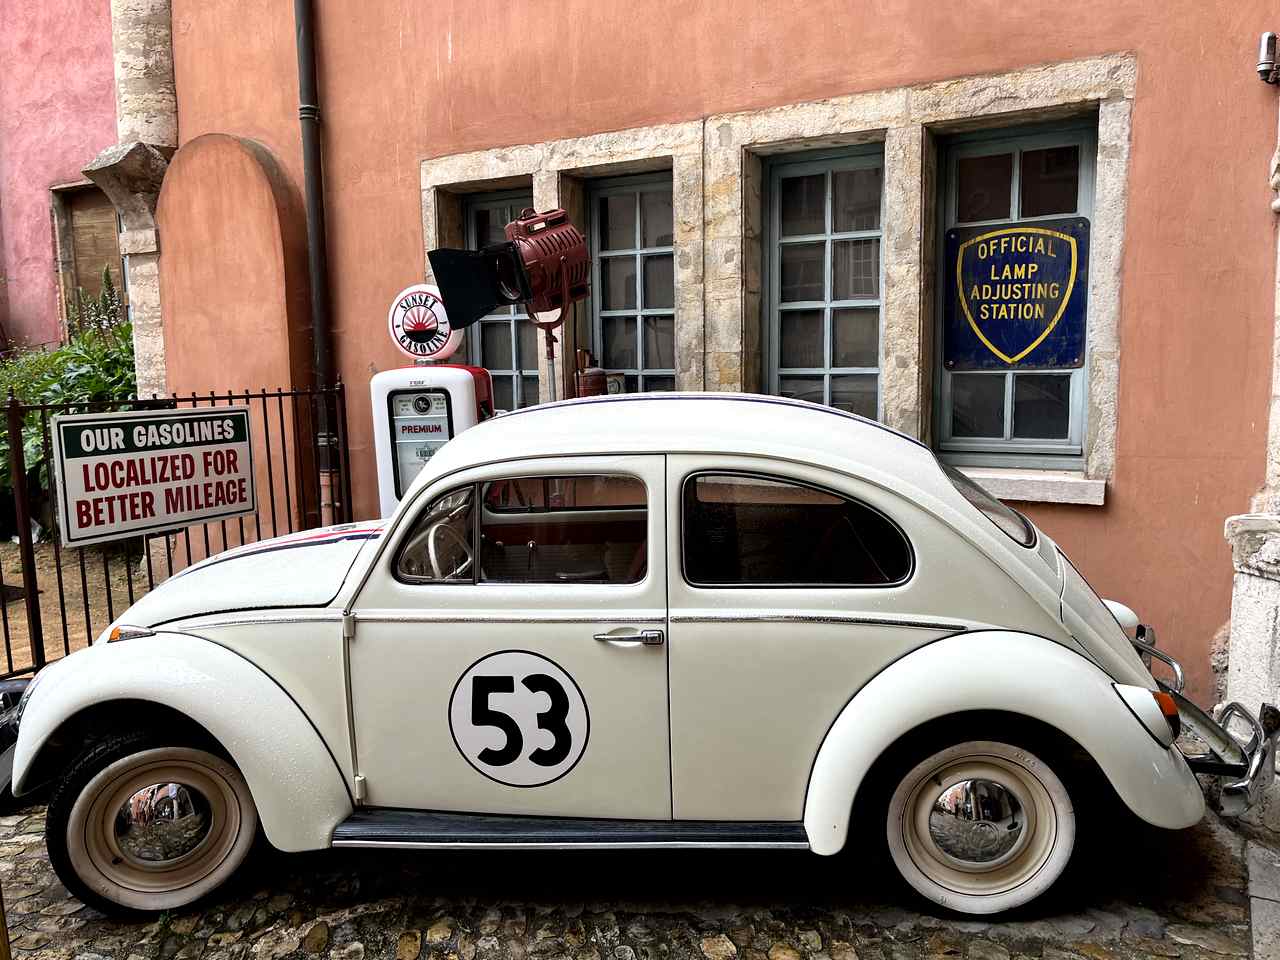
Herbie, The Love Bug
Movie buffs can also enjoy more than 1000 original movie props from around the world at the Museum of Cinema and Miniatures in the atmospheric surroundings of a Renaissance building in Vieux Lyon, the Old Town. Watch out for Herbie, The Love Bug; Harry Potter’s glasses; and some seriously gory horror movie props.
Walk through 2000 years of urban architecture

Lyon from Fourviere Hill
The beautiful Renaissance buildings are just one element of the urban architecture that earned UNESCO World Heritage status for the city, continuously developed across 2000 years. For a panoramic view, stand on the hilltop terrace beside the 19th century basilica at Fourvière.
I love the way you pass seamlessly from one era to another as you walk through this foot-friendly city. Tread on Roman flagstones at the twin Roman theatres in Fourvière; explore the narrow streets and hidden passages – traboules – of the Old Town; and stroll amongst the elegant 18th century townhouses and squares of the Presqu’Ile, the peninsula between the Rhône and Saône rivers. There’s a different atmosphere again on the hillside of Croix Rousse where silk weavers sat behind tall windows in the early 19th century to work the new Jacquard looms.

Musee des Confluences
Ultra-modern buildings are popping up across the city too, especially in the area around Part-Dieu, one of Lyon’s two big stations. I love the bold architecture of the Musée des Confluences, located at the tip of the peninsula. Dedicated to the origins and future of humanity, the museum’s permanent collection is enhanced by temporary exhibitions and events.
Discover the city’s artistic heritage
 Lyon boasts more than 100 murals, painted in the 1980s. Take a guided tour or explore independently. At the top of Croix Rousse hill, the enormous Mur des Canuts – the name given to Lyon’s silk workers – is updated regularly with new scenes. Look out too for the fresco of famous Lyon personalities on the banks of the Saône, and the giant City Library with its piles of books. The wall art tradition continues to evolve with a new wave of street artists and an annual Peinture Fraïche festival in October.

View of the Opera House towards Fourviere, Lyon
There is art to suit every taste at Lyon’s Fine Arts Museum close to the Hôtel de Ville, or Town Hall, but if you are a fan of musical arts, book one of the behind-the-scenes tours of the nearby Opera House, home not just to a resident opera company but also a ballet company and orchestra. An extraordinary building that combines 19th century grandeur with a vast domed roofspace and five floors underground added in 1993 by architect Jean Nouvel.
Eat at a traditional bouchon

Ile Flottante, Daniel et Denise
For authentic local dishes in traditional homely surroundings, check out the 25 restaurants accredited with a Bouchon Lyonnais label. The name comes from the bundle of straw used to groom horses at coaching inns. Expect paté en croute and sausages, coq au vin, Salade Lyonnaise with bacon and poached egg, and delicately flavoured pike quenelles. And I still dream about the fluffy dome of Ile Flottante dotted with crispy red praline, a signature dish at Daniel et Denise in Rue Crequi, one of three branches across the city centre.
Lyon was also home to the late Paul Bocuse who helped establish the city as the Gastronomic Capital of France with his innovative style of nouvelle cuisine. You can still eat at Bocuse brasseries – try Le Nord, Le Sud, L’Est et L’Ouest for regional French dishes – and browse the stalls at the indoor market, renamed in his honour.

Live music at La Commune food court, Lyon
Many of Lyon’s most innovative chefs have trained under the great man who died in 2018, but the city also encourages a new generation at La Commune in an eclectic mix of cuisine. At this ‘incubator for chefs’, entrepreneurs can rent a kitchen in a giant food court to try out their concept for a fixed period of months.
Indulge in retail therapy
A large area of the Presqu’Ile is now pedestrianised between Perrache station and the Town Hall. Here you will find both high-end and High Street retailers, as well as independent boutiques. Edible gifts to take home? Drop in at a branch of Pralus for handmade chocolates, praline, and the scrumptious Praluline, a domed brioche studded with pinky-red praline.
For craft items and gifts such as pottery, jewellery and interior décor, browse the small boutiques now occupying some of the former weaving workshops in Croix Rousse, the city’s latest on-trend area. And for retail therapy with added atmosphere, head to Vieux Lyon for traditional souvenirs such as silk scarves, as well as paintings and framed photos of those colourful facades and Italianate loggias inside traboules. In town on Sunday? Then spend the morning browsing the design and craft markets on Quai Bondy beside the Saône.
Where to stay: Gillian stayed at the Hotel de Verdun 1882, a quiet boutique hotel on the Presqu’Ile close to Perrache station and within easy walking distance of all attractions.
Visitor information: Find information on attractions, accommodation, and restaurants at Visit Lyon. For free access to visitor attractions and public transport, invest in a Lyon City Card, available to buy at stations, tourist offices and key cultural outlets, or order on line for 24, 48, 72h or 96h, with or without airport transfer on the Rhône Express.
The post Top 5 Things to do in Lyon, France appeared first on The Travel Magazine.




 Lyon boasts more than 100 murals, painted in the 1980s. Take a guided tour or explore independently. At the top of Croix Rousse hill, the enormous Mur des Canuts – the name given to Lyon’s silk workers – is updated regularly with new scenes. Look out too for the fresco of famous Lyon personalities on the banks of the Saône, and the giant City Library with its piles of books. The wall art tradition continues to evolve with a new wave of street artists and an annual Peinture Fraïche festival in October.


