Is Very the new Habitat? It is if these 6 five-star garden furniture buys are anything to go by
These are the best-rated buys from the Very sale

We’re going to wrap up the week with an insightful discussion from the Yorkshire Photo Walks Tube channel with four transformative questions that all photographers need to ask themselves whether they’re experienced or just getting started.
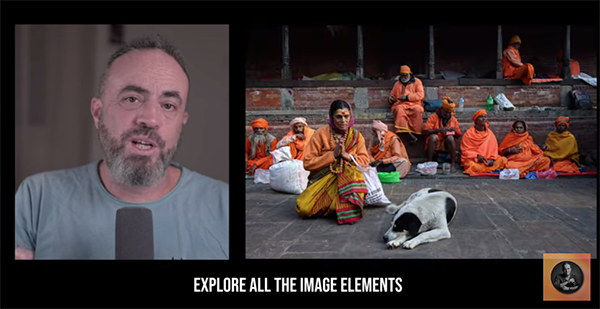
By reflecting upon the answers you’ll discover how to break free from the mundane, and craft creative images that reflect your unique vision. British pro Tom Marsh, AKA the Flat-Capped Photographer, is also a respected tutor whose popular YouTube channel has a unique emphasis full of inspiration and takes a philosophical approach to the making of photographs.
Tom explains why his quartet of questions is so illuminating, while sharing his personal answers and insights. The goal is to reflect upon your own thoughtful responses that he promises will represent “a great opportunity to redefine your creative journey and capture photographs that truly stand out.”

We all reflect upon what Tom Says are “generic” questions like What camera should I buy?” How should I compose this scene? Which settings are appropriate? Am I getting this right? His point is that these types of queries are of little value because “if you ask generic questions you’re going to get generic answers” that don’t really help expand your skills and creativity.
Tom says a more valuable approach begins by reflecting upon the type of photography you enjoy most. This may seem superficial, or even a bit obvious, “but what we’re going by asking this is really honing in on what is that interests us and why we pick up a camera in the first place.”
This could be a particular genre, a spectacular location, or a specific technique that always gets your creative juices flowing—even when you find yourself in an artistic rut. Once you identify a clear direction, the inspiration that follows will result in “photographs that are unique to you.”
This 10 minutes of introspection also involves pondering exactly who it is that you want to impress with your photos, whether it’s family and friends, Instagram followers, gallery owners, or potential customers at local events. Tom explains why the best possible answer may be “I want to impress myself.”
At this point you’re halfway through this interesting episode that can make photography more fun and enjoyable while significantly enhancing the quality of your work. It can be a very rewarding exercise. There are more thought-provoking videos on Tom’s instructional YouTube channel, so make it a point to visit soon.
We also recommend watching a tutorial we featured with another accomplished pro who demonstrates seven straightforward techniques for capturing perfectly exposed available-light portrait photographs indoors or outside.
To celebrate the 10th anniversary of their AI-powered photo-management software, Excire is sponsoring People in Focus, a free-to-enter contest for people of all skill levels. The contest started June 1, 2025 and runs through June 30th. A total of $7000 in cash prizes is being awarded. That’s a serious purse, but what makes People in Focus unique is the umpiring. The competition is being judged entirely by artificial intelligence.
AI Trained by Expert Photographers
Excire’s in-house AI model has been trained by expert photographers to evaluate each image based on aesthetic characteristics. This allows for instant scoring, as well as a live leaderboard that updates in real-time.

Get to Know Excire
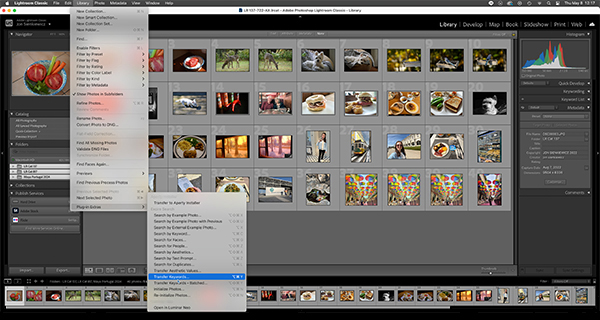
Excire Foto 2025 is a standalone digital asset management utility that assists users in organizing, searching and accessing their images and videos. Excire Search is a Lightroom plugin with most of the same capabilities. Both leverage powerful AI technology to provide features such as text-prompt search, facial recognition, GPS search, and searching by the keywords you previously assigned. Excire also delivers potent culling functions based on parameters like sharpness, subject type and similarity.
Excire Foto 2025 also can perform AI-powered aesthetic ratings, a feature that’s being leveraged in this contest.
For more information about Excire Foto 2025, read this resent Shutterbug article: Clean Up Your Photo Library Mess with Excire Image Management Software.
Excire offers 14-day free trials for their standalone program, Excire Foto 2025, as well as for their Lightroom Classic plugin, Excire Search 2024.
Snap Judgement
Excire has explained that they are definitely not proposing that AI can replace subjective human taste. Their stated goal is to generate discussion around photography and AI, and have some fun at the same time. They pointed out that Excire AI has already been used to judge several international photography competitions. Additionally, Excire has conducted AI-judged contests of their own, but on a smaller scale.

People in Focus
Visit Excire’s contest website for official rules and complete information. Here are some of the highlights.
There is no cost or obligation to enter. Note that you must be 18 or older to participate. Some entries may be shared on Excire’s social media. Add your own © copyright indicia if you must.
First Prize: $4000 (USD)
Second Prize: $2000 (USD)
Third Prize: $1000 (USD)
To enter, visit: www.competition.excire.com.
All judging is done instantly, and you receive your current competition ranking the moment you submit an image. You can submit one photo per day until the contest ends on June 30, 2025.
When you submit your first image to the competition, you’ll receive a special 20% off discount code that can be used on all Excire products (valid through June 30th). There’s no obligation, however.
Excire encourages users to “not think too narrowly” when selecting their best shots to enter. Excire pointed out that eligible subjects include (but limited to) headshots, studio portraits, travel and environmental portraits, street candids, people-focused event photos, and wider scenes that feature people as a dominant element.

My Conclusion
Ambivalent about using AI to judge a photography contest? Not me. Remember the AI model was tutored by expert photographers, so the standards are consistent and blended. In many ways that’s inherently less biased than one individual making the decisions.
Unfortunately, I’m not eligible to enter. But I’ll bet it’s a thrill to receive a snap judgement the instant you upload a snap.
Join the Shutterbug Community!
Sign up for a free account. Subscribe to our newsletter (see sign-up form on our homepage) and bookmark Shutterbug as a Favorite on your browser so you can check back often. Visit our Gallery section and spend five minutes or less uploading your best shots once a week or so. You may even become a Shutterbug Photo of the Day photographer. In the Galleries you’ll see the amazing work of thousands of photographers from all over the world. Add your own images to our ever-growing collection. It’s a great way to connect with other photographers and share your knowledge and passion for photography.
—Jon Sienkiewicz
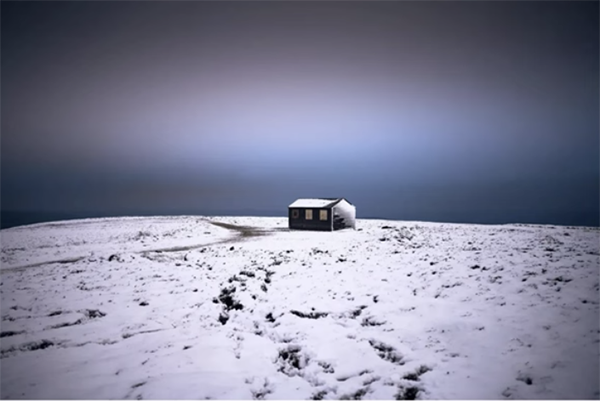
We often sing the praises of shooting at wide apertures to achieve soft, blurred backgrounds that accentuate the key element within the frame and guide a viewer’s eyes exactly where you want them to go. Pro Gil Kreslavsky takes a contrarian view in this interesting tutorial by demonstrating why he recommends stopping down your lens instead.
Gil is a notable Israeli photographer who specializes on travel, documentary and street photography. He’s also an experienced instructor whose popular YouTube channel shares practical insights, real-world tips, gear discussions, and behind-the-scenes glimpses from his workshops and travels.
Here’s how he summarizes today’s eight-minute episode: “This video challenges the traditional view of photographic framing, and I argue that setting your aperture to f/11 is the crucial first step in building strong compositions.” His reason for stopping down can be described on one word: “Context.”

Gil admits that shooting wide open does isolate a key element and may create an effective effect in certain situations. As pleasing as the image may look, however, this familiar approach also “rips a subject out of the scene”—thereby compromising context with regard to whatever story you’re trying to tell.
In other words, all those potential compositional elements like lines, curves, and shapes become so blurred that they no longer strengthen the image. Of course all this depends on the specific task at hand, and sometimes a burred background is necessary for decluttering a busy shot.
But here’s Gil’s point: “If you make a habit of always shooting at wide apertures you’re missing out on an entire world of effective composition. Your missing the chance to create images that aren’t just pretty, but also very interesting.”
Put another way, some common habits, like the one we’ve been discussing, can result in all-to-common photos and actually stymie your creative growth. Gil digs into all the details and illustrates the thoughtful technique with a variety of eye-catching images.
Be sure to explore Gil’s instructional YouTube channel where you’ll discover other outside-the-box photography tips and techniques.
We also encourage you to check out our helpful beginners guide that explores the essence of high-contrast b&w photography and demonstrates everything you need to understand for capturing attention-grabbing monochrome images that transcend the norm.


