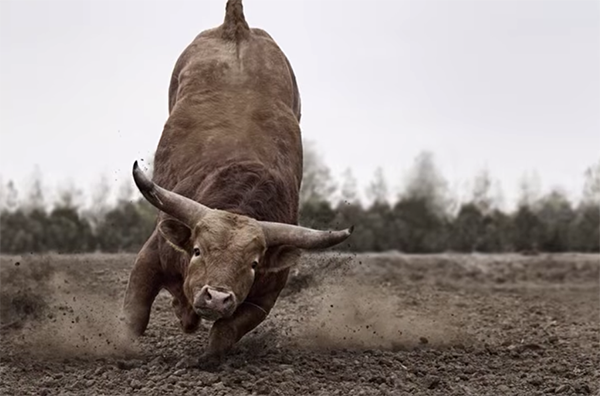
Use Custom Camera Modes for Epic Photos of Birds & Mammals (VIDEO)
One important wildlife photography technique that deserves far more attention involves configuring your camera with two or three Custom modes for instantly switching between settings for action, low light, or general photography.
Instructor Paolo Sartori kicks off this eye-opening tutorial with a question: “Have you ever missed a shot because you were fumbling around with camera settings like shutter speed, aperture, or an incorrect focus mode?” And suddenly the perfect moment is gone forever.
Photographers often experience these frustrations because they neglected to spend a few moments creating Custom modes that can dramatically accelerate their workflow during changing conditions in the field. Sartori is a notable Italian nature and wildlife photography pro who insists that “this simple workflow has saved me countless times in the field.”

And before we forget, be sure to grab Sartori’s free Wildlife Photography book by clicking on the link in the description beneath the video. As for today, they’ll be no more missed opportunities once you take advantage of what you’ll learn in the next seven minutes.
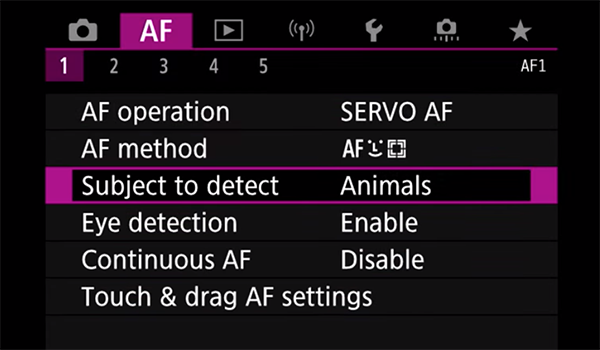
Sartori uses a Canon camera to demonstrate how to set up the Custom modes he prefers. The procedure is much the same with other popular brands, and he includes some specific tips for Sony and Nikon users.
Keep in mind that the Custom modes you create are a very subjective matter, so just don’t copy Sartori’s personal settings and call it a day. Rather, listen to him explain why he makes the choices he does, and then use the same rationale to configure Custom modes that are most helpful and appropriate for your specific style and the types of images you shoot most.
Your batting average is guaranteed to improve once you’re prepared to avoid curve balls by quickly changing your stance. Then head over to Sartori’s popular YouTube channel and browse his other helpful how-to videos.
On a related note, we also suggest watching the bird photography primer we recently featured with an accomplished Canadian pro who discusses five common bird photography mistakes and provides straightforward tips for solving them in the field.