Masala Zone restaurant review, Covent Garden, London
You have likely already experienced dining at one of Masala Zone’s venues. This chain of brasserie-style restaurants has been gracing London’s most trendy streets, including Soho and Piccadilly Circus, for over 24 years. Their stated mission is to serve “proper” Indian food.

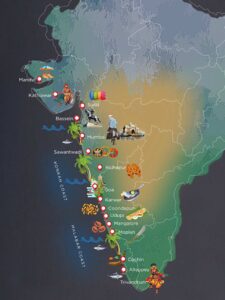
West Coast
Even if you have dined there before, now is a great time to visit because for 12 weeks only, Masala Zone is rolling out a brand new menu – West Coast Voyage 2025 – highlighting the food of this region of the Indian subcontinent.
This is interesting because the West Coast has a population of over 100 million people and spans numerous cuisines and sub-cuisines, some of which are on this new menu.
It promises plenty of flavours comprising a selection of Thali, Curries, House Biryanis and Grazing Small Plates such as Goan Spiced Crab Cake served with vindaloo mayo, Baby Squid Chili Fry from Cochin served with a tomato chutney and Cochin Lamb Curry with roasted coconut from Kerala.
Excited to try these new dishes, we hot-footed it to the Masala Zone on Floral Street in Covent Garden.
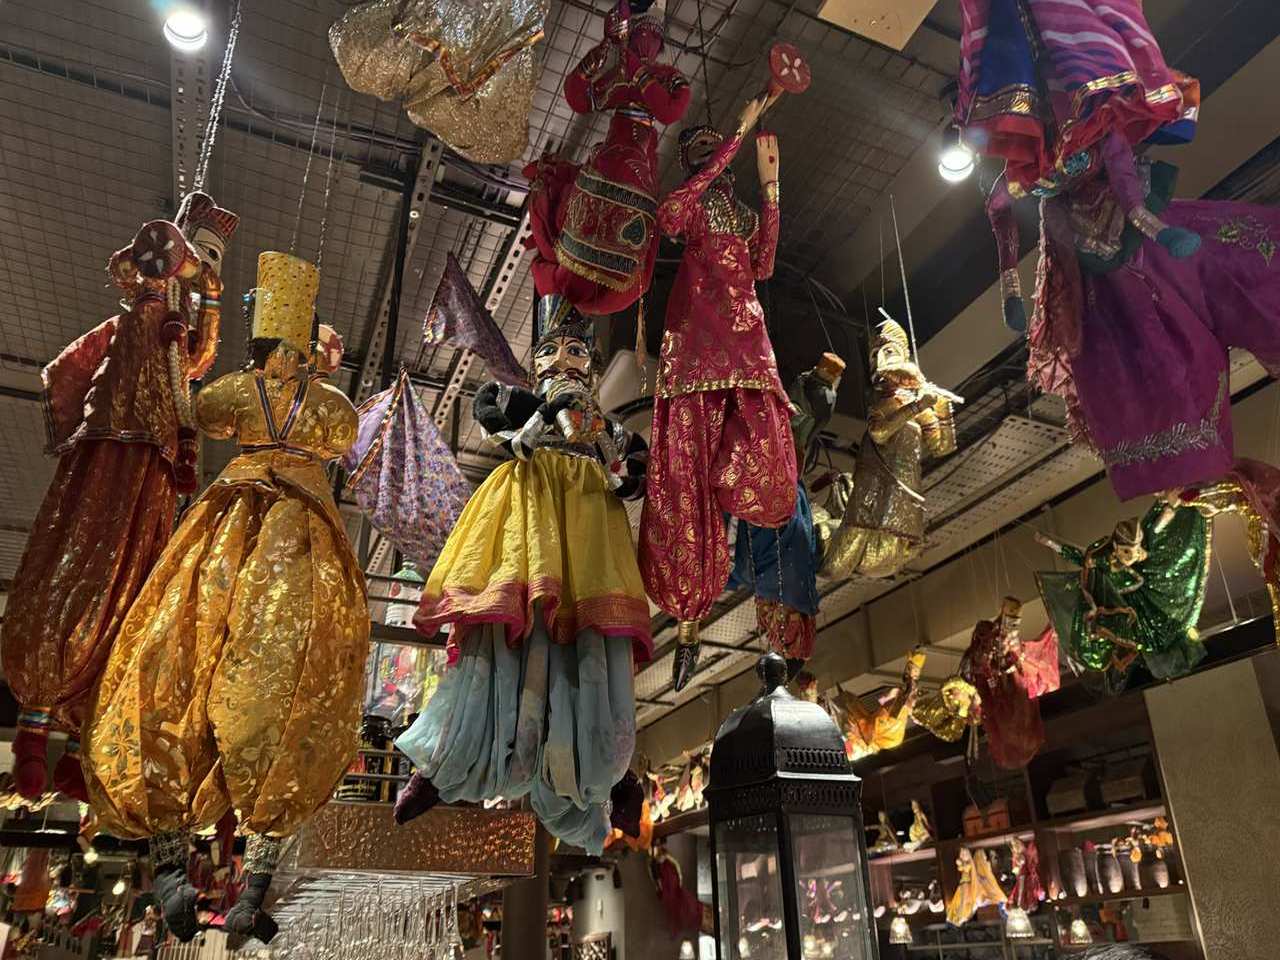
Inside is a wonderful scene of distinctive theatrical and highly colourful puppets dressed in gold, red and purple from Rajasthan hanging overhead, scarlet drapes, sumptuous chandeliers, ornate old wooden temple doors, wooden floors and dimmed lighting. It’s a great vibe and heady scene.

Masala Zone Rajasthani puppets
Must-have poppadoms arrived with mango chutney, coriander, a mint sauce and a pretty hot garlic and chilly sauce while we perused the menu. We spotted a black pepper and saffron Negroni on the cocktail list and soon we were sipping a delicious combo of flavours.
I liked the idea of sharing and ordered a quartet of dishes from the Grazing Menu. The Chow Patty Puri Pops is a fun dish from Bombay’s Chowpatty Beach and comprises six hollow crispy-fried puffed balls filled with potato, chickpeas, onions, spices. They come with tamarind water on the side – the idea is to pour the tamarind water over the balls, pop them in your mouth for a flavoursome crunchy bite. Great fun to eat.
Bombay Vada Pao Sliders, are two deep-filled lightly spiced vegetable patties that come in a home-baked caramelised onion pao bread, an example of street food, and are wholesome and tasty.
Delhi Samosa Chat is no ordinary samosa; this one comes smashed and topped with yoghurt and flavoured with a chutney resulting in hearty bites of spicy cooked potatoes and peas.
I’m not into seafood generally but took a punt on the Karwari Crispy Prawns. This earthy dish from the Malabar Coast turned out to be an absolute delight, crispy on the outside, soft on the inside served with raw mango and chutney.
We could have ended our meal there, but instead, we ordered a couple of main dishes; Goan cereal herb chicken tikka. This is a dry dish of soft chicken pieces in a herb crust and so the waitress suggested ordering a black dal makhani, to go with it.
My dining partner could not decide, so the waitress brought him samples of three sauces so he could taste test. The Cochin lamb curry with roasted coconut is considered to be the Rogan Josh of Kerala, the Alleppey prawn curry sauce from the Malabar coast, a blend of raw mango, ginger, green chillis and turmeric and the Kolhapur paneer. The latter comes from Kolhapur and is a blend of pepper, red chillies, star anis, Blackstone moss and dried coconut.
The Alleppy Prawn curry came top of that taste test and arrived in a bowl of bright yellow curry. The sides were pilau rice, Peshawari nan and garlic nan. There was a selection of desserts and though tempted by the kulfi and the mango srikhand fruit cup, we simply couldn’t.
Verdict:Masala Zone has a wonderful vibe perfect for friends or a night out with family, alongside tasty and various dishes. When you are craving Indian cuisine Masala Zone fits the bill.
Masala Zone Covent Garden
48 Floral Street
London WC2E 9DA
Tel: 020 7379 0101
[email protected]
More info here.
The post Masala Zone restaurant review, Covent Garden, London appeared first on The Travel Magazine.


