Heating experts warn against cranking up the thermostat to heat your home quicker – this is what you should be doing instead
You need to stay away from this social media trend
How about an “advanced” shooting technique that’s easy enough for anyone to master in minutes? What makes this method so cutting edge isn’t because it requires special skills, but rather because it delivers eye-catching effects that stand out from the crowd.
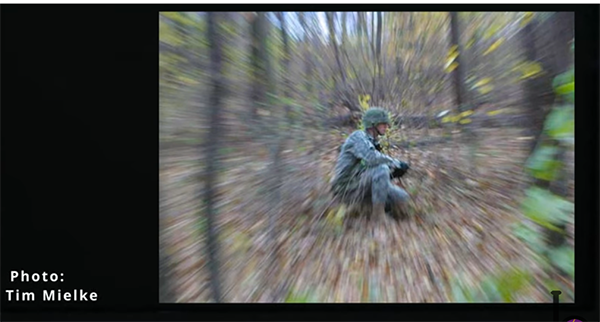
The topic of this tutorial from the Better Pix YouTube channel is a unique form of motion blur that’s created by zooming during a longish exposure while slightly moving the camera. All you need to get the job done is whatever camera you own, any zoom lens in your arsenal, and the tips described in the next three minutes.
Our unnamed instructor puts it like this: “In this video you’ll learn how to create motion blur in the camera and not cheating with post-production tricks.” We recommend having your camera and lens handy as you watch, so that you can try it yourself as the simple steps are explained.

You may have tried zooming in or out while capturing a shot, but today’s approach includes a unique twist that accentuates the effect. That’s because it involves shifting the camera up-and-down, side-to-side, or in a circular motion as you zoom. The magic is accomplished while shooting handheld.
You’ll learn the best way to brace your camera as you move the camera while zooming. Our instructor covers the necessary settings and suggests this as a starting point; “I recommend a shutter speed of 1/8—1/15 second while zooming the lens during that slice of time.”
As you’ll see, this technique involves a bit of experimentation with shutter speed, ISO, and aperture depending on prevailing light levels and the specific subject at hand. In other words, there’s no right way to achieve a variety of compelling effects. Just play around with the suggested variables until you capture a photo that really strikes your fancy.

The finer points of this simple approach are best understood by watching the following video demonstration, so we won’t bother summarizing them here. We’re pretty sure that you’ll be inspired to get out there and see what you can create.
And if you’re thinking about investing in new gear, be sure to watch the recent video we featured with another knowledgeable pro who explains how to determine if the camera you own is the right choice for your style of photography—or if it’s finally time to invest in something new.
Today’s post-processing tutorial is unusual because it doesn’t involve improving the look of an image in any way; no color or exposure modifications, sharpening tricks, or any other enhancements. The quick video is important nonetheless because it demonstrates how to significantly streamline your workflow.
The eye-opening episode from the Sandra D. Imagery YouTube channel is all about Photoshop’s timesaving Guide tools which are often ignored by beginners and pros alike. We guarantee that you’ll update your Photoshop workflow according after watching the seven-minute lesson.
Sandra is an accomplished photographer and Adobe expert who prides herself on helping other creatives with easy-to-follow explainers that reveal image-editing tricks and techniques. As she says, “Photoshop Guides are imaginary lines that help guide your eye” when evaluating composition. This is an easy way to confirm that nothing in the frame is crooked or askew.

Using a horizontal guide, for example, helps you make sure that the horizon is perfectly straight when shooting landscapes. Likewise, a vertical guide enables street shooters to quickly check the alignment of streets signs, lamp posts, or side of buildings. Other common examples abound.
Before getting started it’s important that Photoshop’s Ruler is enabled and appears atop the workspace. If you don’t see the Ruler simply click on the View tab and then select View from the dropdown list of options.
Once you’re all set up, click and hold on the ruler and drag the line down to evaluate a horizonal line like a horizon. Similarly, you can quickly ascertain whether or not a vertical line is straight by clicking and dragging the vertical Ruler to the right (this one is found at the left side of the screen).

Now that you’ve identified any problems it’s super simple to align everything properly by following Sandra’s straightforward instructions. Then head over to her popular YouTube channel for more post-processing wisdom.
We also recommend watching the basic tutorial we featured recently with another image-editing expert who lays out a complete beginners guide to your camera’s powerful EV-Compensation feature that enables you to shoot photographs with perfect exposures every time.
