
Enhance Landscape Photos with Realistic Fog in Lightroom (VIDEO)
All photographers who shoot in the field understand why atmospheric conditions like drizzle or mist enables them to capture compelling images full drama and emotion. But what those times when Mother Nature fails to cooperate and you’re greeted by clear skies?
The answer is simple: Use Lightroom to create some artificial atmosphere of your own. And that’s the topic of today’s tutorial from the popular PHLOG Photography YouTube channel that walks you through a realistic fog effect that transforms a ho-hum landscape scene into a truly-special image.
German photographer Christian Mohrle is a familiar face on these pages because our readers appreciate his great imagery and post-processing tutorials. As always, you can download his sample Raw file with a link beneath the video and follow along as he walks you through the straightforward steps.
You can fast-forward to the 6:55-minute mark of the video if all you care about is the fog effect, but we strongly urge to watch from the beginning. That’s because Mohrle starts by demonstrating a variety of global adjustments that make the image as good as possible before turning to the masking magic and introducing the fog.
Mohrle’s photo was shot at a high ISO setting and need quite a bit of work. His preliminary adjustments begin in Lightroom’s Details tab where he clicks on Denoise. You’ll see how he turns down the strength to avoid a muddy look. He then moves to the Basic panel and changes the profile from Adobe Color to Adobe landscape which immediately boosts base saturation.
Other modifications include a refinement to white balance, a gentle increase in exposure, and adjustments to shadows that revel more details in the darkest portions of the frame. Mohrle then boosts Texture and Clarity, while bringing down Dehaze to simplify what follows.

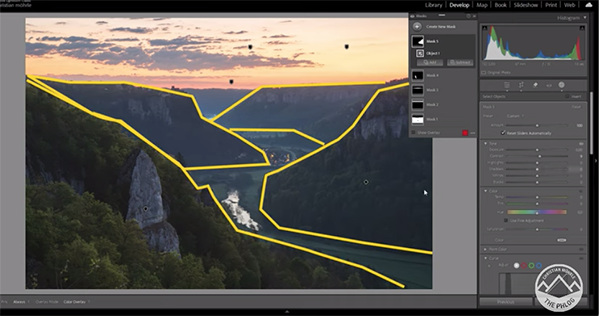
It’s finally time for the fun part of this lesson; namely, using selective masking to add some moody fog that greatly enhances the shot. The video concludes with some thoughtful color grading and very careful sharpening. Check out the before/after images and you’ll be impressed.
There are many more shooting and editing videos on Mohrle’s instructional YouTube channel, so pay a visit when you have time to explore.
And don’t miss the tutorial we featured recently with another post-processing expert who demonstrates how to use the Color Mixer Tool in Adobe Camera Raw (ACR) to create outdoor photographs with perfectly balanced tones.


