
Give Landscape Photos a Unique Dreamy Look with a Simple LR Edit (VIDEO)
We’re always on the lookout for post-processing techniques that imbue photos with a unique look that stands out from other images you’ve captured in the past. This quick Lightroom tutorial from the PHLOG Photography YouTube channel provides a quick and effective method for giving landscape photos a beautiful soft appearances that differs greatly from the more common sharp-and-vibrant approach.
German pro Christian Mohrle is one of our favorite landscape photographers and post-processing experts, and before you click the play button we suggest downloading his sample Raw file using the link beneath the video. This way you can follow along and make the changes yourself as the 11-minute lesson proceeds.
Mohrle’s goal today is to rehabilitate a contrasty and underexposed waterfall photo, but the process you’ll learn has broader applications for enhancing all sort of images captured in the field. He’s a firm believer in following a specific sequence when putting Lightroom’s tools to work. For him this means making a few basic adjustments to the image as a whole before turning to selective enhancements that really deliver the magic.

Today’s preliminary steps begin in Lightroom’s Basic panel where he changes the profile from Adobe Color to Adobe landscape which pushes saturation, slightly brightens the darkest areas in the frame, and helps create the soft look he’s after. Mohrle also tweaks Color Temperature, boosts exposure, opens the shadows for more detail, and adds Texture for a slightly sharper look. Other global modifications include decreasing Clarity and Dehaze.
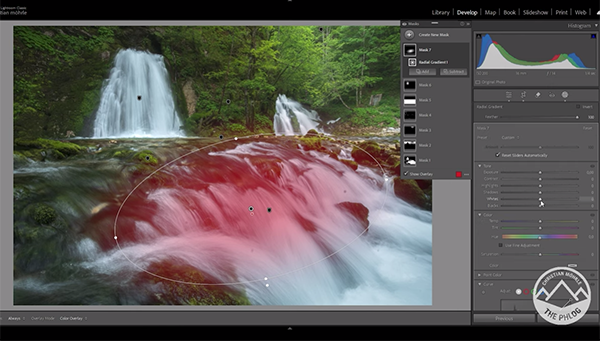
Now the fun begins by heading into Lightroom’s Masking panel for selective enhancement to various areas in the scene, and he walks you through every step of the way as he adds a subtle glow to the upper right corner of the shot, introduces more structure to the foreground waterfall, and brightens up a smaller waterfall to separate it from the background.
The image is now significantly improved, but there’s a bit more work to do, beginning with careful color grading. He makes good use of the Luminance sliders in Lightroom’s Color Mixer to “add punch” by accentuating the green tones. Dropping yellow Saturation quickly enhances this effect, as does pumping up green Saturation. Mohrle also boosts blue Saturation in the water.
All that remains is a bit of judicious sharpening, and Mohrle’s impressive transformation is complete. Take a look at his before/after examples and your sure to like what you see. Then head over to the PHLOG Photography YouTube channel for more shooting and editing tips for outdoor photographers.
We also think you’ll appreciate another tutorial we posted recently, demonstrating how to capture spectacular sunrise photographs with gear advice, composition tips, and recommendations for the best camera settings to use.


