How to Add Fog for Landscape Photos with Atmosphere (VIDEO)
Sometimes we’re out in the field and conditions aren’t great. Either the light isn’t right, or maybe everything you see looks like images you’ve shot in the past. So what to do?
The idea of giving up, going home, and returning on a better day simply doesn’t sit well with most of us. So how about this: Do the best you can and then sit down behind the computer to add some dramatic fog to the scene for an eye-catching effect. In today’s episode from the PHLOG Photography YouTube channel you’ll learn how easy this is to do in Lightroom.
German landscape pro Christian Mohrle makes it super simple to follow his advice by including a link beneath the video for downloading his sample image. This enables you to make the adjustments yourself as they’re explained.

The tutorial follows Mohrle’s standard procedure whereby he makes several basic adjustments to an image to prepare it for the selective enhancements that really make the shot. He begins by opening Lightroom’s Basic panel and changing the profile from Adobe Color to Adobe Standard. This simple step immediately lessens contrast which is one key to achieving the effect.
Other preliminary adjustments include using the appropriate sider to further reduce contrast, dropping Highlights for more details in the trees, and cutting shadows to achieve more “punch” in the foreground. Mohrle also reduces blacks, Vibrance, and Dehaze, and adds a bit of Texture and Clarity.
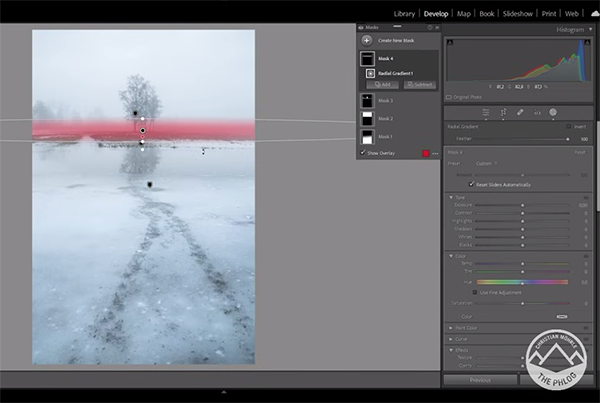
The foregoing steps accentuate a bit of fog that appeared in the original photo, but Mohrle wants to take things further by adding more fog just above the horizon. And this is where masking and selective enhancements come into play for significantly ramping up the atmospheric effect.

Mohrle adds a simple mask over the foreground which he uses to boost contrast and brighten Highlights in this portion of the frame—all while keeping a close eye on the Histogram to avoid overexposure. He also modifies Color Temperature to introduce blue tones to the foreground.
Next Mohrle places a Linear Gradient over the background and makes several adjustments to the sky. In this step it’s important not to bias tones in a distant tree so that it remains separated from what lays behind. Now it’s time to add an obvious layer of fog above the horizon, and Mohrle walks you through the simple steps.
All that remains to complete the impressive transformation is minimal color grading and sharpening. If you like what you see head over to Mohrle’s popular YouTube channel where there’s much more to learn.
On a related note, be sure to check out the tutorial we posted from another accomplished pro recently, explaining a simple three-step Lightroom technique for turning ho-hum winter landscape photographs into money shots.


