How to Edit BACKLIT Outdoor Portraits in Photoshop (VIDEO)
When most of us got started in photography we were told to “always shoot with the sun at your back.” That advice was reasonable for beginners interested in capturing simple images with a “Kodak Moment” look.
Now that your skills have expanded and you’re looking to make photos with a more compelling look, it’s time to try the opposite approach; namely, shooting against the light. Doing this will result in very impressive images, as long as you processing them properly.
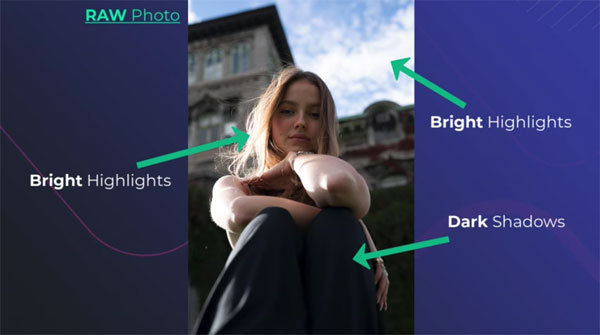
Backlit photography is a particularly interesting technique for outdoor portraiture. At first your images may appear too contrasty with dull colors, and your model will likely be underexposed. But the tutorial below explains how to fix all that and more with a few clicks in Photoshop.

Instructor Justin Laurens is a professional portrait photographer and a retouching expert, and he explains how to get the job done in less than 13 minutes. While this episode involves enhancing portrait photos, you can also use his tips for other types of outdoor subjects.
As Laurens says, “outdoor backlit portraits can make for some dreamy, visually striking and cinematic-looking images because of the way the halo or rim light makes your model pop out of the background and appear three dimensional.” The main challenge with editing high-contrast images like these is understanding how to “relight” the model and the background to create a vibrant and realistic portrait.
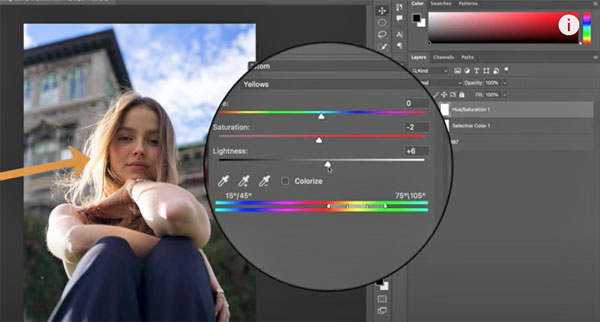
Laurens walks you through a step-by-step method he uses regularly which involves adjusting exposure to correct overly bright highlights and crushed shadows, but that’s only half of the battle. Equally important is his color grading method for really making the photos pop.

We urge you to watch until the end, after his transformation is complete. That’s because Laurens wraps up the lesson by explaining how to replicate your edit and use it to batch-edit multiple photos in seconds.
We also suggest paying a visit to Laurens’ instructional YouTube channel, especially if portraiture is your thing.
And don’t miss another Photoshop tutorial we posted, with five simple tips for making selections with super clean edges.


