How to Shoot AMAZING Blue-Hour Portrait Photos (VIDEO)
Today’s portrait tutorial from the In Your Fayes YouTube channel borrows a popular landscape photographs technique that will supercharge your portraiture skills and enable you to capture beautiful people pictures that really grab attention.
The topic at hand is shooting during the soft, cool light at Blue Hour as the sun drops below the horizon. This behind-the-scenes episode from a Dutch pro known as Faye discusses every step of the process. It’s a foolproof method that’s appropriate for photographers of all skill levels.
Faye violates one of the “rules” that we preach often; namely the importance of careful advance preparation so you’re ready to shoot as soon as you arrive at a pre-determined location. In this case Faye’s intentional lack of forethought was for the sake of instruction, so you can see everything she recommends before snapping the shutter.

Other than choosing a model (that’s up to you), she hits the streets of Auckland, New Zealand before scouting a spot, determining her specific gear, and everything else that typically goes into a successful a professional session. We don’t recommend following this approach, but rather that you use Faye’s advice to check off all the key aspects for getting the job done.
Faye gets to the meeting spot early so she can spend a few moments contemplating the mood she wants to convey. It’s already 7:30pm when the model arrives, with Blue Hour looming, so they take a quick stroll to find a good place to start shooting. You’ll pick up some helpful tips for choosing a location that works particularly well when nighttime lights are about to transform the streets.
There’s plenty to learn as Faye freestyles the shoot, including a variety of compositional advice for employing car lights and sparkling cityscapes into the background of your portraits. You’ll also want to play close attention to how she directs the model while suggesting a number of flattering poses.

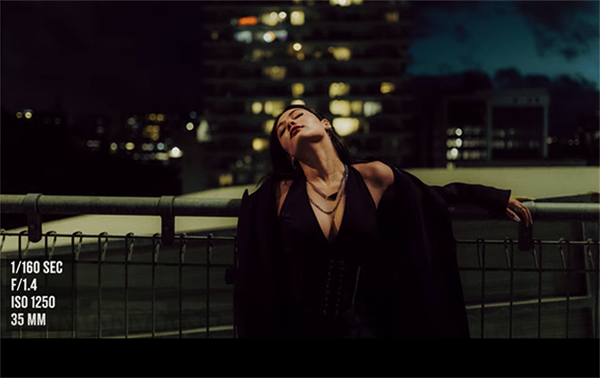
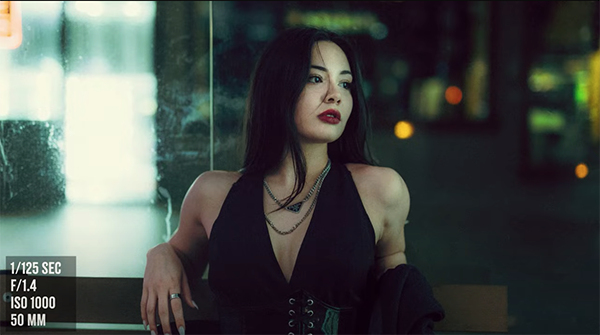
Faye’s goal is achieving a “cinematic look,” and the camera settings she recommends are part of the equation for achieving this compelling effect. She includes this information in captions on her images so you’ll understand exactly how they were captured. The right lens is important too, and you see the chosen focal length in the captions as well.
So find yourself aa willing subject (male or female) and do the advanced prep that Faye recommends. Then pack a minimum amount of appropriate equipment and hit the streets for a rewarding evening of Blue Hour portrait photography.
There’s much more to learn on Faye’s instructional YouTube channel and in a recent tutorial we posted from another pro, explaining how to use Photoshop’s High Pass Sharpen and White Balance tools for sensuous portrait photography edits.


