
Lightroom’s LOCAL ADJUSTMENTS Take Photos to the Next Level VIDEO)
Here a simple way to differentiate between knowledgeable Lightroom users and their less experienced counterparts: The former use local adjustment to maximize their edits while the latter fail to understand how these essential tools provide significantly better results.
The goal of today’s eye-opening tutorial from Utah-based landscape pro Austin James Jackson is to provide a few pro tricks to help your photos POP by selectively improving color, exposure contrast, and other key variables. By following his advice you’ll be able to give outdoor images a more polished and finished look with greater depth and dimension.
Here’s the common mindset that Jackson is trying to change: “A lot of photographers will adjust the basic sliders, they’ll go through the Tone Curve and Hue/Saturation sliders, and then they’ll call it a day.” If this workflow sounds familiar, you’re leaving a lot on the table with regard to the full potential of every photo you process.

Lightroom’s Local Adjustment tools reside inside the Masking panel and Jackson insists that learning how to use them will “instantly” make you a better photographer. Unlike the global adjustments mentioned above, this selective approach enables you to enhance specific portions within the frame using whatever tools are required, without affecting the rest of the image.
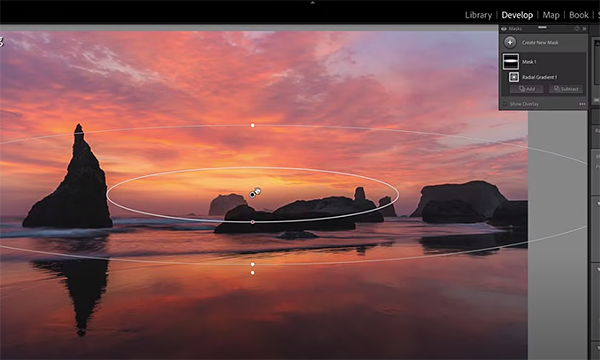
Today’s demonstration shot is a pretty seascape scene with rosy colors in the clouds and similar warm reflections in the water. Jackson already made a few basic enhancements like those mentioned above, and many photographers would be pleased without any further adjustments. But watch what happens when Selective Adjustments are applied with straightforward masking techniques.
Jackson walks you through simple step-by-step masking techniques that are designed to take the impact of his photograph “over the top.” First on the agenda is employing a Radial Gradient to add a subtle glow to a specific area in the sky. He does this by raising Exposure, boosting Highlights, and increasing Saturation. He also drops Dehaze and modifies Feather.
The transformation proceeds in a similar fashion with other types of masks, applying adjustments only where they’re needed to balance out color, tones and other important variables to arrive at a beautiful result.
Once you see how all this this works you won’t be able to unsee it—and that’s a very good thing because these techniques will improve your imagery by leaps and bounds. Be sure to visit Jackson’s YouTube channel, especially if you’re a landscape photographer, where is much more to learn.
We also suggest watching a tutorial we featured recently with another accomplished pro who demonstrates a powerful Lightroom technique that accentuates landscape photos with menacing weather for a very dramatic effect.


