Slovakia’s ‘High-Tatras Mountains’ means high-drama in this winter wonderland
Visiting the Tatras Region of Slovakia is like parachuting directly into a spectacular wilderness. Whether you’re ascending or descending the breathtaking mountainous landscape on foot and skis or feeling your body come alive floating in the region’s warm geothermal waters, the high Tatras is the perfect place to cleanse, unwind and get back to nature.
Here you can indulge in unforgettable experiences you’ll be talking about for years. And you will be in good company, as the team at Lonely Planet, added Slovakia as one of thirty countries to visit in 2025’s ‘Best in Travel’ listing.
Where else can you view chamois and marmots in the wild, stay in a two-room hotel next to a solar high-altitude observatory at the top of the 2,634m Lomnica summit, walk inside the Tatra Ice Dome in-between an ice sculpture, this year depicting Wawel Cathedral, witness the last-working mountain Sherpas of Europe carrying supplies up to mountain huts or ski on the same slopes as World & Olympic champion Petra Vlhova?
High Tatras – Easy to get to
The answer is closer and more accessible than you would ever believe, with direct flights from London-Luton to Poprad International Airport with Wizzair and Ryanair, who operate regular services; alternatively, train and bus services coming into the centre of Poprad, all combine to make it so easy to access.
The Ideal Ski Destination
The Tatras region’s world-class ski resorts tend to often go under the radar, largely attracting domestic ski tourists or those from neighbouring countries. But things are changing, as word gets out that Slovakia’s epicentre of Skiing gets better with every year that passes, and also the regional capital city of Poprad is the European City of Sport in 2023, and in 2019 topped Lonely Planet’s Best in Europe list for 2019, which highlights the most exciting places to visit across the continent.
The High- Tatras offer the ideal, natural opportunities for winter sports and yet if you ask most skiers where they tend to go for their annual ski break, the western Alps dominate – France, Austria and Switzerland being their go-to destinations.
However, by expanding their ski horizons just a little further east towards Slovakia, they may well be pleasantly surprised by the ease of access, perfectly groomed slopes equipped with snow cannons, incredible value for money, geothermal waters to bathe in, varied styles of accommodations and cuisines and a few UNESCO heritages within reach too.
Whilst the low Tatras shines a spotlight on Jasna Ski Resort, the region’s fabulous ski experiences does not start and end at Jasna. The region is so compact, that you do not need to plug in the coordinates of Tatranska Lomnica, Strbske Pleso and Stary Smokovec Ski resorts into the GPS, as they are a mere 40-minute drive from Jasna.

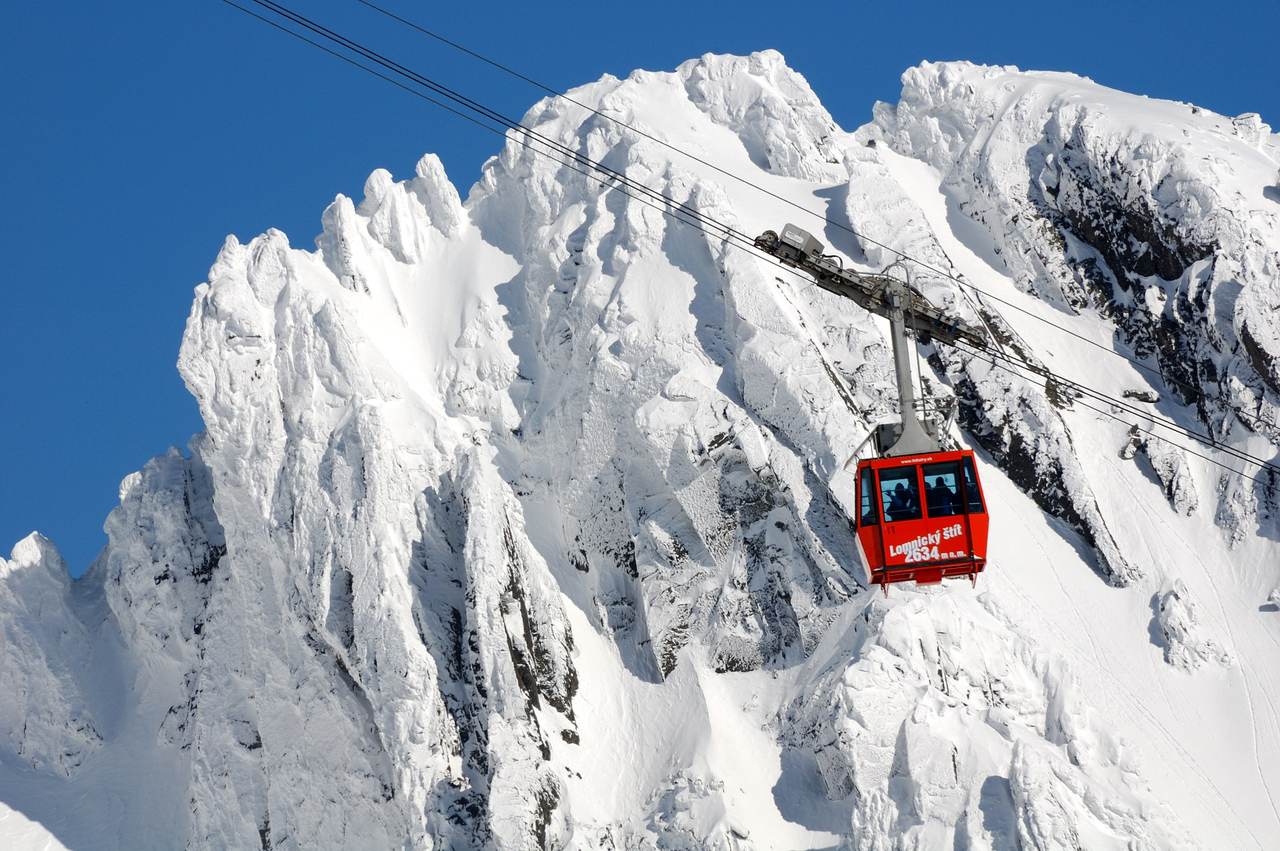
Jump on a cable car within 15 minutes of arrival c. Marek Hajkovsky
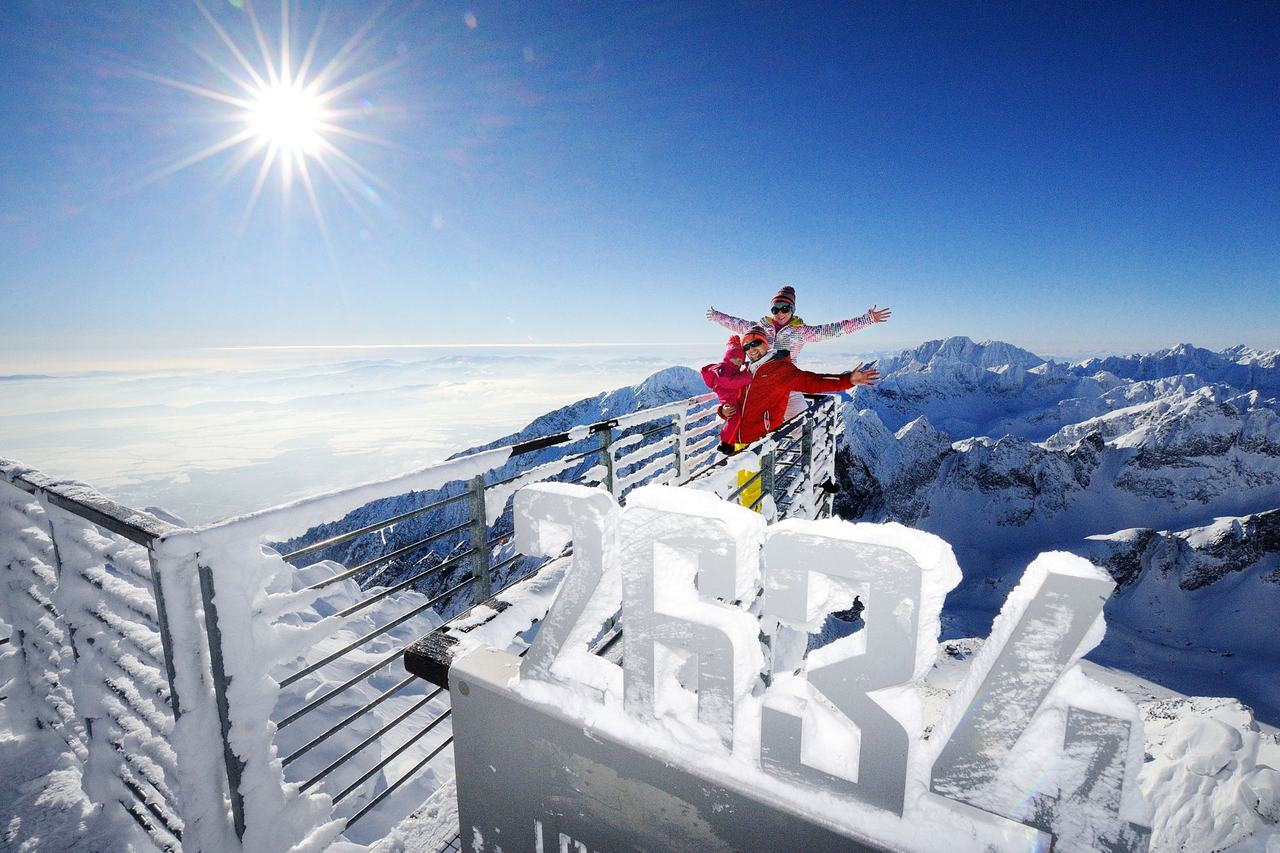
In fact from stepping out of Poprad International Airport, one could be at the foot of Mt Lomnica ready to jump on a cable car within 15 minutes of arrival, either ready to ski or to take a series of cable cars to the breath-taking views of Slovakia’s second highest peak atop Mt. Lomnica. Admire the breathtaking views at 2,634m with a coffee from the café in hand, or have the chance to stay in a two-room hotel, which sits beside a scientific observatory.
This is a chance to claim the summit for yourself for a night or two; being at one with distant snow-covered peaks piercing cloud cover, fragmenting to reveal glacial lakes, before being shrouded by the night sky revealing an astronomical sky of stars, surely must be on everyone’s bucket-list.
Tatranska Lomnica Ski Resort (High Tatras)

Tatranksa Lomnica Peak c. Marek Hajkovsky
Home of the steepest slope in the region called the ‘French mulda’; advanced skiers can ski down from 2196m directly to Tatranska Lomnica through Lomnica pass, for over 5.5km, making it the longest and loftiest run in Slovakia. That said, the resort is geared-up for beginner to upper intermediate ski proficiency. In terms of magnificent scenery, epic vistas and immersing yourself in the High Tatras Mountains, just head to Lomnica peak at (2632m) and let your breath be taken away. Whilst there is no snow park for freestylers, there is a ‘Fun Zone’ along the ‘Start vychod’ slope with its undulating waves putting smiles on the faces of families and beginners. This resort will have skiers purring with delight, just like a snow cat.
The ski resorts in Tatranska Lomnica and Stary Smokovec guarantee quality in the High Tatras. If you are keen to ski in some of the most dramatic and Instagram-worthy scenery, as well as ski on the longest ski slope in Slovakia and the highest ski slope in Central Europe, tap the coordinates of Tatranska Lomnica into your GPS – there are 12 tracks and the choice is up to you, depending on what experienced skier you consider yourself to be. Beautiful views and wide red slopes can be found at Strbske Pleso. But of course, not only that – cross-country skiing fans will appreciate 18 km of cross-country tracks.
For those looking for alternatives to skiing but still wish to enjoy the winter landscape, there is a whole host of possibilities. Why not consider a romantic walk through the Tatra valleys, with 20 km of marked tourist trails in winter and earn yourself a well-known “cottage tea” in one of 12 alpine chalets that are opened to the public all year round or climb a snow-covered peak with a professional mountain guide.
For culture vultures, why not consider an afternoon exploring the ‘Sherpa Museum’ located in Stary Smokovec, which details, records and traces the history of the men and women porters who continue to carry loads of up to 100kg along lofty mountain trails to supply the mountain hits dotted across the region. Similarly, the TANAP Museum and Gallery will bring to light the region’s natural assets and historical context, whilst interweaving the life, culture and people of the Tatra Mountains.
The Finish Line
As the sun sets on your active adventures, unique experiences are just awakening. Join like-minded star-gazers for ‘Dinner under the stars’; this gastronomic treat can be found at 1,751m within Café Panorama situated on Mt Lomnica; after dinner ascend the observation tower and travel amongst the starts, installations and planets, but don’t forget to download the “Star Walk 2” APP and point your phone skywards.
The ‘little big mountains of Europe’
In short, the Tatras region of Slovakia is an all-year-round sports travel destination and tends to punch above its weight for adventure sports, especially as it is spread over just 610 square kilometres (236 sq. miles). 50 peaks at more than 2,000m high, with the highest being Mt. Gerlach at 2,655m and the highest peak in the Low Tatras, Mt. Dumbier (Chopok), at 2,042m. Hence, the region carries the moniker the ‘little big mountains of Europe’ proudly.
However, there is no denying that during winter, is when this snow-covered winter wonderland comes into its magical own. Skiers can find everything they need to create and curate memorable skiing experiences in the Tatras Region!
Ready to book an incredible ski holiday and cultural experience?
Visit Enjoytatras.com or email [email protected]
 Image credit: Martin Maličký; Marek Hajkovsky; Enjoytatras.com & vt.sk/en/
The post Slovakia’s ‘High-Tatras Mountains’ means high-drama in this winter wonderland appeared first on The Travel Magazine.


