")


Unlock This Secret Knock-Out Tool & Simplify Your Photo Edits (VIDEO)
What if we told you that in the next four minutes you’ll learn how to use a “secret” Knock-Out tool that will greatly simplify your Photoshop workflow and delver precision results faster than you thought possible? If this piques your interest, pay close attention to this video from the Photoshop Tutorials Pejiz YouTube channel.
As the name suggests, this oft-ignored tool enables you to “knock out” the contents of a particular layer from the layers below. You’ll learn how to make an appropriate selection, depending upon the type of element that needs to be removed.
Our instructor named Pejman is an accomplished designer who specializes in tutorials for inexperienced Photoshop users who want to up their game with straightforward post-processing techniques, photo-retouching tricks, and making the most of Adobe Camera Raw (ACR). Most of the methods he describes work wonders for landscapes, portraits, wildlife images, and more.
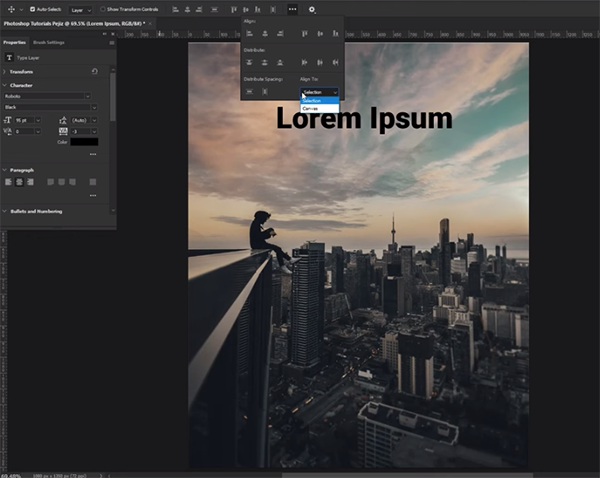
Pejman demonstrates how to employ the Knock-Out tool when dealing with an unwanted Text layer. While watching how easy this is to do, keep in mind the myriad of other ways to put this method to use. The lesson begins with a quick demonstration of how to create a Text layer in the first place, just in case you ever want to do that.
Once you’ve imported an image here’s all you have to do: Press the “T” key to bring up the text window, type in you text, and hit “enter.” Then simply follow Pejman’s tips for refining various characteristics like font type and size, style attributes like italic or bold, and whether you want the type centered, flush left, or flush right.
Now that you’ve created a text layer it’s time to knock it out, and Pejman describes the simple step-by-step process for maintaining perfect balance in the photo with the use of simple Photoshop tools. This portion of the video runs barely three minutes so we’ll let the expert demonstrate exactly how it’s done rather than summarizing it here.

Be sure to visit Pejman’s instructional YouTube channel where you’ll find many more post-processing tips and techniques.
And for another basic primer don’t miss the Beginners Guide we featured recently with another image-editing expert who explains everything you need to know about Focal Length Blending in Photoshop and Lightroom.