St Moritz is so steeped in tradition that the Grace La Margna Hotel is the first new hotel to open in the past fifty years. Its unique approach and modern interior bring a different aspect to a summer holiday in this pretty mountain resort.

Grace La Margna Hotel, St Moritz, Switzerland
This new, boutique hotel, retains its 20th-century façade with interiors designed by a local architect. It comprises two wings, the modern Grace wing and the original Margana wing. The latter, a historic building in the style of Engadin Art Nouveau, designed by Swiss architect, Nicolaus Hartmann.
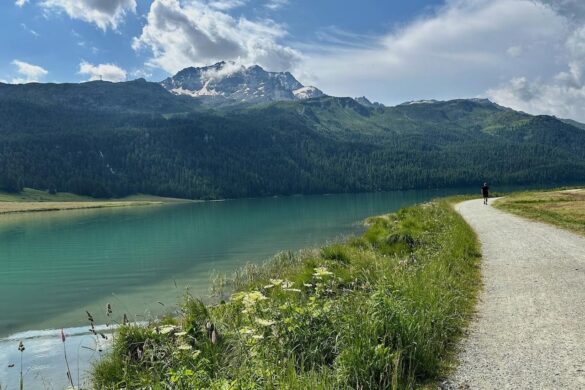
Winter is the high season of St Moritz yet it has many advantages for a healthy stay in the summer delightfully exploited by the La Margna Hotel. Guests can cycle and hike in and around lakes and mountains then enjoy healthy food, treatments and massages in the spa.
Who for
Grace La Margna Hotel is ideal for couples, singles, families, groups celebrating a special occasion or colleagues on a bonding exercise.
Accommodation
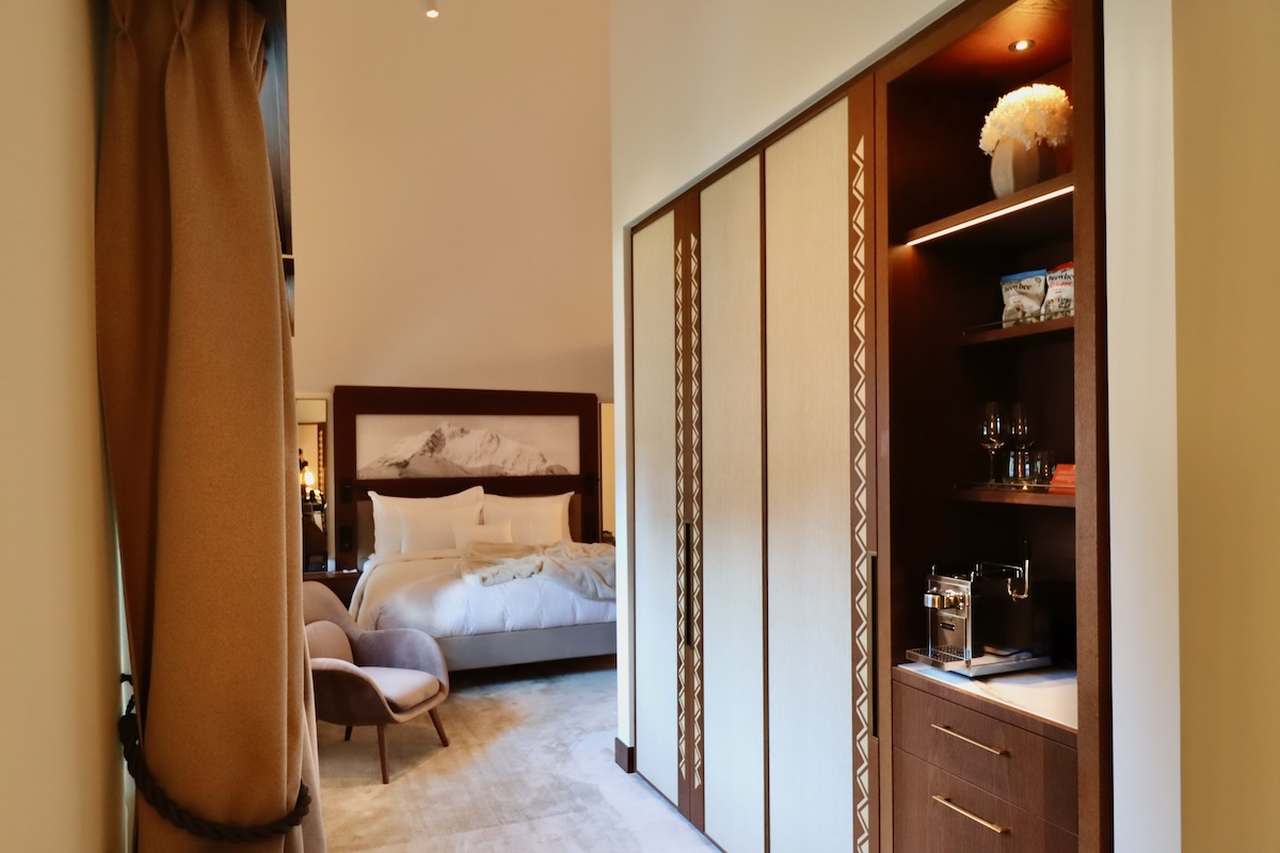
The two wings of the hotel have 74 rooms, including 32 suites. Rooms vary from the La Margna Superior Room mirrored by the Grace Superior Room through a range of suites to the amazing Penthouse with a large terrace incorporating a hot tub and panoramic views of the town and the lake.
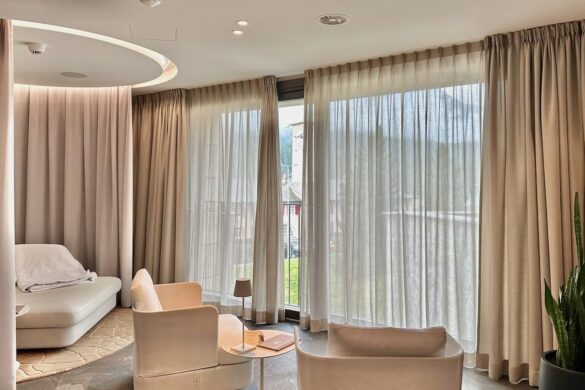
Rooms in the new Grace wing also feature floor-to-ceiling windows and air-conditioning. All the rooms have king-size beds by the Swiss brand Elite Beds All the rooms and suites have spacious bathrooms and most include a bath. The well-equipped rooms include a B&O Bluetooth speaker, a coffee maker by Sjöstrand so Stoll coffee and tea by Mariage Frères can be enjoyed in the rooms. Toiletries include natural care products from the Engadine brand Feuerstein. Each bathroom is equipped with a Dyson hairdryer with various attachments. Technological features include controls for the lights and a tablet to order that special pillow.

Junior Suite at the Grace La Margna Hotel in St Moritz, Switzerland
Food and Drink

The View a Restaurant in the Grace La Margna Hotel in St Moritz, Switzerland
Breakfast and dinner are served in the main restaurant, The View. As well as an a la carte menu this restaurant offers a sharing menu – a delicious mix of flat breads with dips followed by a main course. Dessert involves the theatre of creating the Grace version of tiramisu at the table.

Creating a Tiramisu at the Table, Grace La Margna Hotel in St Moritz, Switzerland
Breakfast in The View is a delightful mix of buffet and menu choices. The buffet includes good choice of luscious fresh fruit, freshly baked bread and local cheeses. Friendly waiters take requests for hot drinks, orders from the menu, and serve fresh bread rolls at the tables.
N/5 (pronounced Number 5) is the main bar in the hotel. It has been created around the original features of the bar including the chandeliers that march across the ceiling and marble fittings that add up to a total weight of 8 tons requiring a reinforced floor. This bar is open all day and features a bar menu. The bar and the bar menu have been nominated for awards in Switzerland and is a hotspot for locals and other visitors.

N/5 Bar in the Grace La Margna Hotel in St Moritz, Switzerland
Afternoon tea is available in the Living Room and features a luxury version of the local nut cake. Max Moritz, a culinary boutique on the ground floor is subject to seasonal opening.

The Living Room at the Grace La Margna Hotel in St Moritz, Switzerland
Facilities
The Spa and Wellness Centre has a good-size swimming pool surrounded by comfortable loungers. Beyond the pool is a large, warm jacuzzi with a variety of powerful jets. Yoga and swim sessions take place every Tuesday and Friday.
There is a steam room, an organic salt sauna, a Finnish sauna, an Aquamoon and two emotional showers with different functions delivering relaxing water experiences. The sonnenwiese (sunbathing close to nature) tanning device stimulates collagen formation and the natural renewal processes of the skin gently tanning the skin. A good choice of massages and treatments are available in the treatment rooms. After a session in the spa guests can relax in the lounge or private spa suite where health drinks and food are provided – but bubbles can be ordered too.
Other facilities include a small gym offering the latest equipment from TechnoGym and an old-fashioned Cigar Room. A Sports Shop sells and hires equipment and a boutique.
Activities
Grace La Margna offers an interesting range of activities. These include Master Classes in mocktails or cocktails and pizza making. These light-hearted events are a chance to get to know the staff and meet other guests in the hotel.
Guided walks which include an al fresco fondu (weather permitting) also feature in the programme. And so do guided e-bike tours. Instruction is available for those who have not used an e-bike before. These two activities present a great opportunity to explore the stunning landscape surrounding the hotel and profit from some healthy exercise.

Pizzaiolo Mauro Starting his Masterclass at the Grace La Margna Hotel in St Moritz, Switzerland
How much
Double rooms start at £432.27 (CHF500) for one night but offers are available for longer stays. Rates include breakfast with hot dishes cooked to order. Also included is free wifi, a complimentary minibar and public transport from the second night. In addition, guests must pay a local city tax of CHF 5.00 per person per night on check out.
What’s nearby?
Grace La Margna Hotel is in the Engadin St. Moritz region. An area of incredible beauty due to its unique lake plateau. There are four large lakes, St Moritz, Silvaplana (best for surfing and sailing), Champfèrer (a paradise for anglers) and Silser. There are also numerous, picturesque mountain lakes in the forests that populate the area. Trails criss-crossing this plateau allow all levels of walkers and bikers to safely explore. The pretty village of Silvaplana is within easy reach of St Moritz and the ideal place for refreshing break in one of its cosy cafés.
High-end shopping is nearby in the town of St Moritz. Top brands line the main shopping street and the town also features several museums and the world-famous Café Hanselmann – perfect for taking a break from the retail experience. St Moritz is also on the Albula/Bernina railway line, a spectacular UNESCO railway route which can be incorporated in the journey by rail to the Grace La Margna Hotel.
VERDICT: Switzerland is renowned for its scenery and the Grace La Margna Hotel is the best place for a luxurious and restorative immersion in the best this country has to offer
You may also like:
The post Grace La Margna Hotel review, St Moritz, Switzerland appeared first on The Travel Magazine.


